# <center>Using Angular JS to send Ajax request to PHP - Part 1</center>
#### Repository: https://github.com/angularjs
#### What will I Learn?
In this tutorial, you will learn the following
- Use angular to send Ajax request to PHP scripts
- Fetch information from database on button click using multiple PHP file.
- Fetch information from database on button click using a single PHP file..
#### Requirements
For this tutorial, you will need the following
- A laptop with any operating system such as Windows OS, Mac OSX and Linux
- Your favorite text editor like Atom, Sublime Text and so on.
- A server such as your wampserver or xampserver or mampserver.
- Knowledge of HTML, JavaScript, PHP
- <a href="https://angularjs.org">ANGULAR JS</a> script or include it using the cdn link <https://ajax.googleapis.com/ajax/libs/angularjs/1.6.10/angular.min.js>
#### Difficulty
- Basic
#### Tutorial Content
Angular JS framework which operates exactly as Javascript, makes coding more simplified and easy to use with other programming languages. In my <a href="https://steemit.com/utopian-io/@chri5h/consuming-github-api-using-angular-js">previous</a> tutorial we used Angular JS to send request to github api to retrieve desired dat for further manipulations on your project. This tutorial will show you how to send request to your localhost servers such as your wampserver and xampserver.
Ajax is sending request from your browser to a server and getting back a response without page reload. It helps to make the website more dynamic and "user-data" friendly.
#### Step 1: Getting Started
To begin this tutorial, you need to setup up your localhost server by downloading and installing wampserver or xampserver on your Windows OS or mampserver on your Mac OS as the case maybe. After installation, open up the server and make sure all services are fully functional. Then open up your favourite text editor to include our angular js script. We will need to include the angular js script to the index.html file either using the cdn link or the angular.min.js file downloaded from <a href="https://angularjs.org">Angular JS</a>. Then include a blank js script for writing our own angular js codes.
```html
<!DOCTYPE html>
<html ng-app="myApp">
<head>
<meta charset="utf-8">
<title>Ajax Using AngularJS with PHP</title>
<script src="js/angular.min.js" charset="utf-8"></script>
<script src="index.js" charset="utf-8"></script>
</head>
<body ng-controller="MainCtrl">
<h1>Ajax Using AngularJS with PHP</h1>
</body>
</html>
```
- `ng-app="myApp"` is an angular directive that triggers angular js to function with the HTML DOM that it covers. It tells angular JS the area of the HTML to take charge of.
- `ng-controller="MainCtrl"` is an angular controller created within the angular script `index.js` for manipulation of a particular area of in the html.
Then your `index.js` script for angular script should have the following code snippet.
```js
(function(){
// create a directive
var app = angular.module("myApp", []);
// creates a controller called MainCtrl
app.controller('MainCtrl', ['$scope', function($scope) {
}]);
})();
```
We first have create a directive in our blank `index.js` script file which allows us create a controller which is in-charger of a particular area of our html file. To create a directive, you call the `angular.module()` which requires the following parameters;
- a name which is `myApp` and;
- an empty array `[]` for dependencies such as `$scope`, `$http`, `$log` and so on.
The controller is then built based on the `app` directive that has been created earlier. We begin the controller with a controller name `MainCtrl`, a single dependency `$scope` and then a function with `$scope` as the only parameter of the function.
**NOTE:** The `$scope` parameter can be accessed anywhere within the confines of the `MainCtrl` controller in the html.
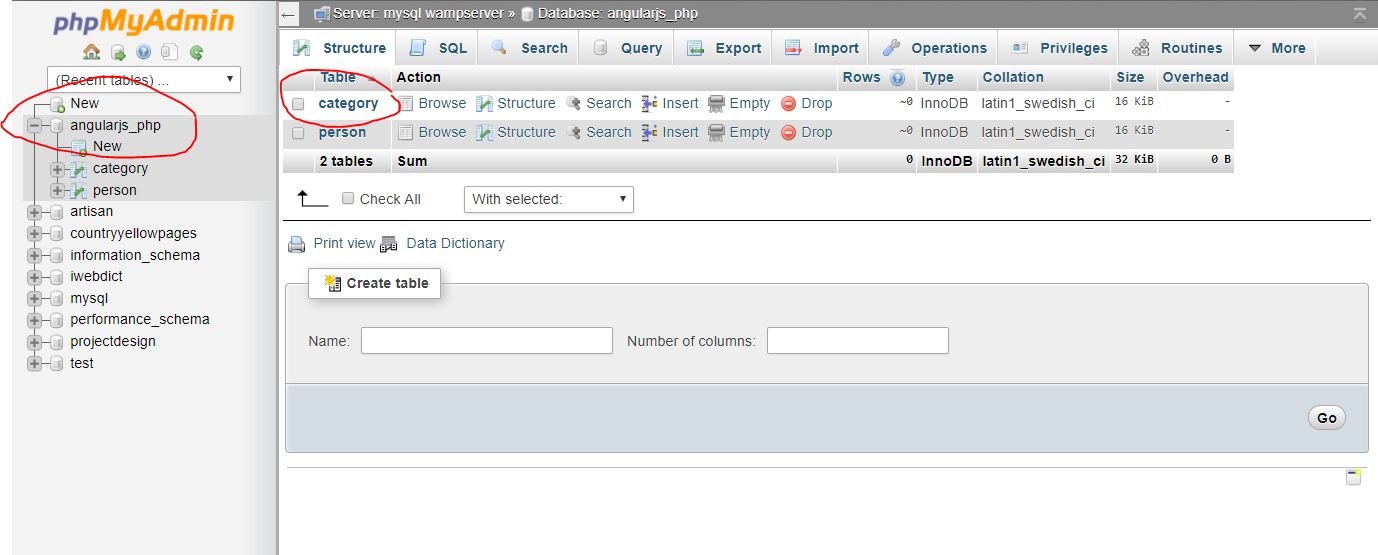
#### Step 2: Create database for accessing information
After installing your preferred server, open the installed server and create a database for the purpose of this tutorial. I am using wampserver and below is a screenshot of the procedure for creating your database with a table and their fields.
<center></center>
**NOTE:**
- `category` table holds the information we need to fetch using buttons. It contains different items and their categories like fruit or food category.
#### Step 3: Fetch details from database using Buttons with different PHP files
We need to first insert records into our database through our localhost UI. For wampserver users, type `localhost/phpmyadmin` and then select the `angularjs_php` database on the left pane. Then select the `category` table on the right pane.
<center>
</center>
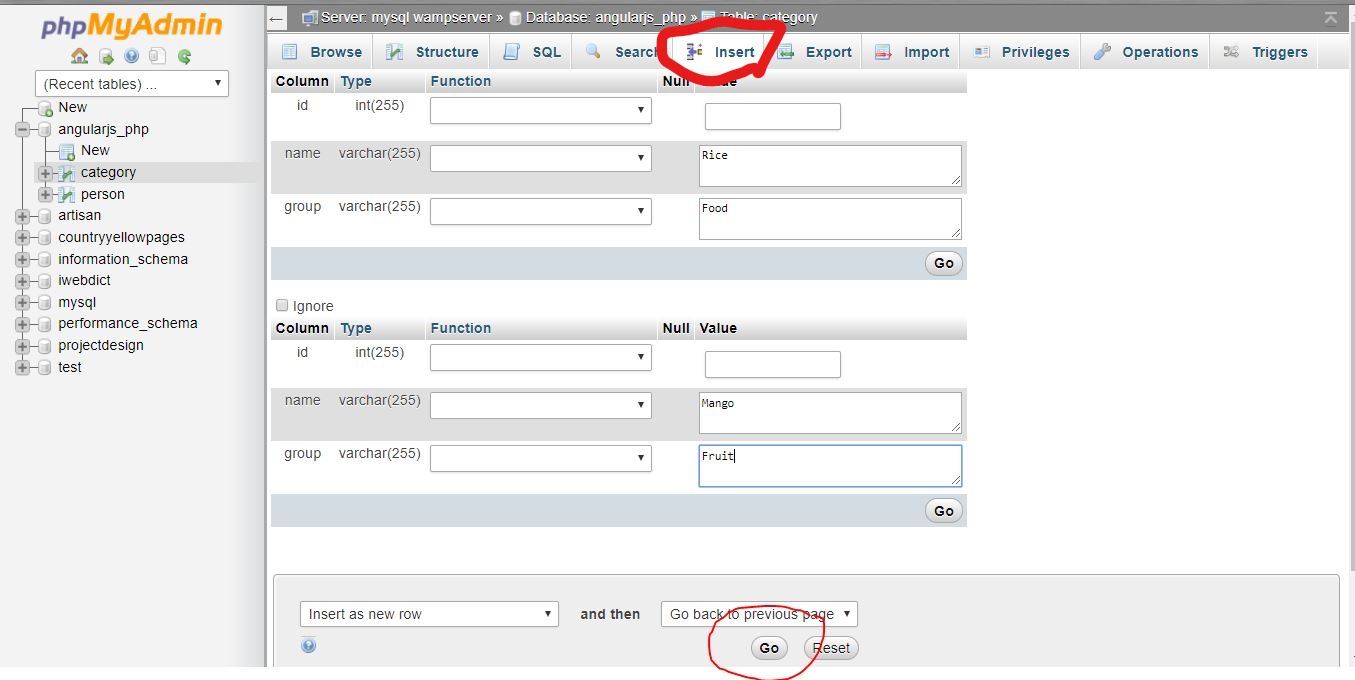
Click the insert at the top navigation and enter details of various foods and fruit you know and hit the `GO` button at the bottom of the page. Repeat as many times as possible to have enough records.
<center>
</center>
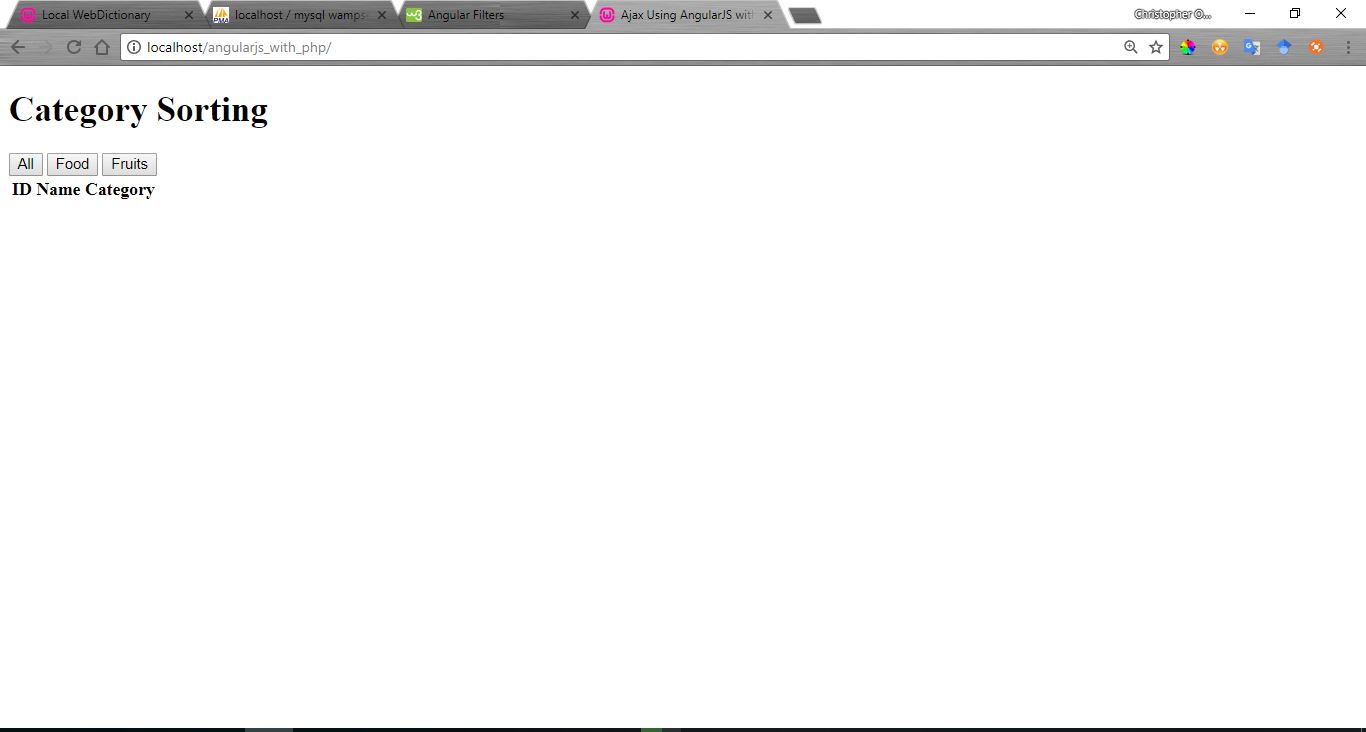
In our html file, we need to create a table to contain the information that will be fetched and then three buttons;
- All button will get all items from the category table
- Food button will get all items that are food in the category table
- Fruit button will get all items that are fruit in the category table
```html
<h1>Category Sorting</h1>
<div class="buttons">
<button type="button" name="button" ng-click="all()">All</button>
<button type="button" name="button" ng-click="food()">Food</button>
<button type="button" name="button" ng-click="fruit()">Fruits</button>
</div>
<table>
<tr>
<th>ID</th>
<th>Name</th>
<th>Category</th>
</tr>
<tr>
<td></td>
</tr>
</table>
```
The `ng-click` is an angular directive that triggers the function within the quotes `" "` once the element has been clicked. It executes the necessary function and carries out the function instructions.
<center>
</center>
We will create a `connect.php` file that allows us create a connection to our database which we will include in subsequent php files. For the purpose of this tutorial I will be connecting using `PDO`.
- connect.php : Connection requirement to our database.
```php
<?php
// declare variables neccessary for connection to database
$host = 'localhost';
$user = 'root';
$password = '';
$database = 'angularjs_php';
// create the connection to datase using PDO
$conn = new PDO("mysql:dbname=$database; host=$host", $user, $password);
?>
```
- getAll.php: Script meant to retrieve all items in the database.
```php
<?php
require 'connect.php'; // requires the connect file
// SQL statement for querying the database
$get = $conn->prepare("SELECT * FROM category");
$get->execute();
// gets the response and sends as json
$result = $get->fetchALL(PDO::FETCH_OBJ);
echo json_encode($result);
?>
```
- food.php: Script meant to retrieve all food items in the database
```php
<?php
require 'connect.php'; // requires the connect file
// SQL statement for querying the database
$food = 'food';
$get = $conn->prepare("SELECT * FROM `category` WHERE `group` =:group");
$get->bindParam(":group", $food);
$get->execute();
// gets the response and sends as json
$result = $get->fetchALL(PDO::FETCH_OBJ);
echo json_encode($result);
?>
```
- fruit.php: Script meant to retrieve all fruit items in the database
```php
<?php
require 'connect.php'; // requires the connect file
// SQL statement for querying the database
$fruit = 'Fruit';
$get = $conn->prepare("SELECT * FROM `category` WHERE `group` =:group");
$get->bindParam(":group", $fruit);
$get->execute();
// gets the response and sends as json
$result = $get->fetchALL(PDO::FETCH_OBJ);
echo json_encode($result);
?>
```
Note: The results of the query are fetched using the `fetchALL(PDO::FETCH_OBJ)` command as objects and returned as JSON back to the angular script for further processing.
Next, we will be writing the angular script to send the Ajax request and return response. For each button, we will be writing separate functions that will be executed once they have been clicked within our `MainCtrl` controller. And we will be using the angular `$http` service to send the Ajax request and a `promise` will be returned then we will write two functions that will be executed based on either a success or an error from the `$http` service.
```js
// creates a controller called MainCtrl
app.controller('MainCtrl', ['$scope','$http', function($scope, $http) {
// function to execute the function are successful
var onSuccess = function (response) {
$scope.response = response.data;
};
// function to execute the function failed
var onError = function (response) {
$scope.error = "Could not fetch data";
};
// function to execute if all button is clicked
$scope.all = function () {
var promise = $http({
method: 'GET',
url: 'script/getAll.php'
});
promise.then(onSuccess, onError);
};
// function to execute if food button is clicked
$scope.food = function () {
var promise = $http({
method: 'GET',
url: 'script/food.php'
});
promise.then(onSuccess, onError);
};
// function to execute if fruit button is clicked
$scope.fruit = function () {
var promise = $http({
method: 'GET',
url: 'script/fruit.php'
});
promise.then(onSuccess, onError);
};
}]);
```
`$http` angular service has various parts:
- method: is dependent on how the parameters are defined either by GET or sending the parameter by POST
- url: is the link to which the parameters are sent for processing
- data: a JSON that contains necessary data for the script to function properly.
- function to execute if the Ajax was successful example onSuccess and;
- function to execute if it failed example onError.
To display the results and error, in our `index.html` file we will need to use the angular `ng-repeat` directive to iterate through the JSON that was returned and also pass a filter using angular `|` to order the result in alphabetical order.
```html
{{ error }}
<table>
<tr>
<th>ID</th>
<th>Name</th>
<th>Category</th>
</tr>
<tr ng-repeat="response in responses | orderBy: id">
<td>{{ response.id }}</td>
<td>{{ response.name }}</td>
<td>{{ response.group }}</td>
</tr>
</table>
```
<center>
</center>
Note: For complete snippet for this step, check <a href="https://github.com/chrix95/angularjs_with_php/blob/master/ssortDifferentPHP.html">sortDifferentPHP.html</a>, <a href="https://github.com/chrix95/angularjs_with_php/blob/master/sortDifferentPHP.js">sortDifferentPHP.js</a>, <a href="https://github.com/chrix95/angularjs_with_php/blob/master/script/connect.php">connect.php</a>, <a href="https://github.com/chrix95/angularjs_with_php/blob/master/script/getAll.php">getAll.php</a>, <a href="https://github.com/chrix95/angularjs_with_php/blob/master/script/food.php">food.php</a> and <a href="https://github.com/chrix95/angularjs_with_php/blob/master/script/fruit.php">fruit.php</a>.
#### Step 4: Fetch details from database using Buttons with a single PHP file
In step 3, we had to write 3 php script to achieve the task which seems a bit cumbersome. But we can compression all scripts into one script by using a `POST` request with the all information required. To achieve this, we create a single PHP script that will receive all Ajax request and process and send back response.
First we include the connect.php file into the script using the PHP include syntax and then to get the dat that is posted to the script, we use the code snippet below
```
include 'script/connect.php'; // this includes the connection file
$datapost = file_get_contents("php://input"); // gets the posted data from the angular script
```
Then we need to check if their is data contained in the posted JSON for us to retrieve the information for processing.
```php
if (isset($datapost) || !empty($datapost)) {
$request = json_decode($datapost); // decodes the JSON file for retrieval as object
$all = $request->all;
$food = $request->food;
$fruit = $request->fruit;
}
```
After retrieving the data into the variables `$all`, `$food`, `$fruit`. Then we create a nested IF statement that executes based on which variable is set to `true`. It then performs the SQL query and returns the result as JSON to the angular script.
```php
if ($all) {
$retrieve = $conn->prepare("SELECT * FROM category");
$retrieve->execute();
$result = $retrieve->fetchAll(PDO::FETCH_OBJ);
echo json_encode($result);
} elseif ($food) {
$food = 'food';
$retrieve = $conn->prepare("SELECT * FROM `category` WHERE `group`=:group");
$retrieve->bindParam(":group", $food);
$retrieve->execute();
$result = $retrieve->fetchAll(PDO::FETCH_OBJ);
echo json_encode($result);
} elseif ($fruit) {
$fruit = 'fruit';
$retrieve = $conn->prepare("SELECT * FROM `category` WHERE `group`=:group");
$retrieve->bindParam(":group", $fruit);
$retrieve->execute();
$result = $retrieve->fetchAll(PDO::FETCH_OBJ);
echo json_encode($result);
}
```
To make it functional, the functions created in our angular script will be modified to POST the data to the PHP script.
```js
$scope.all = function () {
var promise = $http({
method: 'POST',
url: 'script.php',
data: {
all: true,
food: '',
fruit: ''
}
});
promise.then(onSuccess, onError);
};
$scope.fruit = function () {
var promise = $http({
method: 'POST',
url: 'script.php',
data: {
all: '',
food: '',
fruit: true
}
});
promise.then(onSuccess, onError);
};
$scope.food = function () {
var promise = $http({
method: 'POST',
url: 'script.php',
data: {
all: '',
food: true,
fruit: ''
}
});
promise.then(onSuccess, onError);
};
```
After effecting this changes, we should get the same result as in Step 3. For complete snippet to this step, check <a href="https://github.com/chrix95/angularjs_with_php/blob/master/script.php">script.php</a>, <a href="https://github.com/chrix95/angularjs_with_php/blob/master/index.html">index.js</a>, and <a href="https://github.com/chrix95/angularjs_with_php/blob/master/index.html">index.html</a>.
#### Proof of Work Done
I hope you find this tutorial very useful and you can access the complete code for this tutorial in the <a href="https://github.com/chrix95/angularjs_with_php">github repo</a>.