In the previous part, we secured our system against the "Single User Mode exploit" to disallow unwanted intruders from gaining full root access. We now feel that our system is a little bit more secure, right? Well... You can tell where this is going... :)
<center>
</center>
---
### Previous parts:
[1. Introduction](https://steemit.com/security/@dimitrisp/linux-security-101-introduction)
[2. General Principles and Guidelines](https://steemit.com/security/@dimitrisp/security-101-general-principles-and-guidelines)
[3. Physical Security: Intro](https://steemit.com/security/@dimitrisp/linux-security-101-physical-security)
[4. Physical Security: Single User Mode](https://steemit.com/security/@dimitrisp/security-101-4-physical-security-single-user-mode)
---
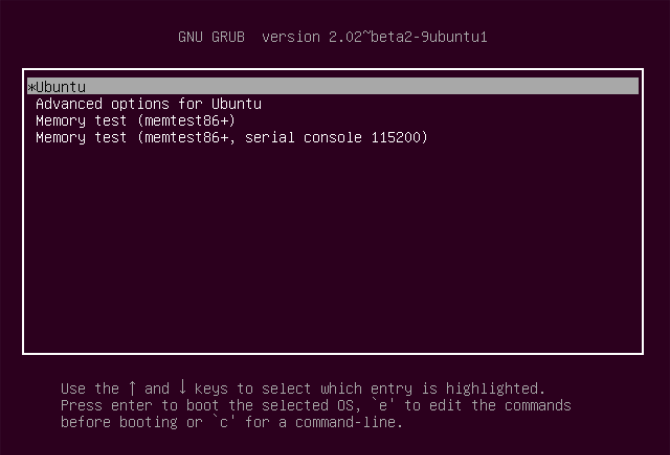
## Single User Mode again!
But this time, in a different sense. Using the bootloader, we can skip the init/systemd initialisation system and drop directly to a shell with root access.
Check the video below:
https://www.youtube.com/watch?v=p3Qf2IaENgc
Basically, we tell our grub entry to initialise the system to a bash session with `init=/bin/bash`, in the same way we accessed "Single User Mode". To combat this, we can add a password to our bootloader's editor functionality. How?
---
## Patching the security hole
We have to add a couple of lines to a file under `/etc/grub.d/`. Inside this folder, you'll notice a handful or two of files. We are going to use the `40_custom` as it is going to be kept intact when a GRUB update is installed.
So go ahead and open the `40_custom` file:
```
sudo nano /etc/grub.d/40_custom
```
<br>In the end of the file add these 2 lines:
```
set superusers="root"
password root mysuperlongsecurepasswordforbootloader
```
<br>You can use any username you want. This is not related to the system at all. This will be the superuser of our bootloader, and it doesn't need to exist in the system as a user.
Save and exit. You can encrypt the password using `grub-mkpasswd-pbkdf2` on Ubuntu/Debian, or `grub2-mkpasswd-pbkdf2` on CentOS/Redhat. You'll have to copy/paste the outcome of this to `40_custom`.
Then we have to rebuild the bootloader config.
Ubuntu/Debian: `grub-mkconfig -o /boot/grub/grub.cfg` or `update-grub`
CentOS/RedHat: `grub2-mkconfig -o /boot/grub2/grub.cfg`
The next time you reboot and try to edit the bootloader to enter Single User Mode, you'll get a nice little prompt saying "Enter username:".
You'll have to type the username and then the password that you set earlier in the 40_custom file. If you type a wrong username/password combo, you'll get thrown again to the bootloader options. When you type the correct combo, you'll have access to the bootloader editor!
---
## Well.. Bypass this too!
If you insert a boot CD, by selecting the troubleshooting option, you can bypass all the security measures you've implemented so far.
How? The troubleshooting option will help you mount the filesystem with root access and can comment out or reverse all the measures we've implemented. It is helpful when your system has crashed and you need to extract your files, but not when a malicious user has access to your system.
How to disable this? You can't. Unless, for example, you are willing to remove the cd/dvd drive! There must be something else though, right?
There is. It's called "Disk Encryption", and we will take a peek on this on the next part of Security 101. [Click here to read it](https://steemit.com/security/@dimitrisp/security-101-physical-security-disk-encryption-i)
---
Craving for more? Until the next part is available, have a look at my Server 101 series:
* [Intro and getting into your server](https://steemit.com/tutorial/@dimitrisp/servers-101-intro-and-getting-into-your-server) - Single Article
* [Basic Server Security](https://steemit.com/tutorial/@dimitrisp/servers-101-basic-server-security-part-1) - 3 Parts
* [Setting up a Web Server](https://steemit.com/tutorial/@dimitrisp/servers-101-setting-up-a-web-server-part-1) - 4 Parts
* [Managing Your Server](https://steemit.com/tutorial/@dimitrisp/servers-101-managing-your-server) - 4 Parts
* [caddy - Lightweight Web Server](https://steemit.com/tutorial/@dimitrisp/servers-101-caddy-lightweight-web-server) - 1 Part
* [Emailify your server!](hhttps://steemit.com/tutorial/@dimitrisp/servers-101-emailify-your-server-part-1) - 6 Parts
* [Setting up a Password-Protected proxy server with Squid](https://steemit.com/tutorial/@dimitrisp/servers-101-setting-up-a-password-protected-proxy-server-with-squid) - 1 Part
* [OpenVPN in less than 2 minutes](https://steemit.com/tutorial/@dimitrisp/servers-101-openvpn-in-less-than-2-minutes)
* [Piwik - Your personal Google Analytics alternative](https://steemit.com/tutorial/@dimitrisp/servers-101-piwik-your-personal-google-analytics-alternative)
* [Email notifications for SSH Logins](https://steemit.com/tutorial/@dimitrisp/servers-101-email-notifications-for-ssh-logins)
* [Keeping your server up to date](https://steemit.com/tutorial/@dimitrisp/servers-101-keeping-your-server-up-to-date)
---
## Also, I am running a witness server.
## Please consider <a href="https://steemit.com/~witnesses" target="_blank">voting me, dimitrisp, for a witness</a> if you find what I post & do helpful and add value to the network
## [You can read my witness declaration here](https://steemit.com/witness-category/@dimitrisp/witness-declaration-of-dimitrisp)