<div class="text-justify">
<div class="pull-left">
### <div class="phishy"> <center> ***WELCOME TO MY BLOG*** </center> </div>
Hellooooo, hellooooo! Very happy to share with you this project that I carried out improvised. I tell you that I have many days thinking about what to do to participate in the [contest](https://peakd.com/hive-189641/@diyhub/diyhub-monthly-contest-january-2023-flower), which by the way remain After a few days, and going through my materials, I found some that I had put aside for some time and I said to myself: "I'd better do this one that was abandoned, then I'll concentrate on the contest because there are many ideas that are raining down and I still haven't I decide". So I decided to give life to a cactus that I've wanted to do and I don't know why. reason or circumstance I left it in oblivion. What I do remember is that when I had the idea of doing it, these plants became very fashionable, in many places, both nurseries and stores in general, these plants, both natural and artificial, were seen and still are on display. In fact, at that time I made a materito or pot with recycled material as well, but in it I planted a natural cactus to give it to my niece Sofía, in order to explain to her the importance of plants, their care and the spiritual meaning of cacti. . Anyway, that was the main idea but not with a natural plant, but since my cactus was already well grown, I decided to plant a few and give them away.
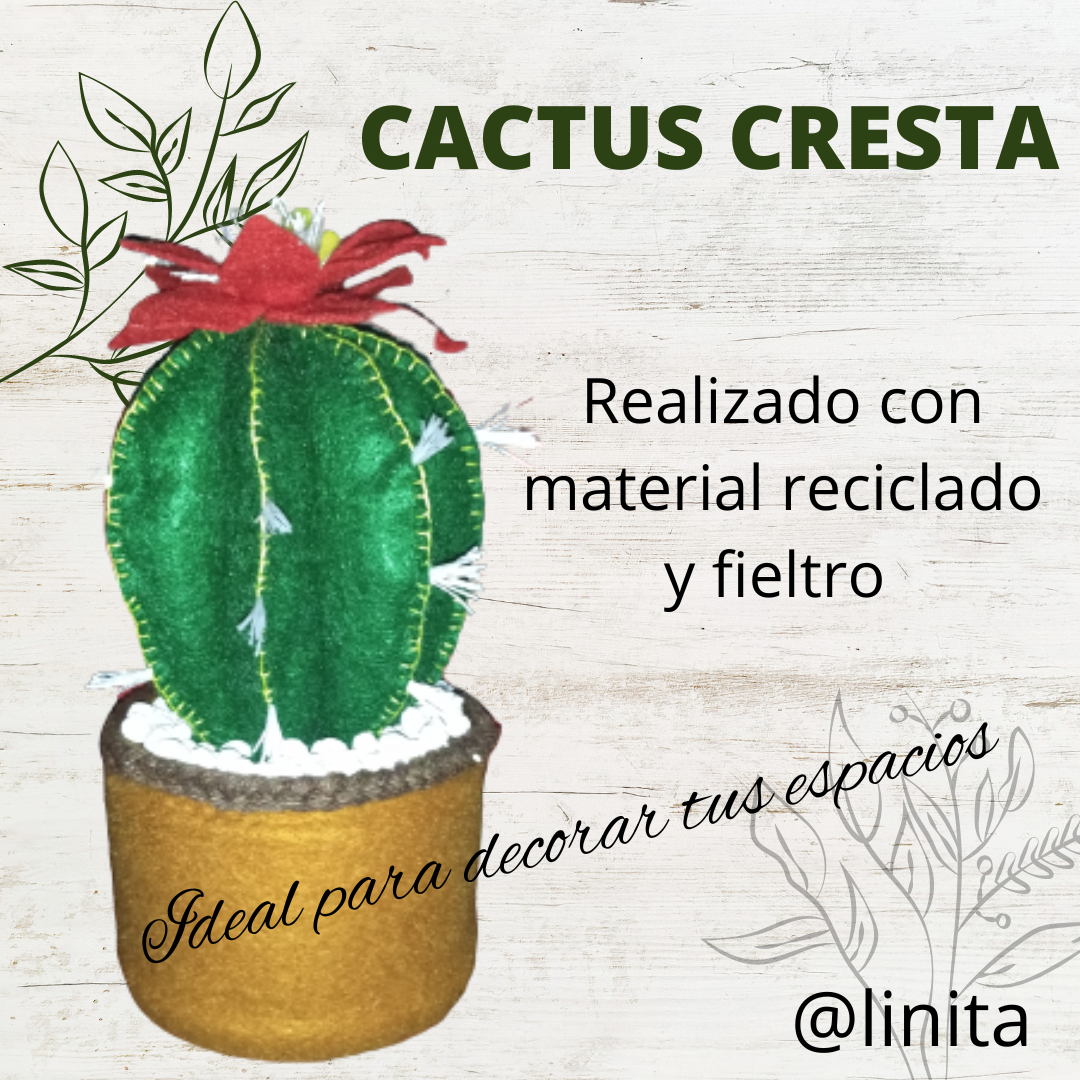
Now I'm doing this one to resume my project and also make the right contribution to all those who still don't have the sense of recycling in their lives and show them how we can transform such simple objects into charming ornaments with great value, both spiritual, if we take into account Consider what it means to have a cactus in our homes, as environmental, if instead of discarding we learn to reuse. let's get started
</div>
<div class="pull-right">
### <div class="phishy"> <center> ***BIENVENIDOS A MI BLOG*** </center> </div>
¡Holaaaaa, holaaaaa! Muy contenta de compartir con ustedes este proyecto que realicé de manera improvisada. Les cuento que tengo muchos días pensando en qué hacer para participar en el [concurso](https://peakd.com/hive-189641/@diyhub/diyhub-monthly-contest-january-2023-flower), que por cierto quedan pocos días, y revisando entre mis materiales, encontré unos que tenía apartados desde hace algún tiempo y me dije: "mejor voy a realizar este que quedó en abandono, luego me concentro en el concurso porque son muchas las ideas que llueven y aún no me decido". Así que decidí darle vida a un cactus que he querido hacer y no sé por qué razón. motivo o circunstancia lo dejé en el olvido. Lo que si recuerdo es, que cuando tuve la idea de hacerlo, se puso muy de moda estas plantas, en muchos lugares, tanto viveros como tiendas en general, se veían y aún se ven en exhibición estas plantas tanto naturales como artificiales. De hecho, en aquel entonces realicé un materito o maceta con material reciclado también pero en él planté un cactus natural para obsequiárselo a mi sobrinieta Sofía, con la finalidad de explicarle la importancia que tienen las plantas, su cuidado y el significado espiritual de los cactus. En fín, esa era a idea principal pero no con una planta natural, pero en vista que ya mi cactus estaba bien crecidito, decidí plantar unos cuantos y obsequiarlos.
Ahora realizo éste para retomar mi proyecto y también hacer el aporte adecuado para todos los que aún no tienen el sentido del reciclaje en su vida y enseñarle cómo podemos transformar objetos tan simples en adornos encantadores y con un gran valor, tanto espiritual, si tomamos en cuenta lo que representa tener un cactus en nuestros hogares, como ambiental, si e vez de desechar aprendemos a reutilizar. Comencemos.
</div>
---
<div class="text-justify">
<div class="pull-left">
### <center> ***MATERIALS*** </center>
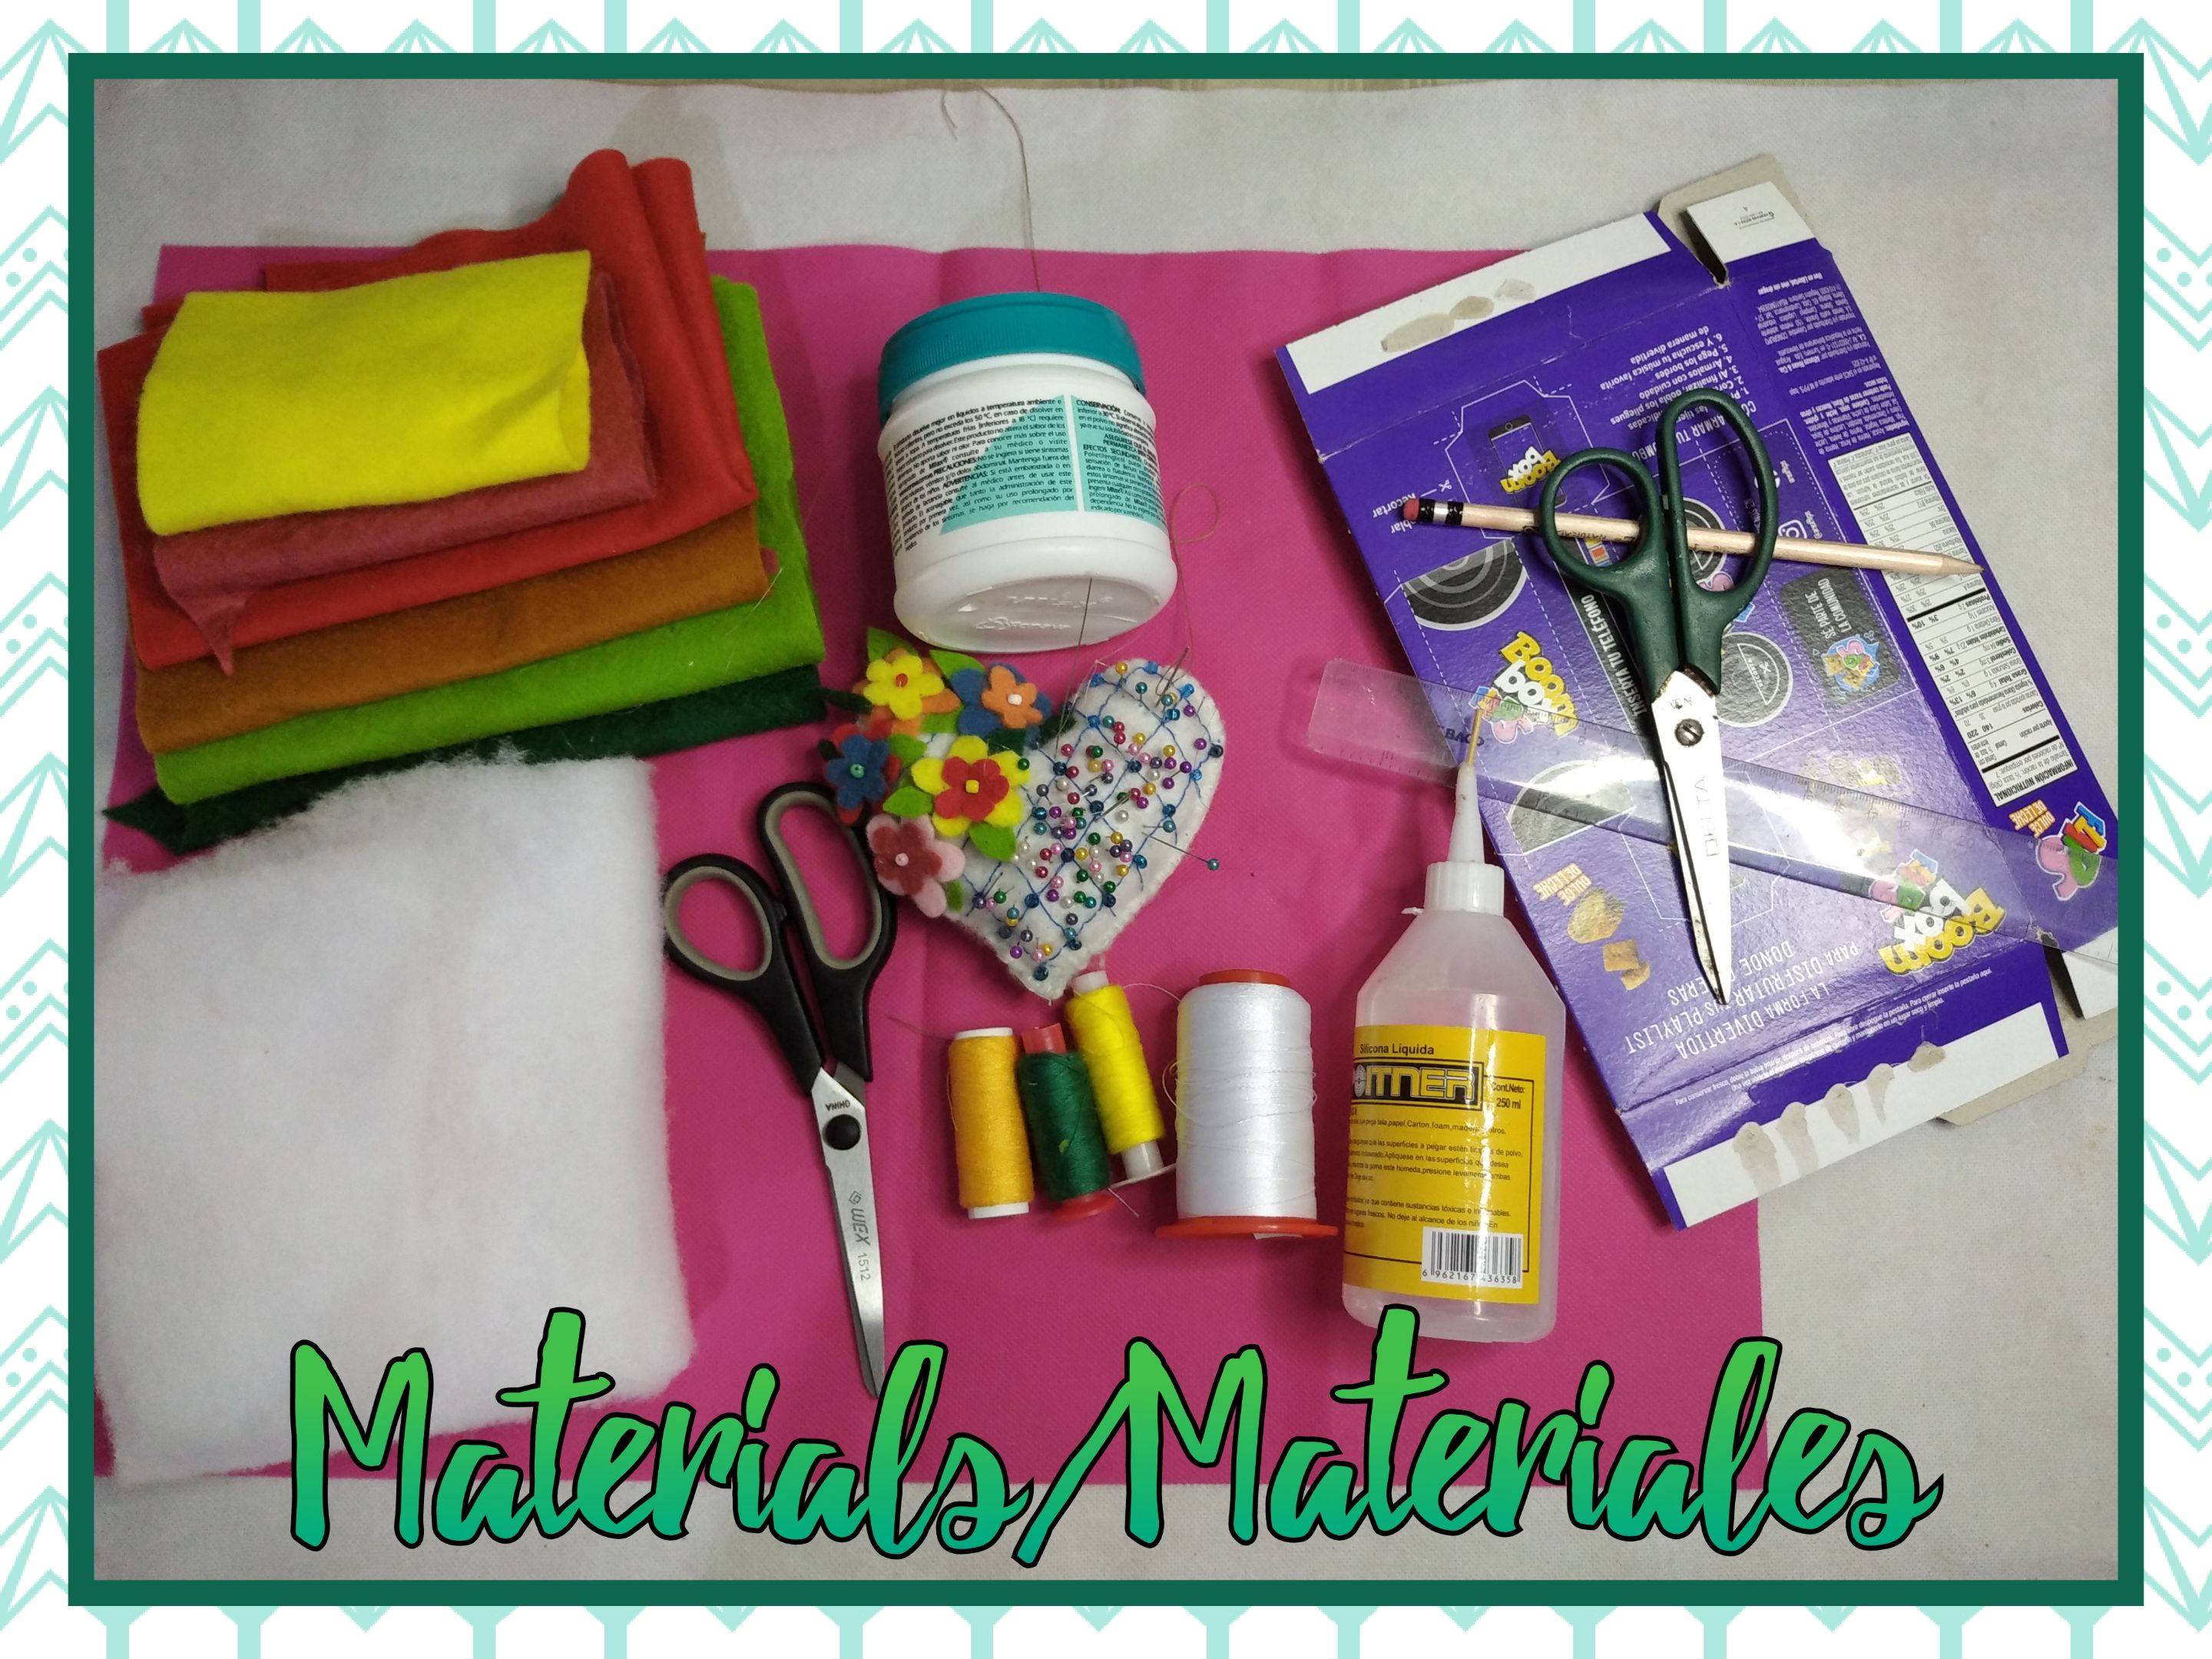
- Cereal box
- Plastic medicine container
- Pieces of felt in assorted colors
- Pair of scissors
- Threads and needle
- Synthetic padding
- Liquid silicone
- Grains of peas
- White paint
- Brown wick thread
- Rule
- Graphite pencil
- Sewing pins
- Whiteboard
</div>
<div class="pull-right">
### <center> ***MATERIALES*** </center>
- Caja de cereal
- Envase plástico de medicamento
- Retazos de fieltro de colores variados
- Tijeras
- Hilos y aguja
- Relleno sintético
- Silicón líquido
- Granos de arvejas
- Pintura blanca
- Hilo pabilo marrón
- Regla
- Lápiz de grafito
- Alfileres de costura
- Tiza
</div>
---
### <center> **STEP BY STEP** // **PASO A PASO** </center>
<div class="text-justify">
<div class="pull-left">
### <center> </center>
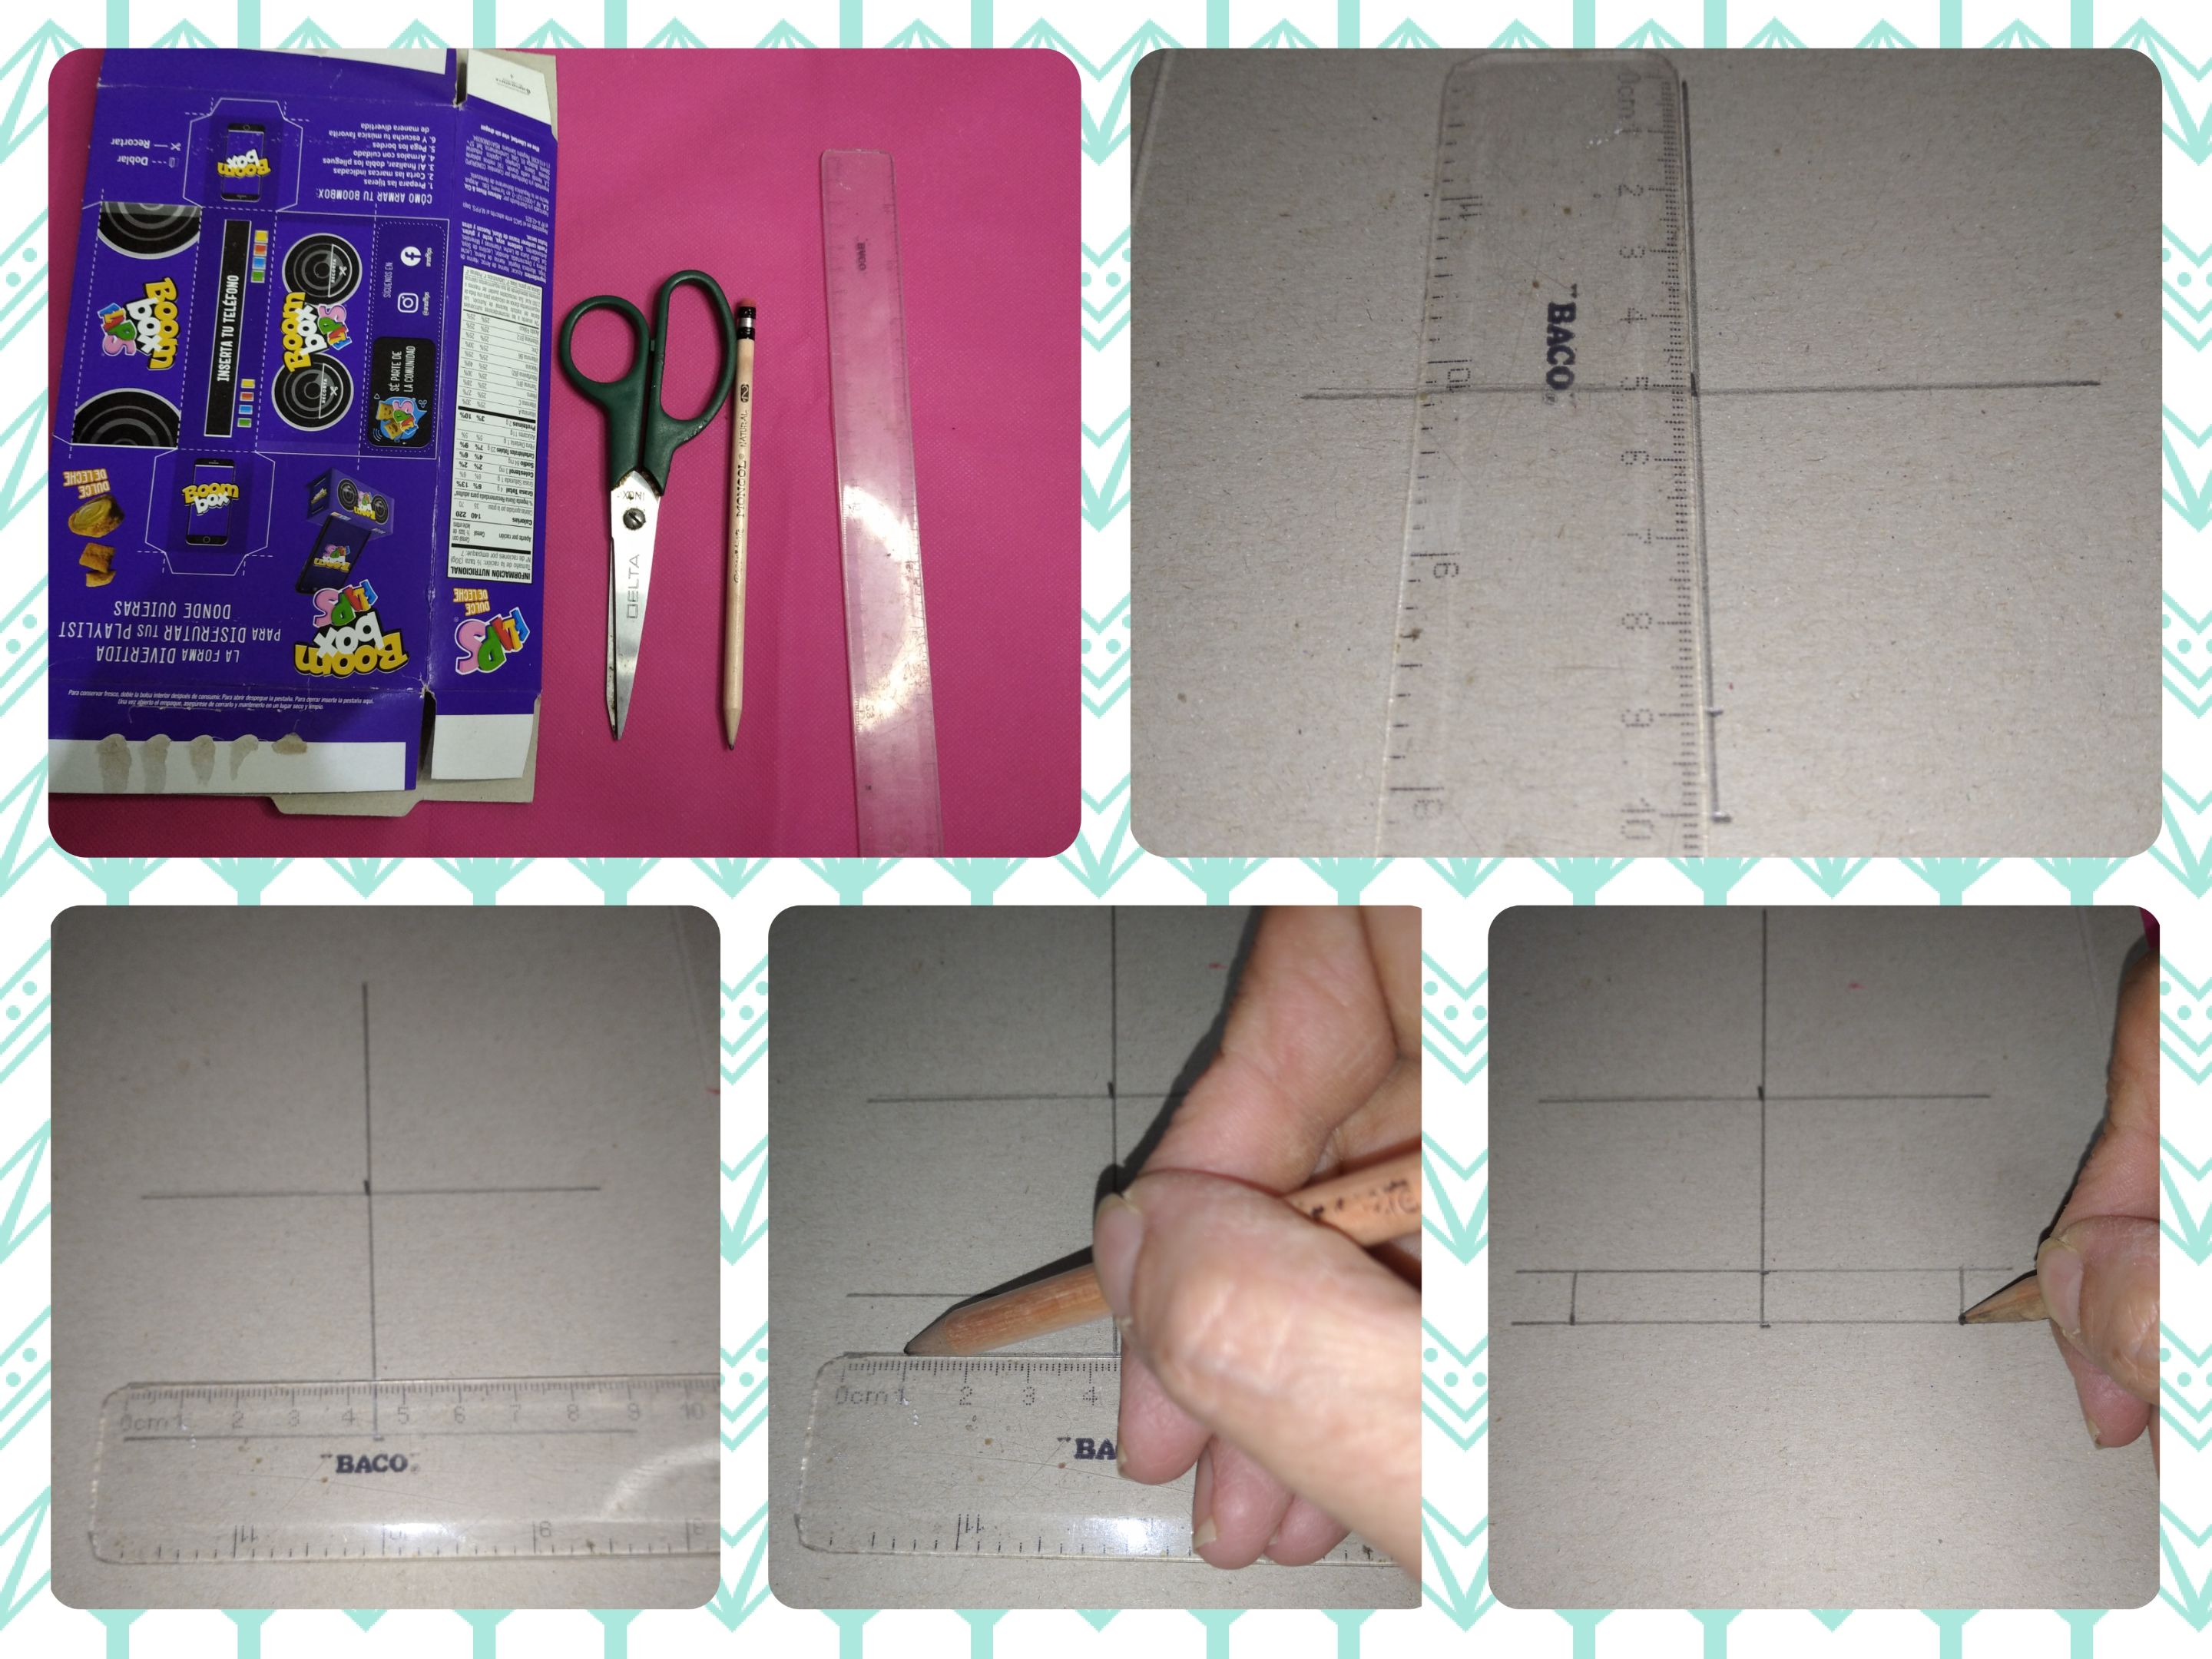
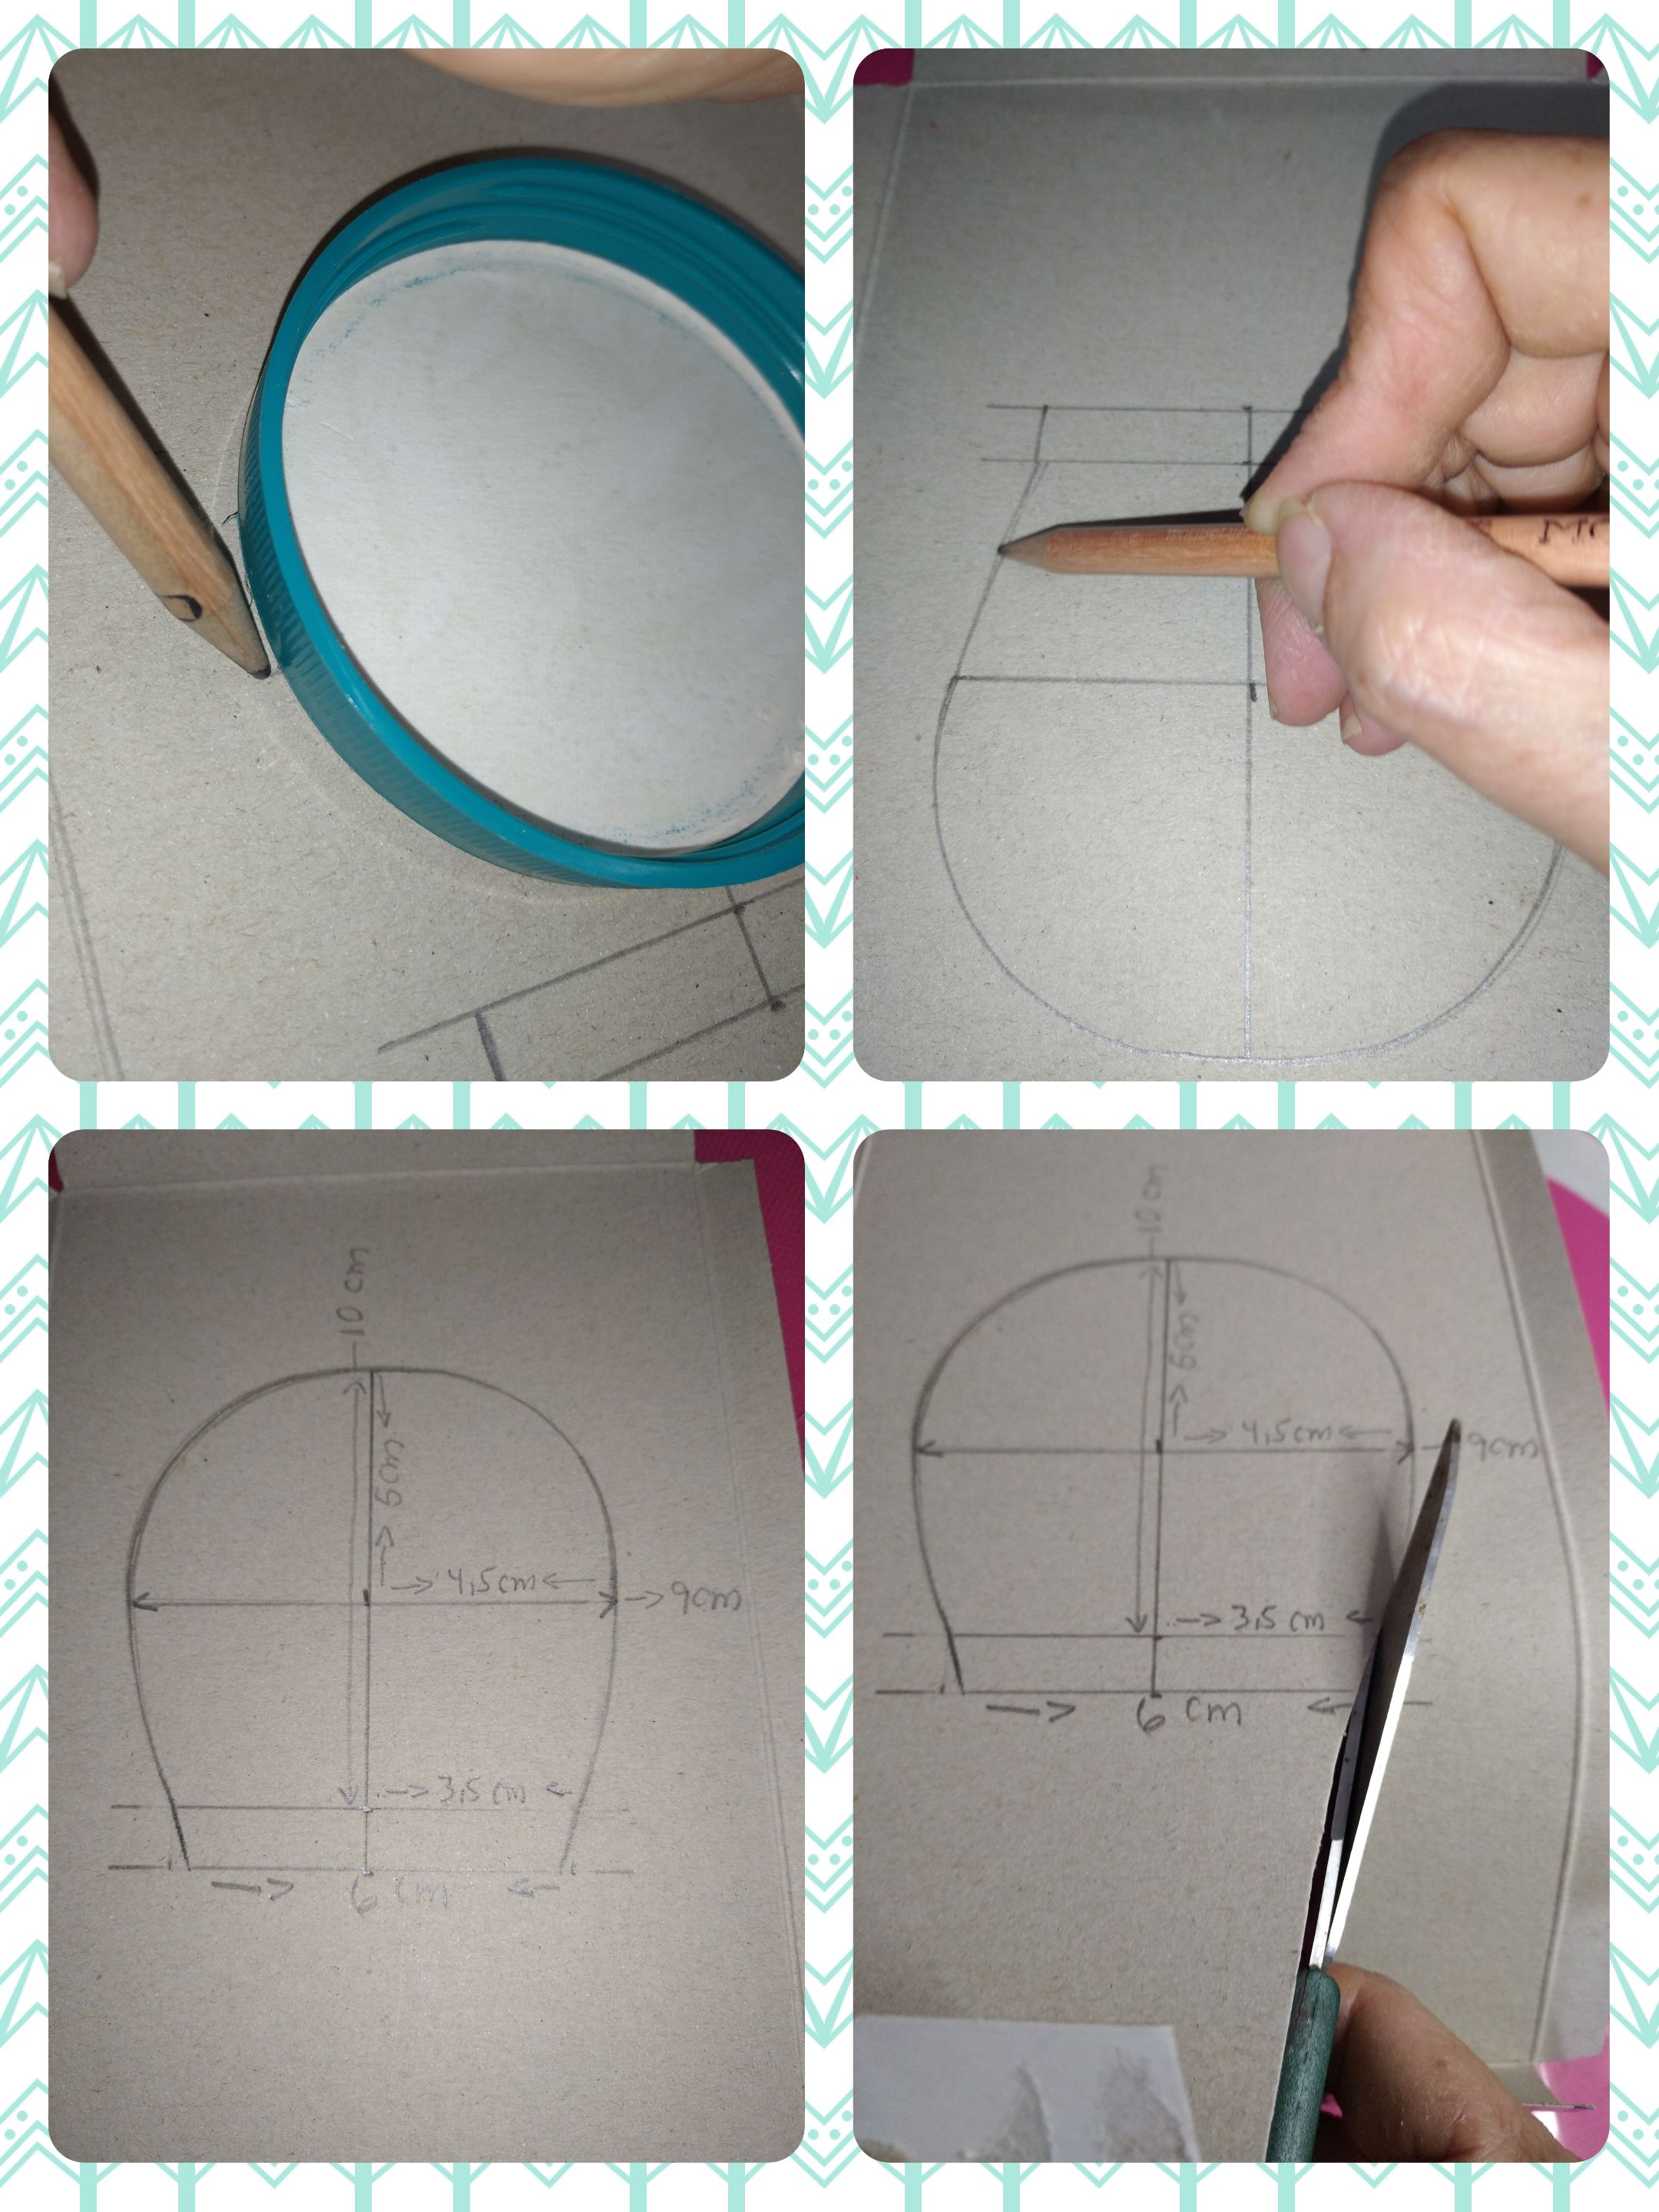
- Firstly I made the pattern of the cactus with the cereal box, taking the diameter of the medication container as a reference measurement.
- I made a horizontal line of 8 cm and a vertical of 10 cm in the form of a cross, passing through the center of the horizontal.
- At the bottom I made another 6 cm horizontal line, taking the vertical line as the axis.
Then I drew another line 1 cm apart on the bottom line.
</div>
<div class="pull-right">
### <center> </center>
- Primeramente realicé el patrón del cactus con la caja de cereal, tomando como medida de referencia el diámetro del envase de medicamento.
- Realicé una linea horizontal de 8 cm y una vertical de 10 cm en forma de cruz, pasando por el centro de la horizontal.
- En la parte inferior realicé otra línea horizontal de 6 cm, tomando como eje la linea vertical.
Luego tracé otra línea de 1 cm de separación sobre la linea inferior.
</div>
---
<div class="text-justify">
<div class="pull-left">
### <center> </center>
- With the lid of the container I made a semicircle joining the ends of the upper vertical and horizontal line on both sides. both the right and the left.
- And following the previous line, I traced the ones below, thus forming the necessary shape for the cactus.
- Then I cut and made the necessary touch-ups until I obtained the mold or pattern.
</div>
<div class="pull-right">
### <center> </center>
- Con la tapa del envase realicé un semi circulo uniendo los extremos de la línea vertical y horizontal superior de ambos lados. tanto del derecho como del izquierdo.
- Y siguiendo la línea anterior, tracé las de debajo, formando así la forma necesaria para el cactus.
- Luego recorté y realicé los retoque necesarios hasta obtener el molde o patrón.
</div>
---
<div class="text-justify">
<div class="pull-left">
### <center> </center>
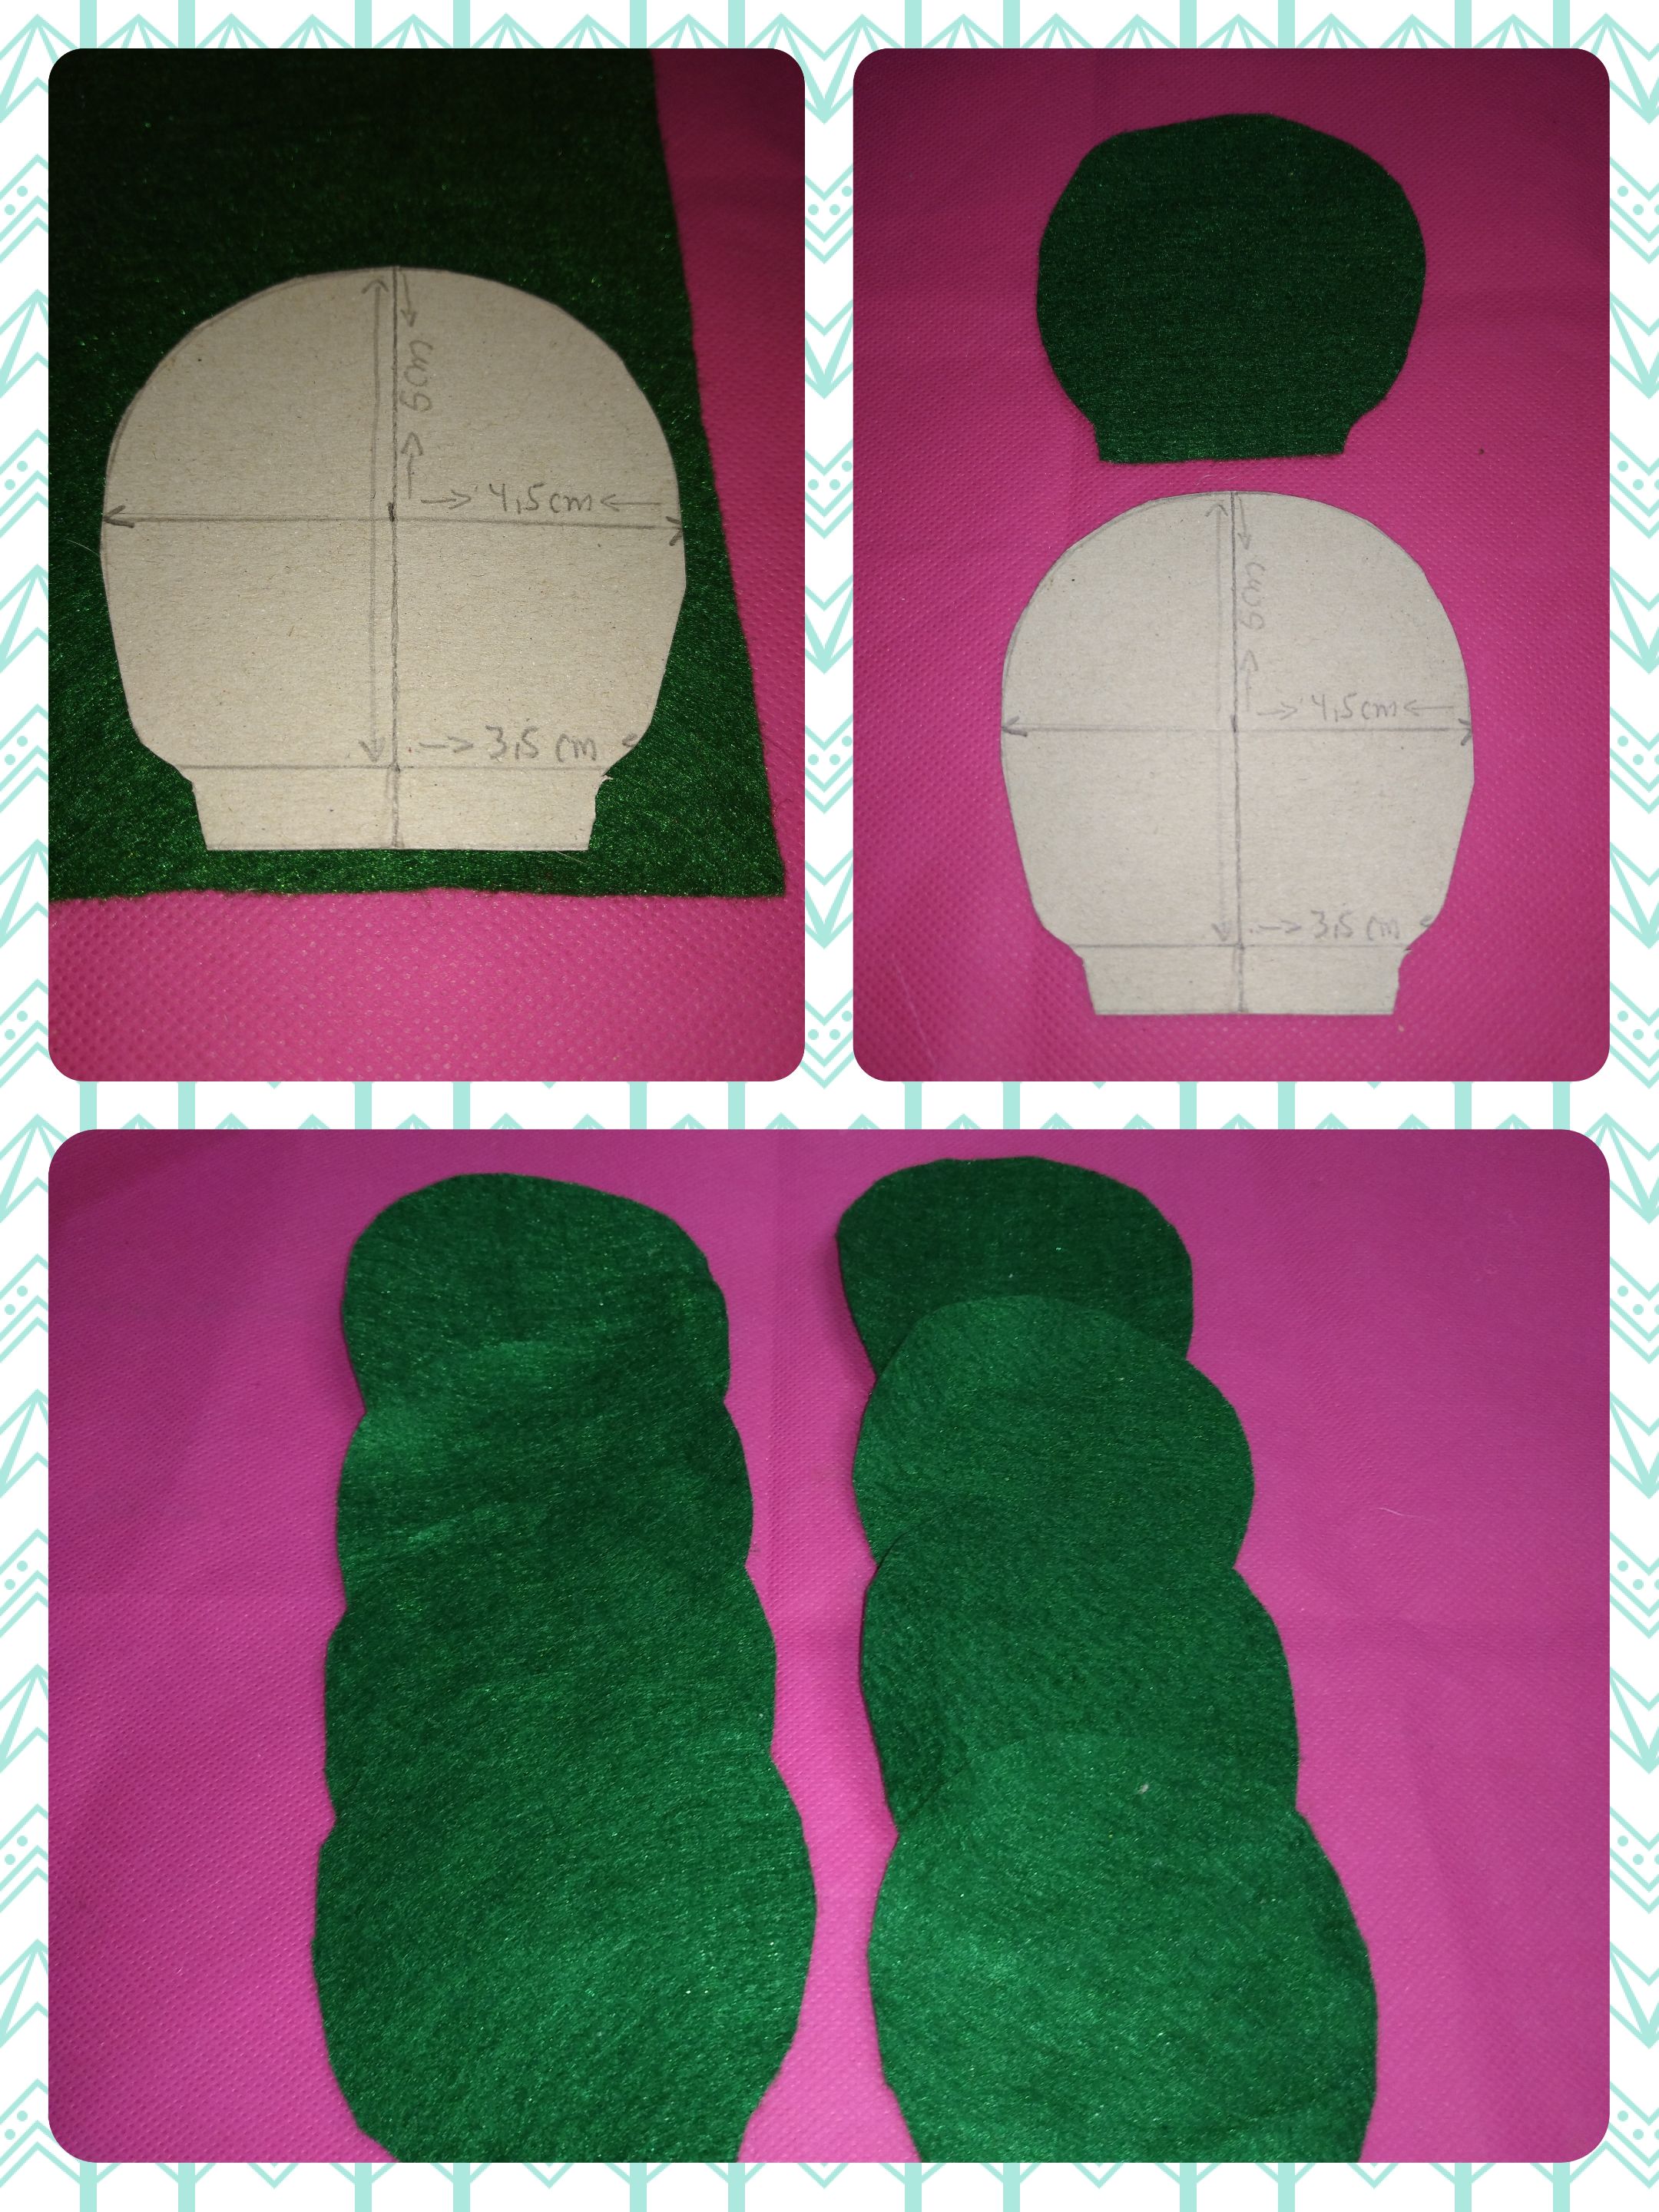
We take the dark green felt and place the pattern made and cut 8 equal pieces.
</div>
<div class="pull-right">
### <center> </center>
Tomamos el fieltro verde oscuro y colocamos el patrón realizado y cortamos 8 piezas iguales.
</div>
---
<div class="text-justify">
<div class="pull-left">
### <center> </center>
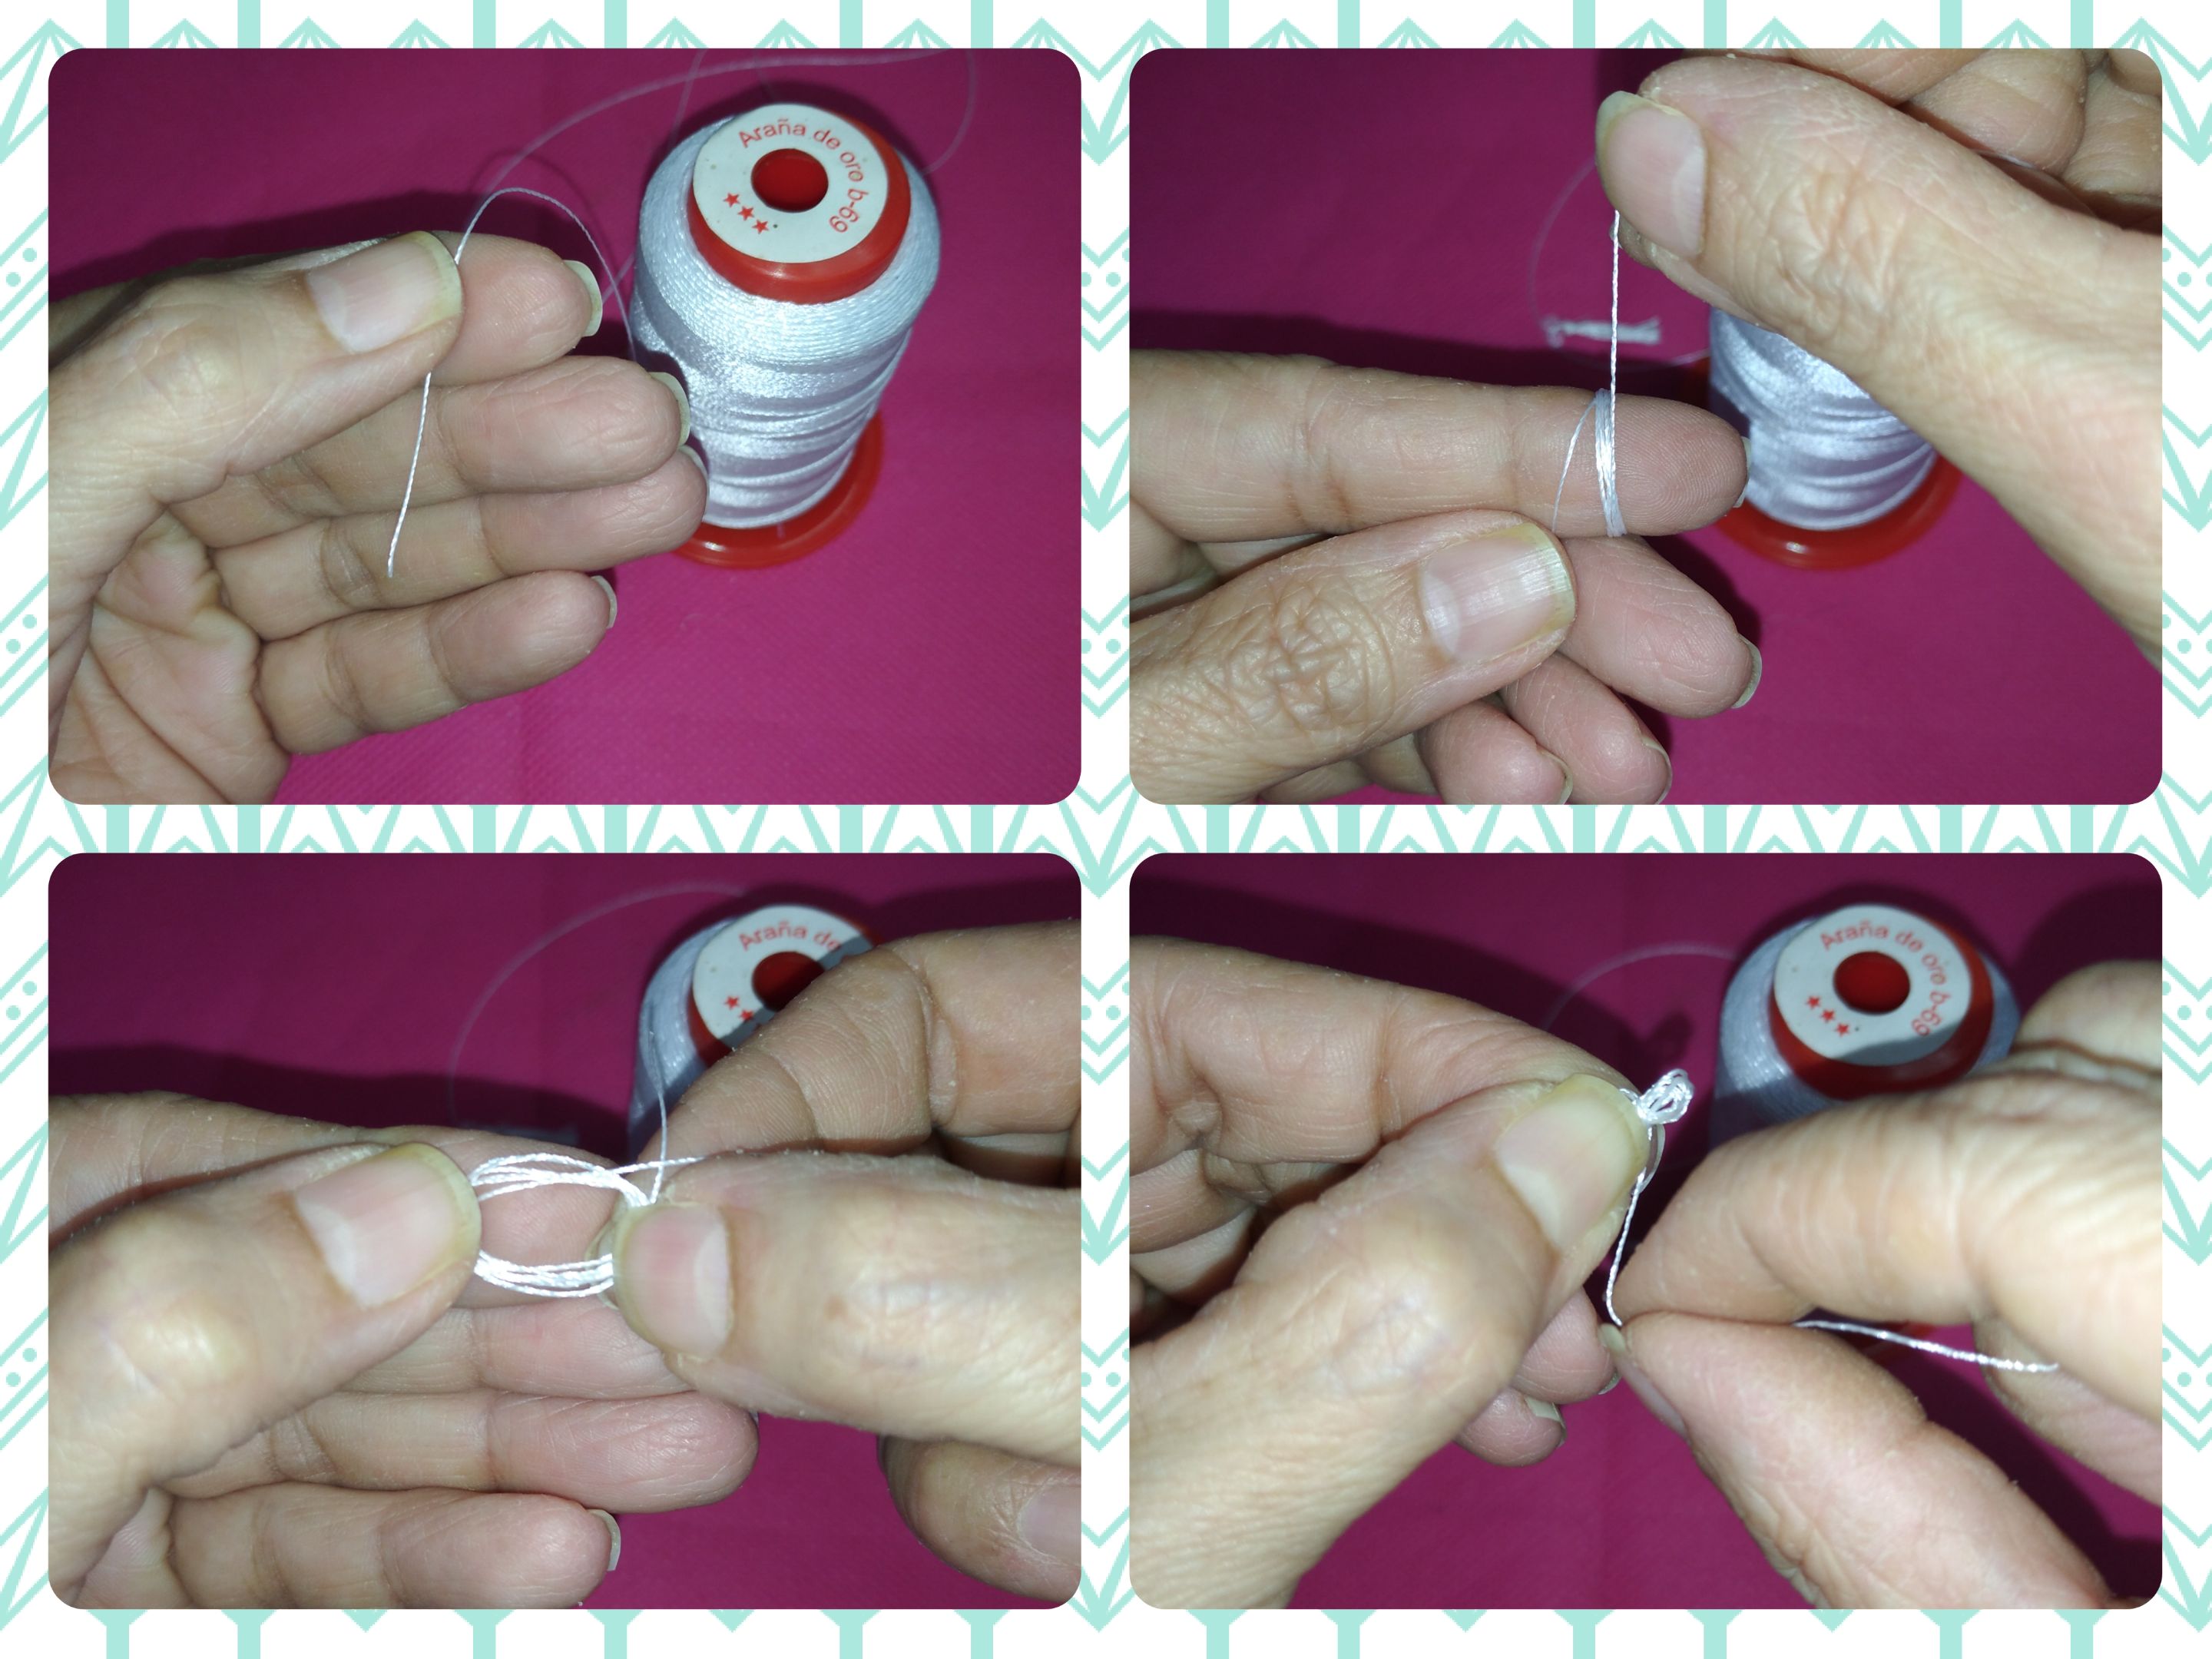
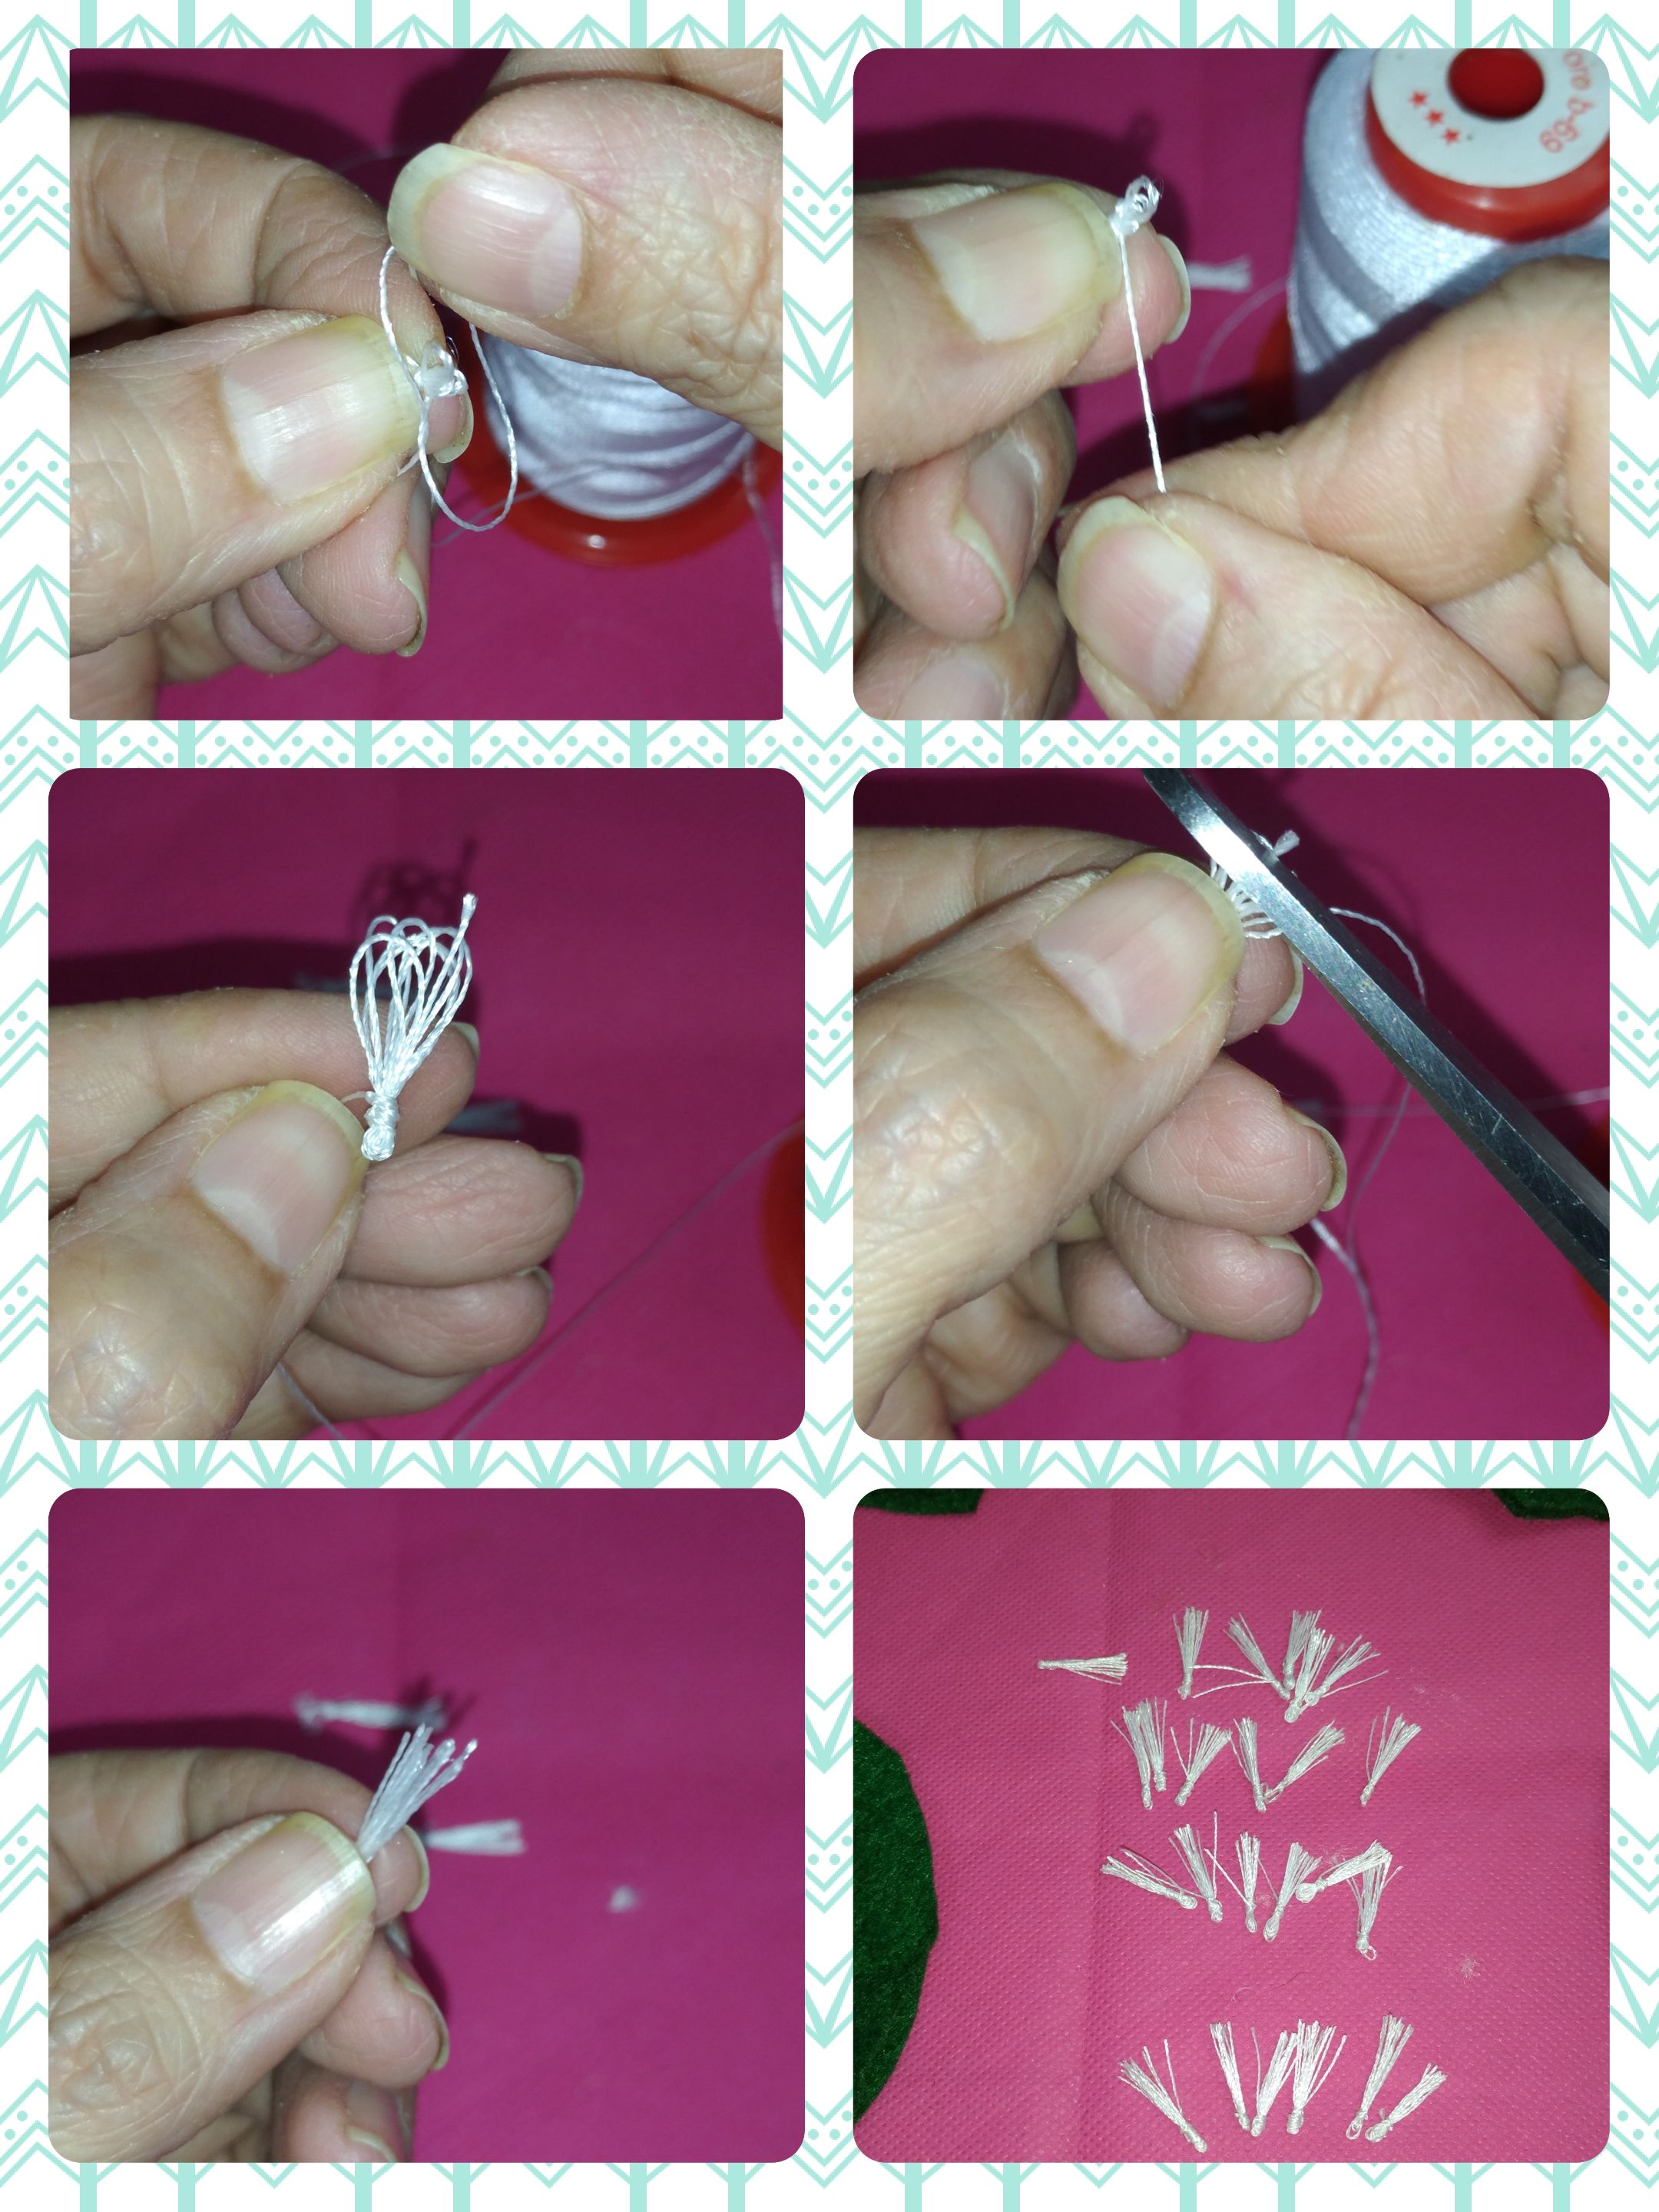
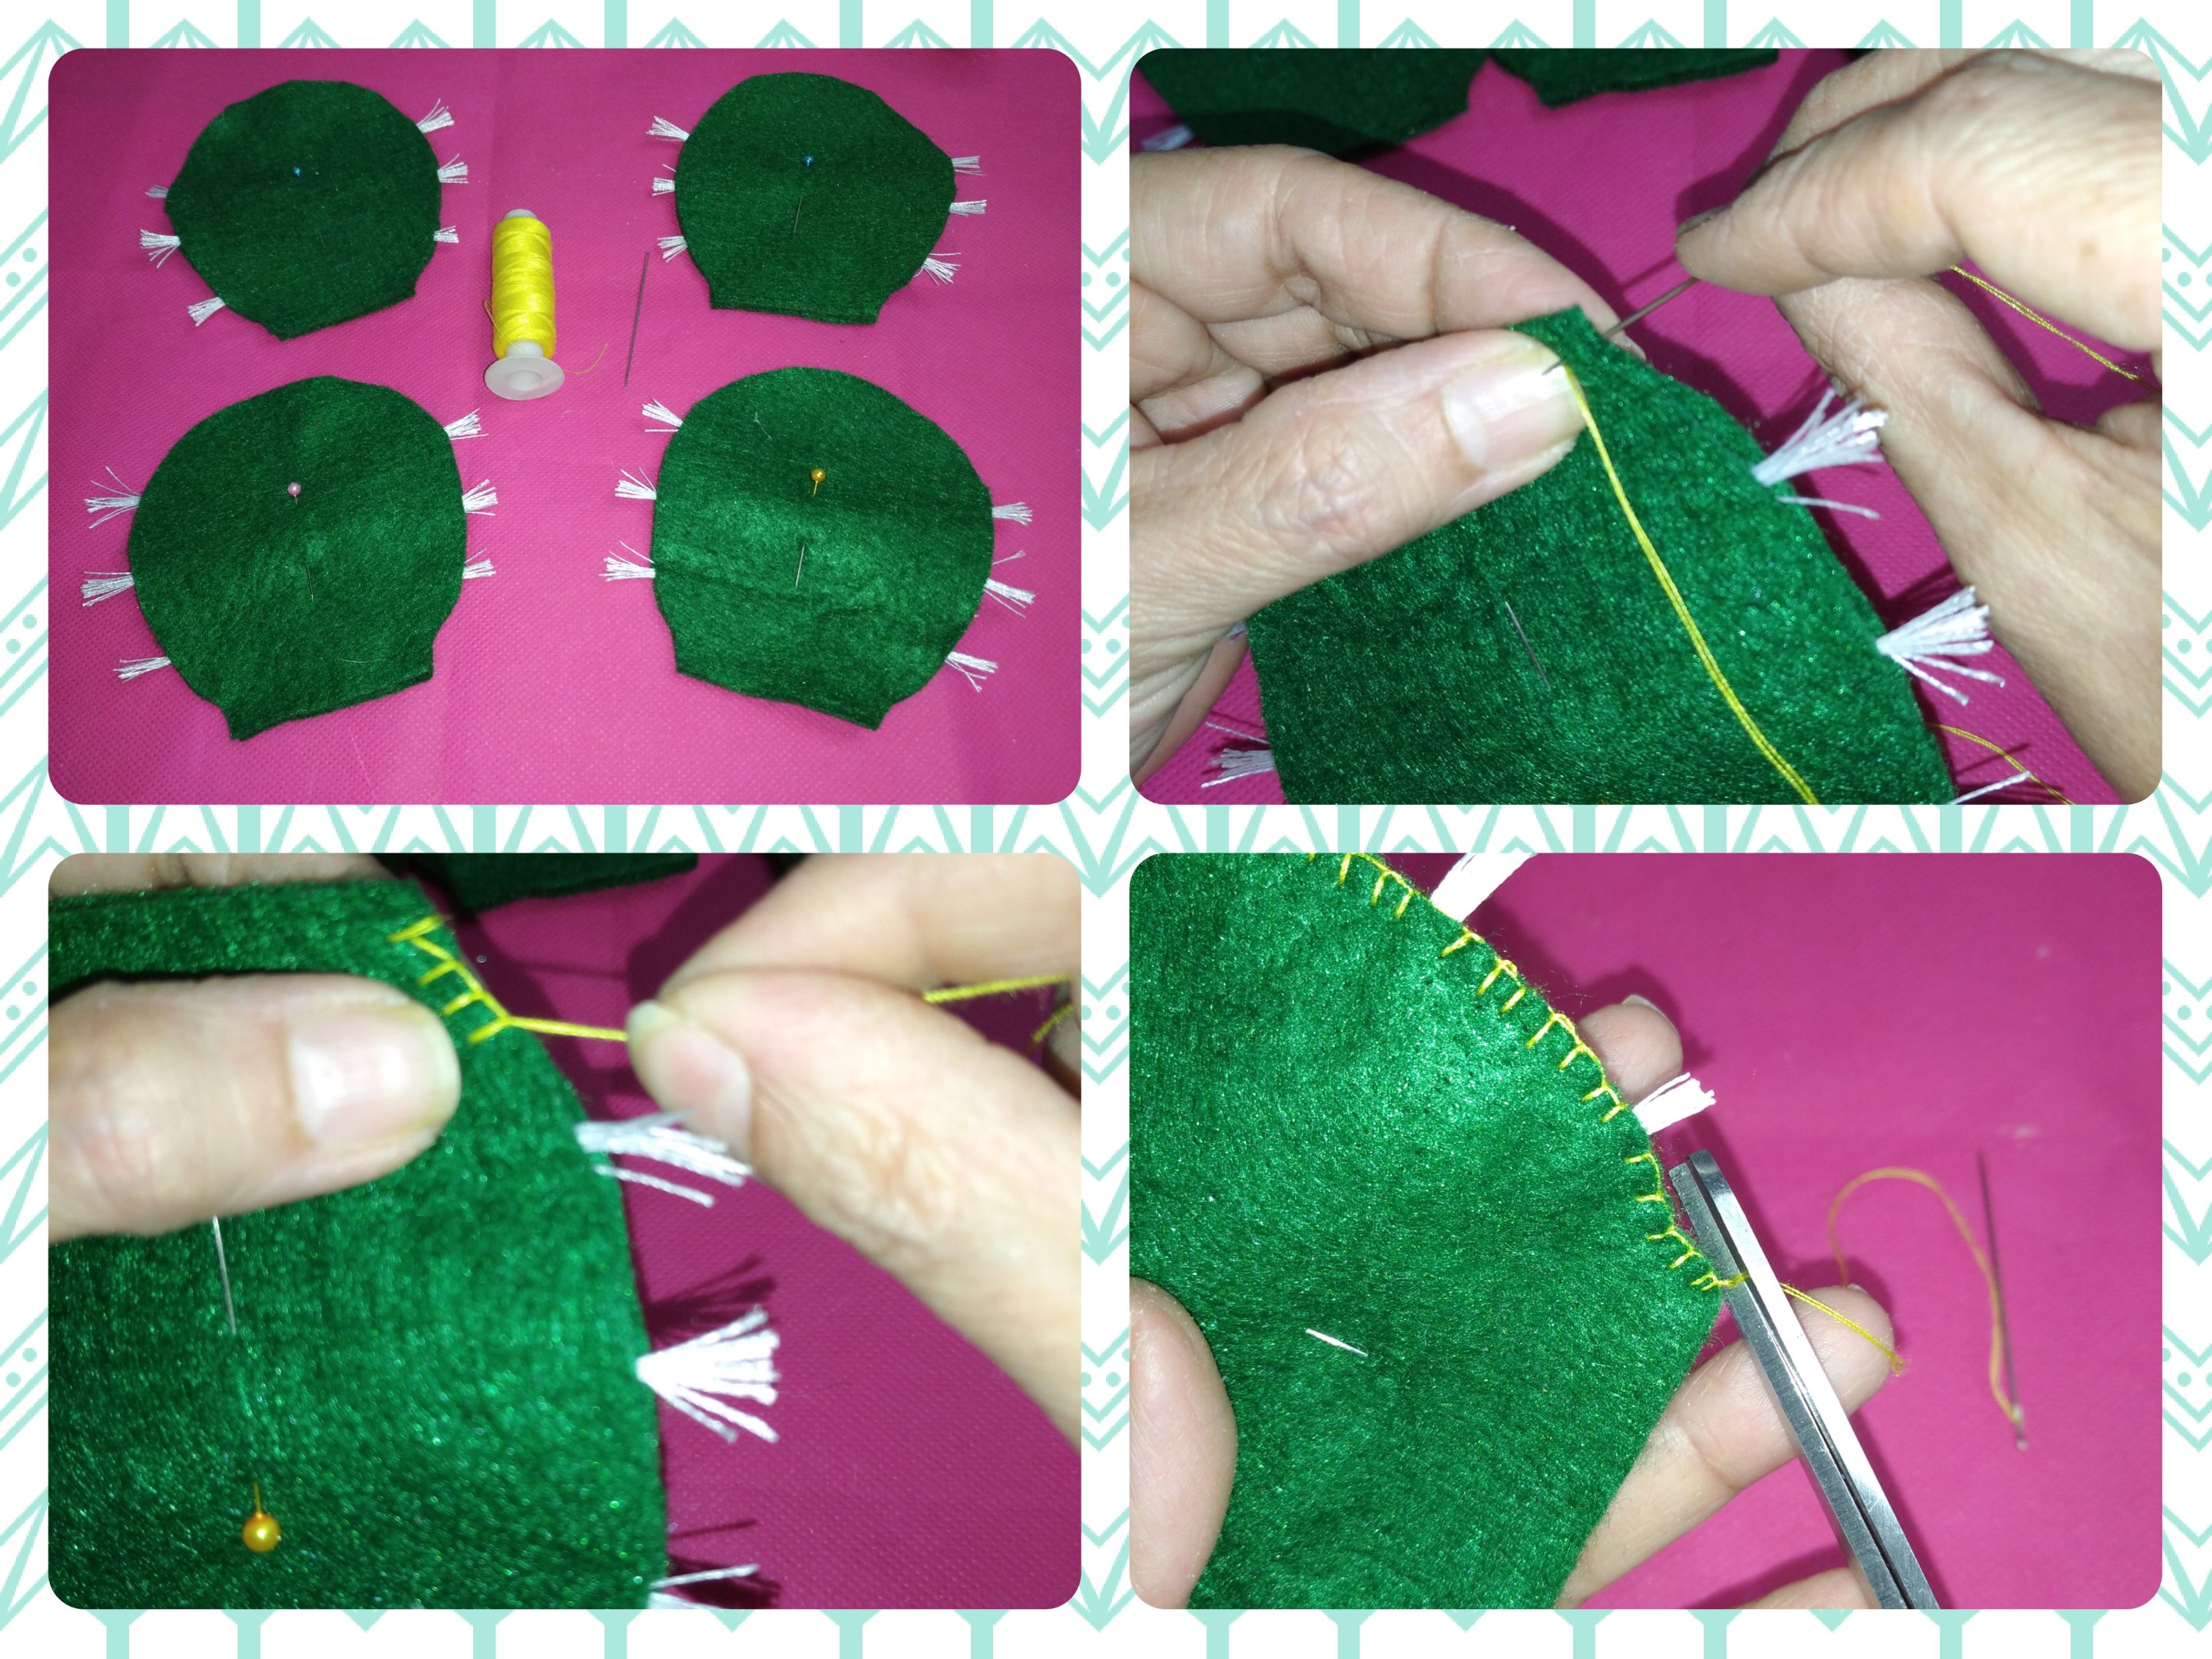
- With the white thread we make what would be the spines of the cactus. We make 6 laps on the finger or on some flat object approximately 1 cm wide. We let go and at one of the ends we make turns with the thread and then we knot and tighten hard. We cut at the opposite end and make some small tassels. Of these we will make 24 pieces.
</div>
<div class="pull-right">
### <center> </center>
- Con el hilo blanco realizamos lo que serían las espinas del cactus. Realizamos 6 vueltas en el dedo o en algún objeto plano de 1 cm aproximadamente de anchura. Soltamos y en uno de los extremos realizamos vueltas con el hilo y luego anudamos y apretamos duro. Cortamos en el extremo contrario y realizamos unas pequeñas borlas. De éstas haremos 24 piezas.
</div>
---
<div class="text-justify">
<div class="pull-left">
### <center> </center>
Now we are going to form 4 pairs of cactus leaves with 6 tassels for the spines. In one of the pieces of the cactus leaves, we position where we want the thorns, then we glue them with liquid silicone and cover with the other piece and fasten with a pin. We will do this same procedure with the three remaining pairs until we have the 4 sheets formed.
</div>
<div class="pull-right">
### <center> </center>
Ahora vamos a formar 4 pares de hojas de cactus con 6 borlas para las espinas. En una de las piezas de las hojas de cactus, posicionamos dónde queremos las espinas, luego las pegamos con silicón líquido y tapamos con la otra pieza y sujetamos con un alfiler. Este mismo procedimiento lo haremos con los tres pares restantes hasta que tenemos las 4 hojas formadas.
</div>
---

<div class="text-justify">
<div class="pull-left">
### <center> </center>
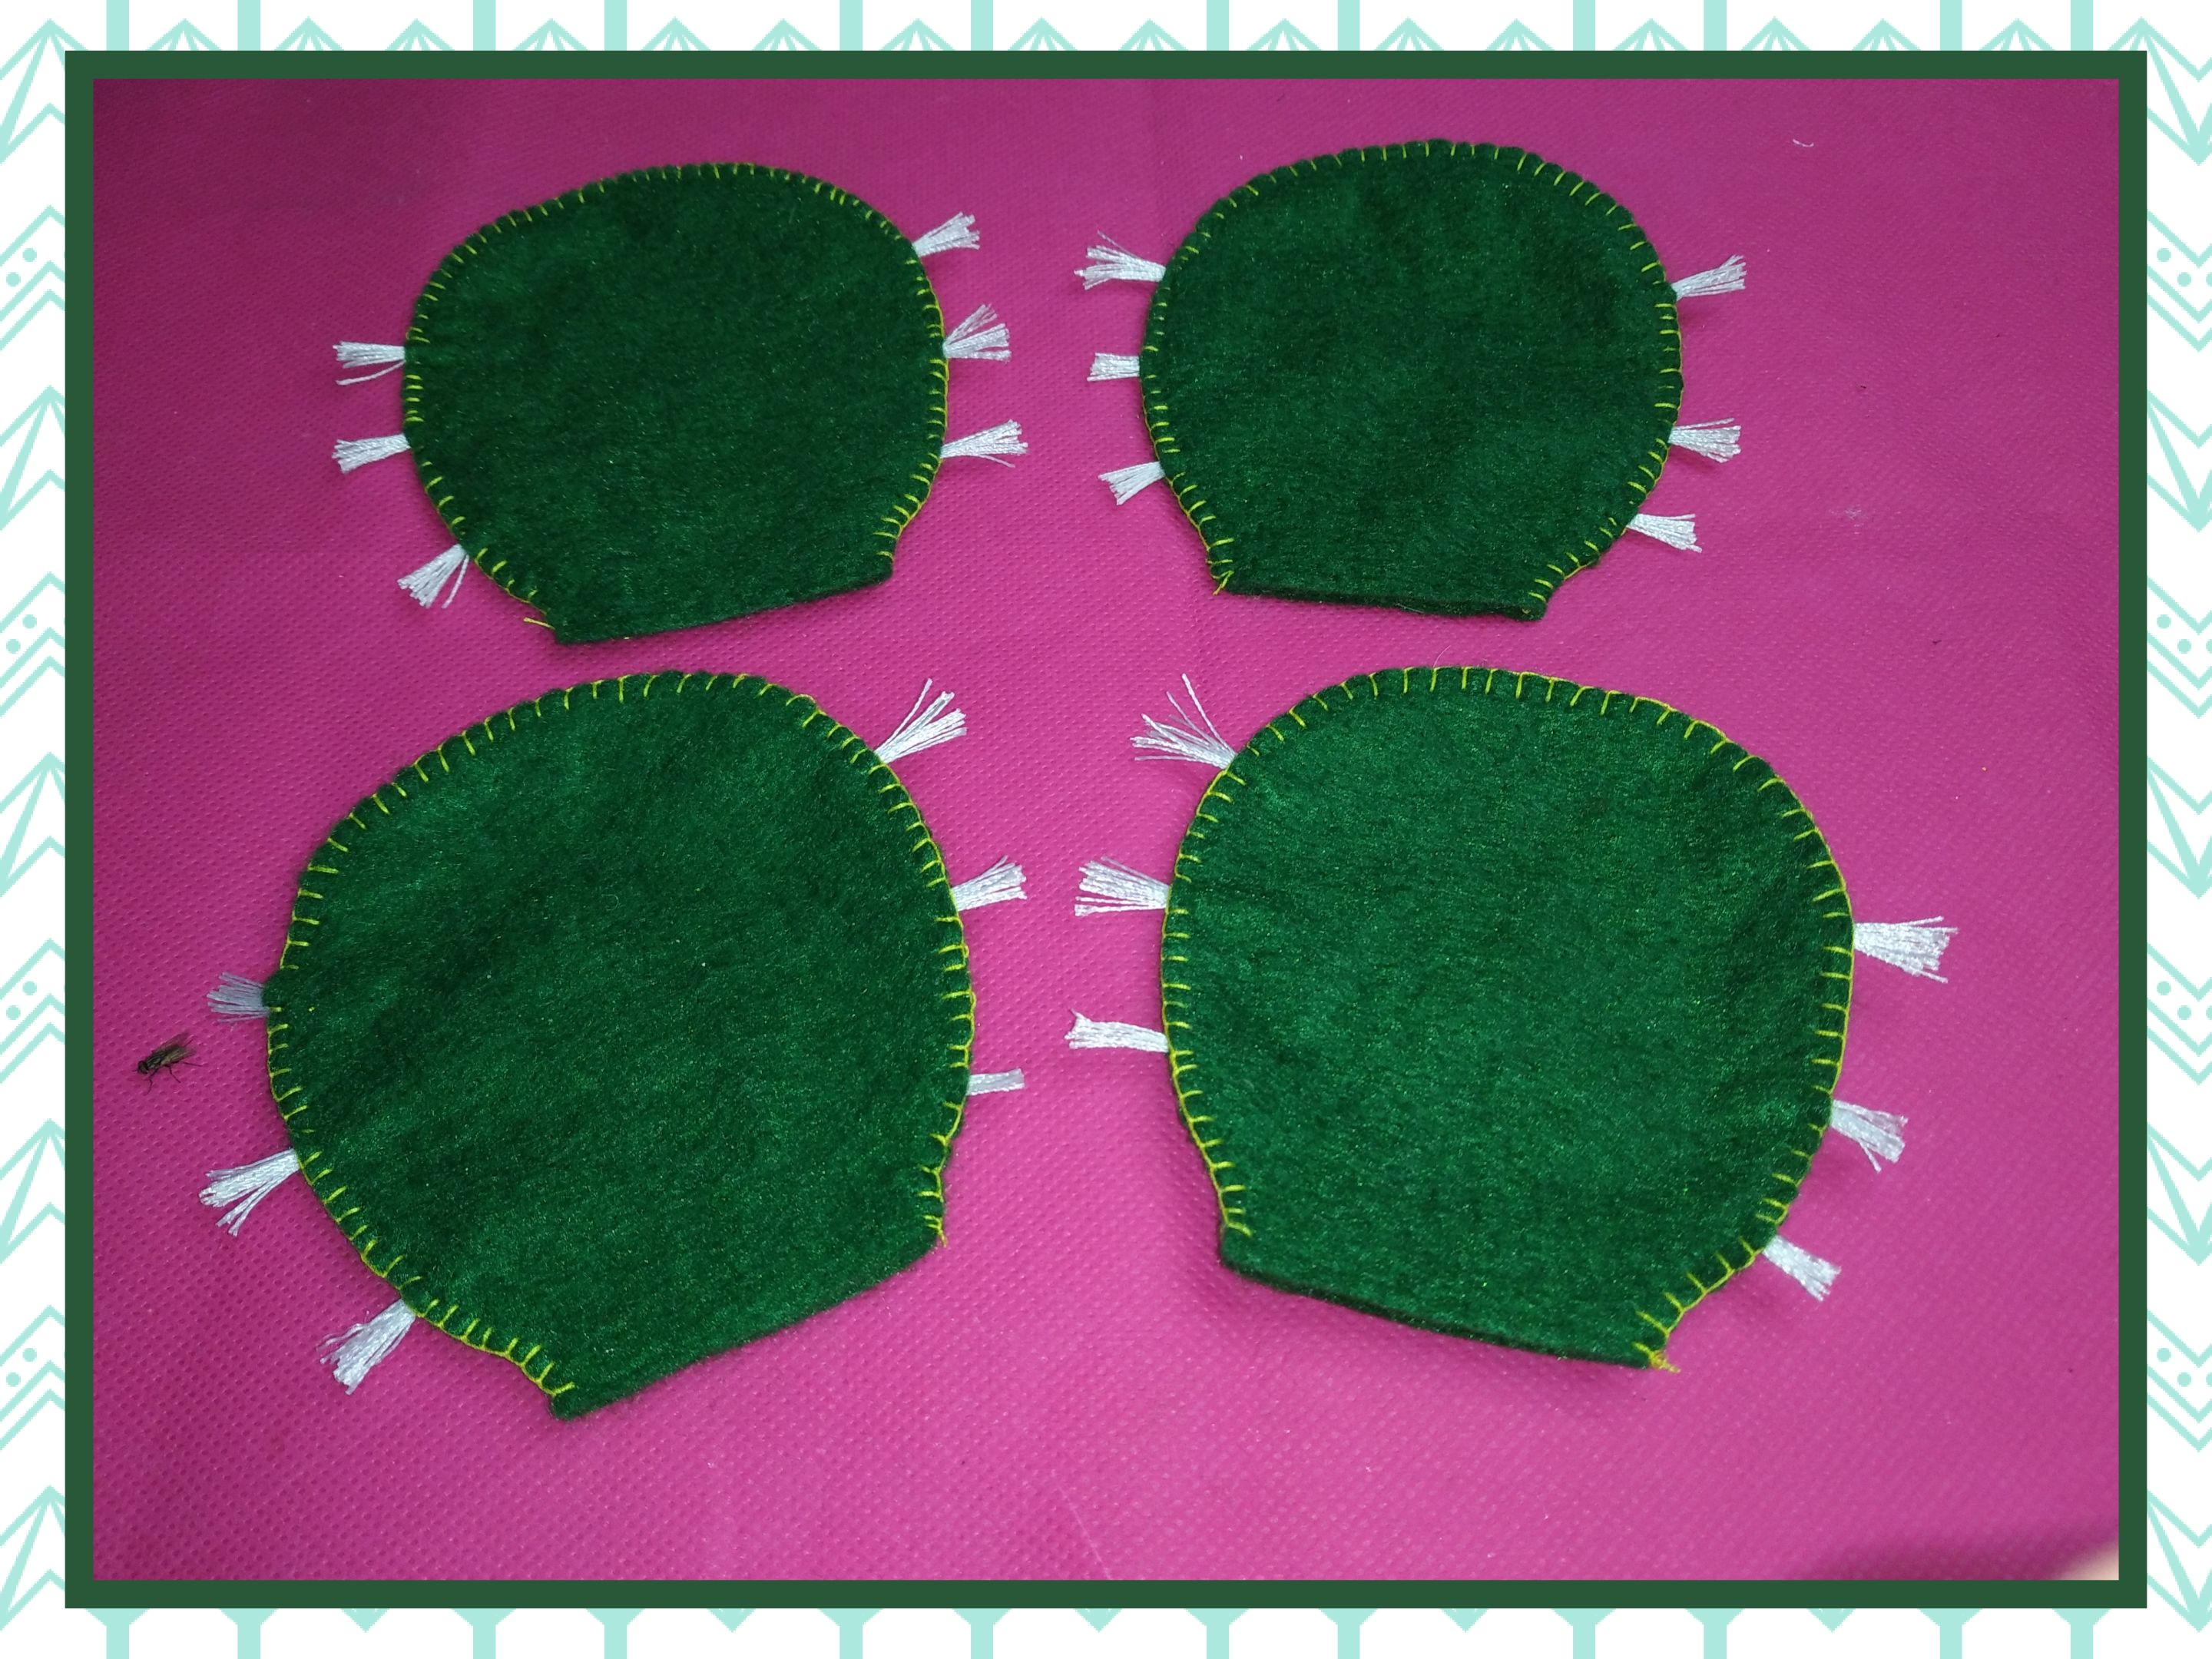
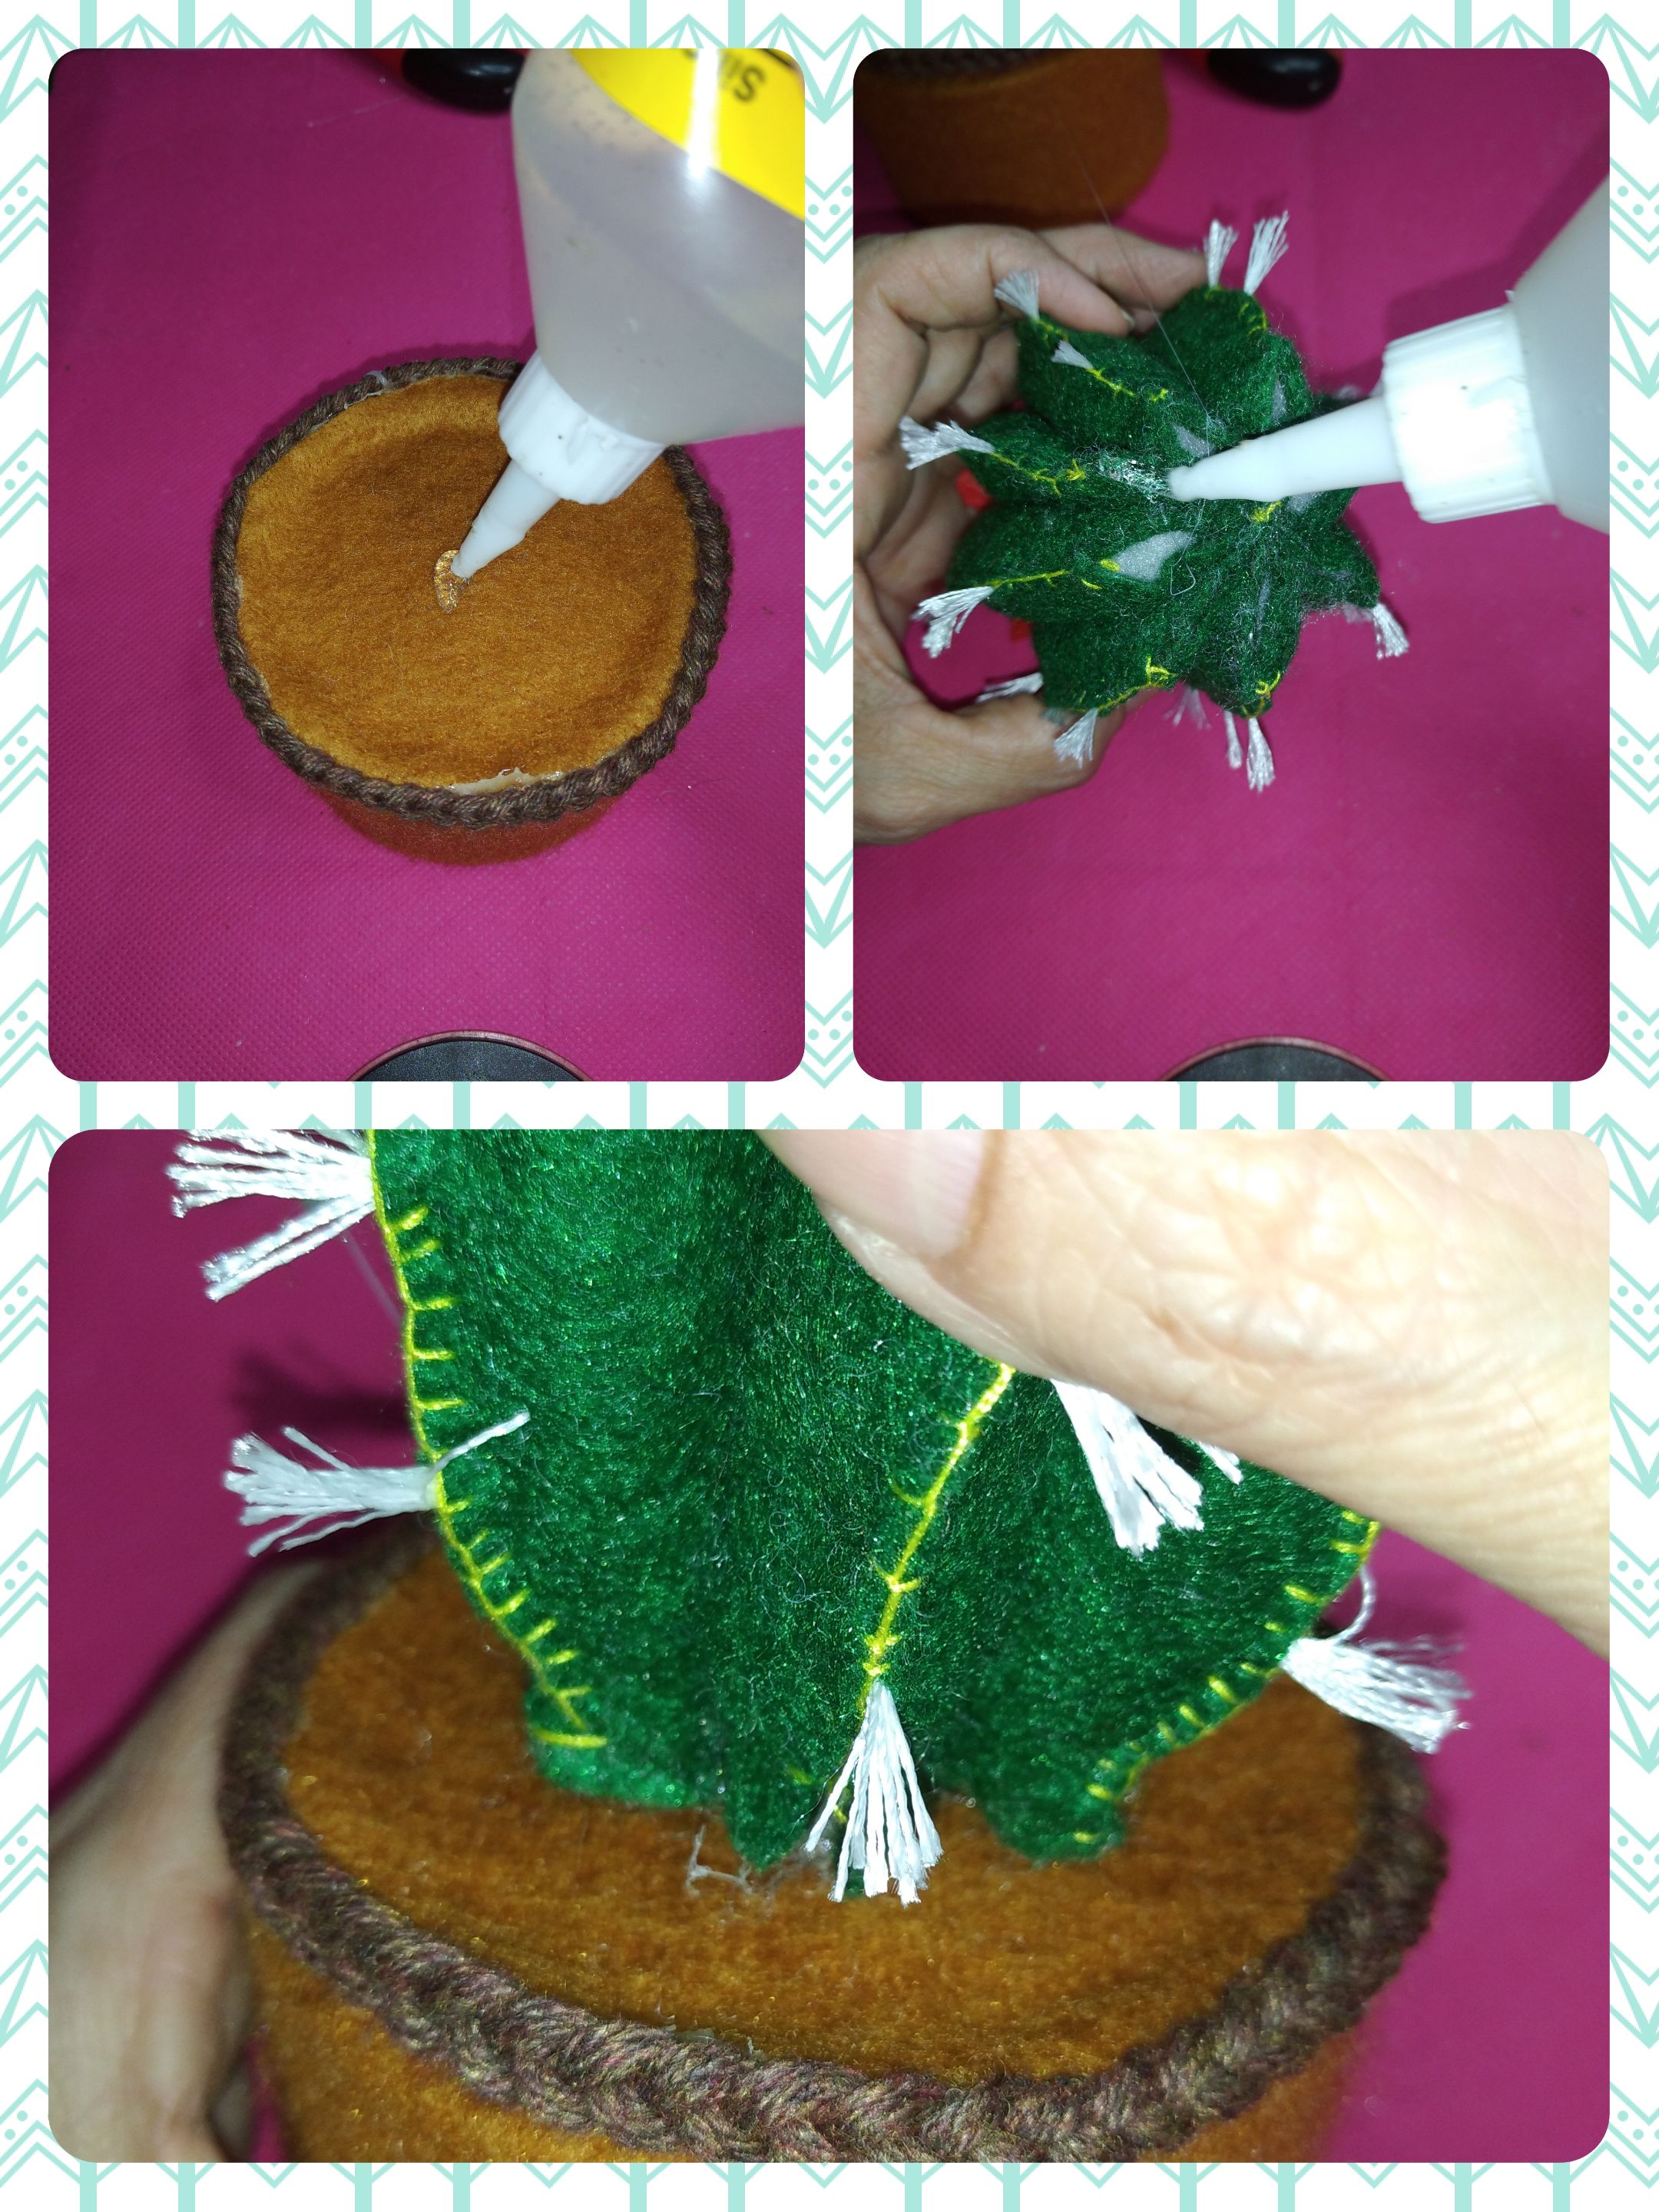
Now we join by making buttonhole-type stitches around the outline of the sheet without sewing the inside part. We will do this in the 4 pieces that we have formed.
</div>
<div class="pull-right">
### <center> </center>
Ahora unimos realizando puntadas tipo ojal por el contorno de la hoja sin coser la parte interior. Esto lo haremos en las 4 piezas que tenemos formadas.
</div>
---
<div class="text-justify">
<div class="pull-left">
### <center> </center>
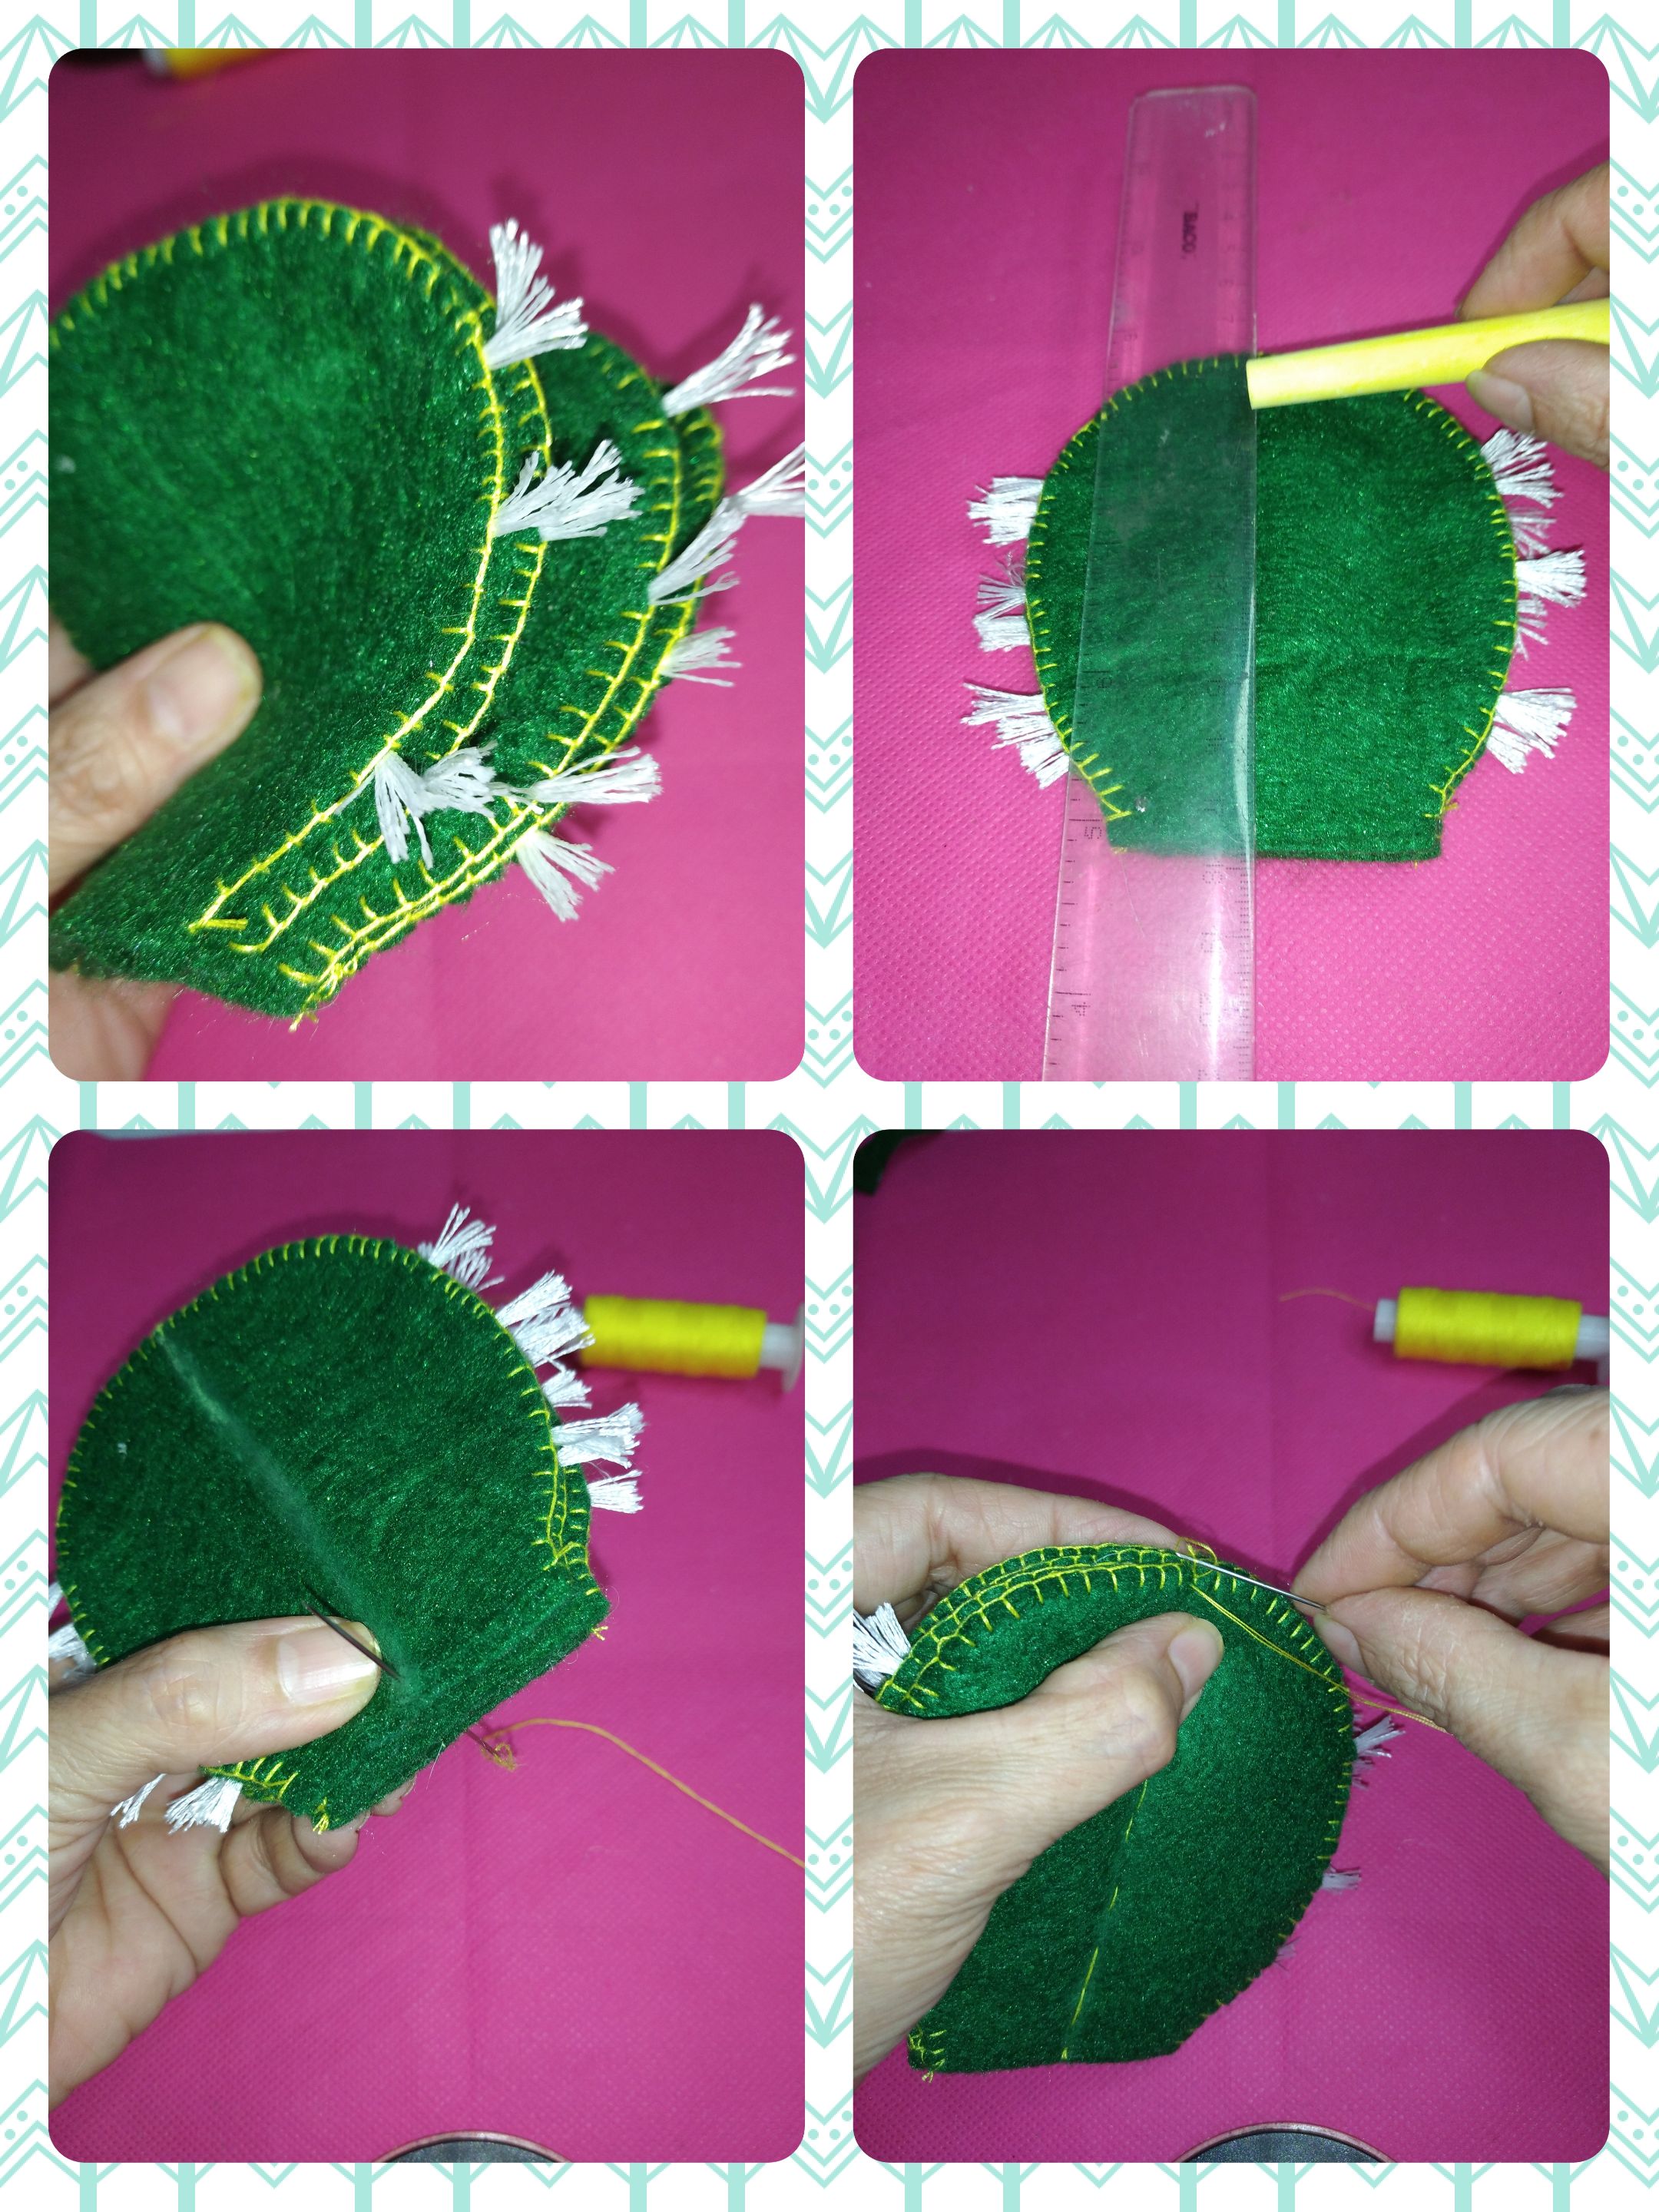
We place all the pieces on top of each other symmetrically. We draw a line through the center using chalk, so that there are no marks left afterwards, and then we sew with backstitch or hem stitches.
</div>
<div class="pull-right">
### <center> </center>
Colocamos todas las piezas una encima de la otra de forma simétrica. Trazamos un linea por el centro utilizando la tiza, para que no quede marcas después, y luego cosemos con puntadas pespunte o de bastilla.
</div>
---
<div class="text-justify">
<div class="pull-left">
### <center> </center>
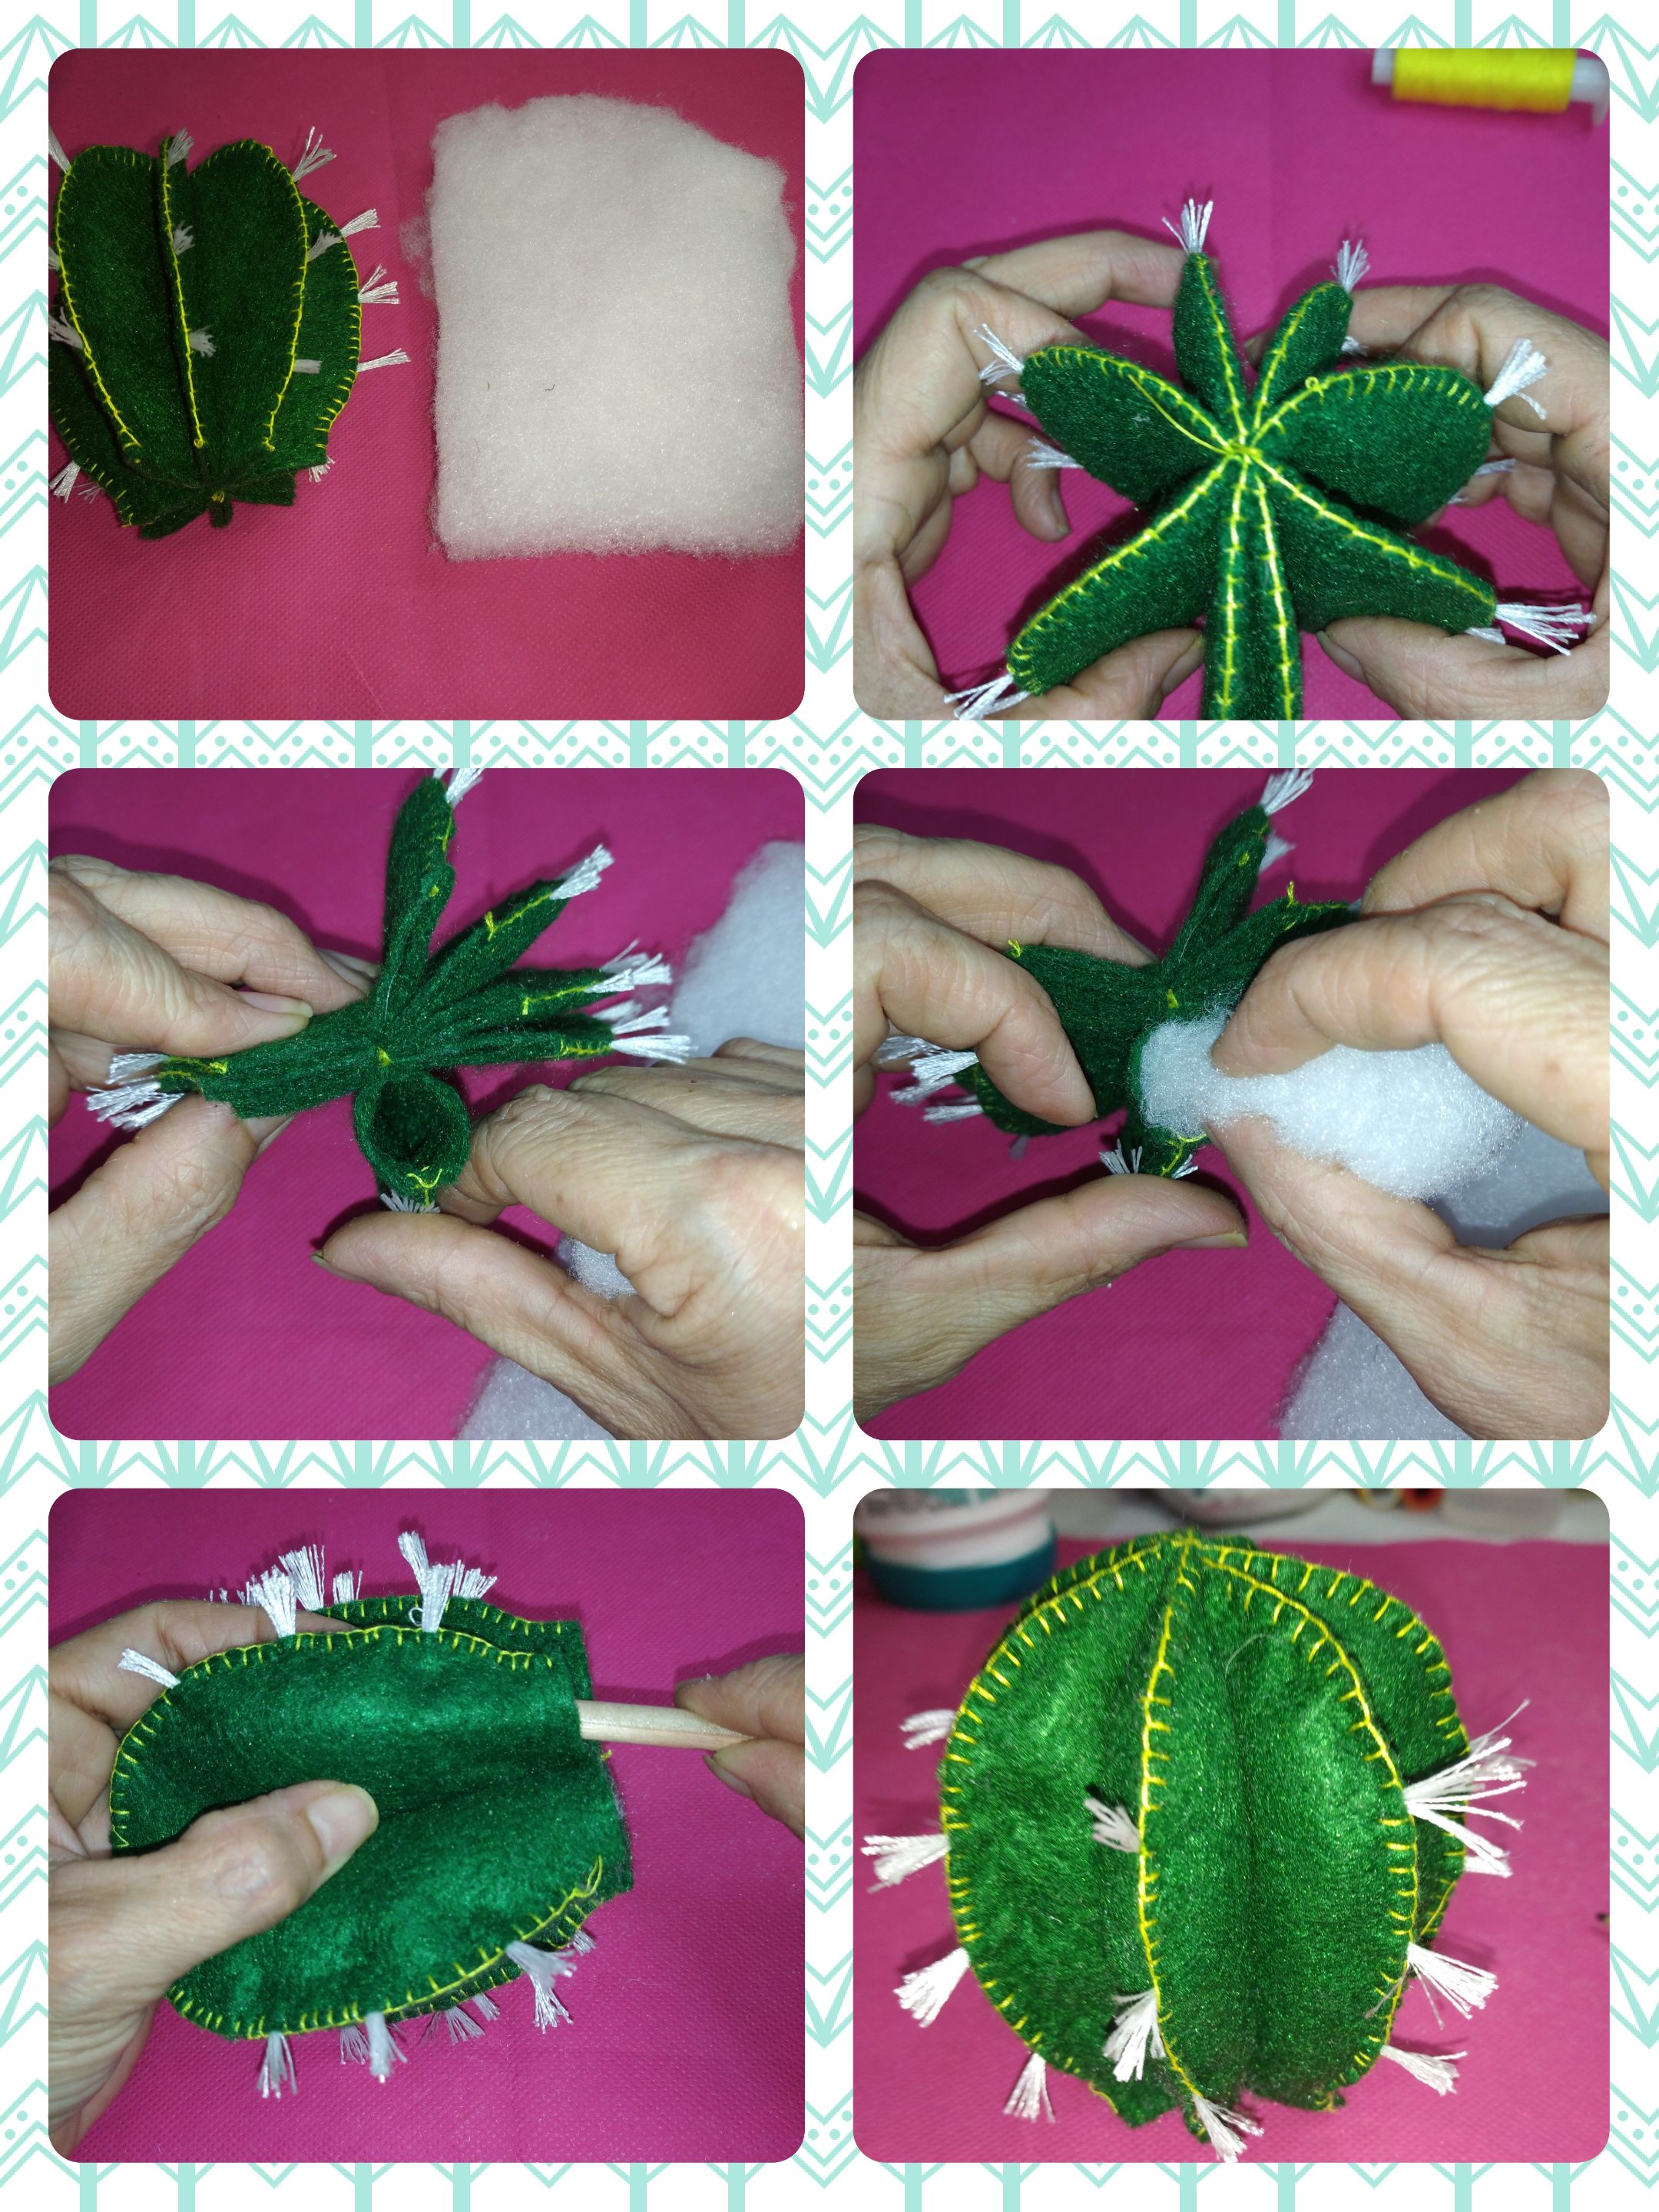
So far, we have already formed our cactus, we can leave it like this or give it more volume. For this we will use the artificial filling or wadding. We open carefully and cut the filling into thin strips to facilitate the introduction. We fill without forcing or pressing too much so as not to break the seam or stretch the felt. We can use a pencil to push the filling.
</div>
<div class="pull-right">
### <center> </center>
Hasta aquí, ya tenemos formado nuestro cactus, podemos dejarlo así o darle más volumen. Para ello utilizaremos el relleno artificial o guata. Abrimos con cuidado y cortamos el relleno en tiras delgadas para facilitar la introducción. Rellenamos sin forzar ni apretar demasiado para no romper la costura ni estirar el fieltro. Podemos utilizar un lápiz para empujar el relleno.
</div>
---
<div class="text-justify">
<div class="pull-left">
### <center> </center>
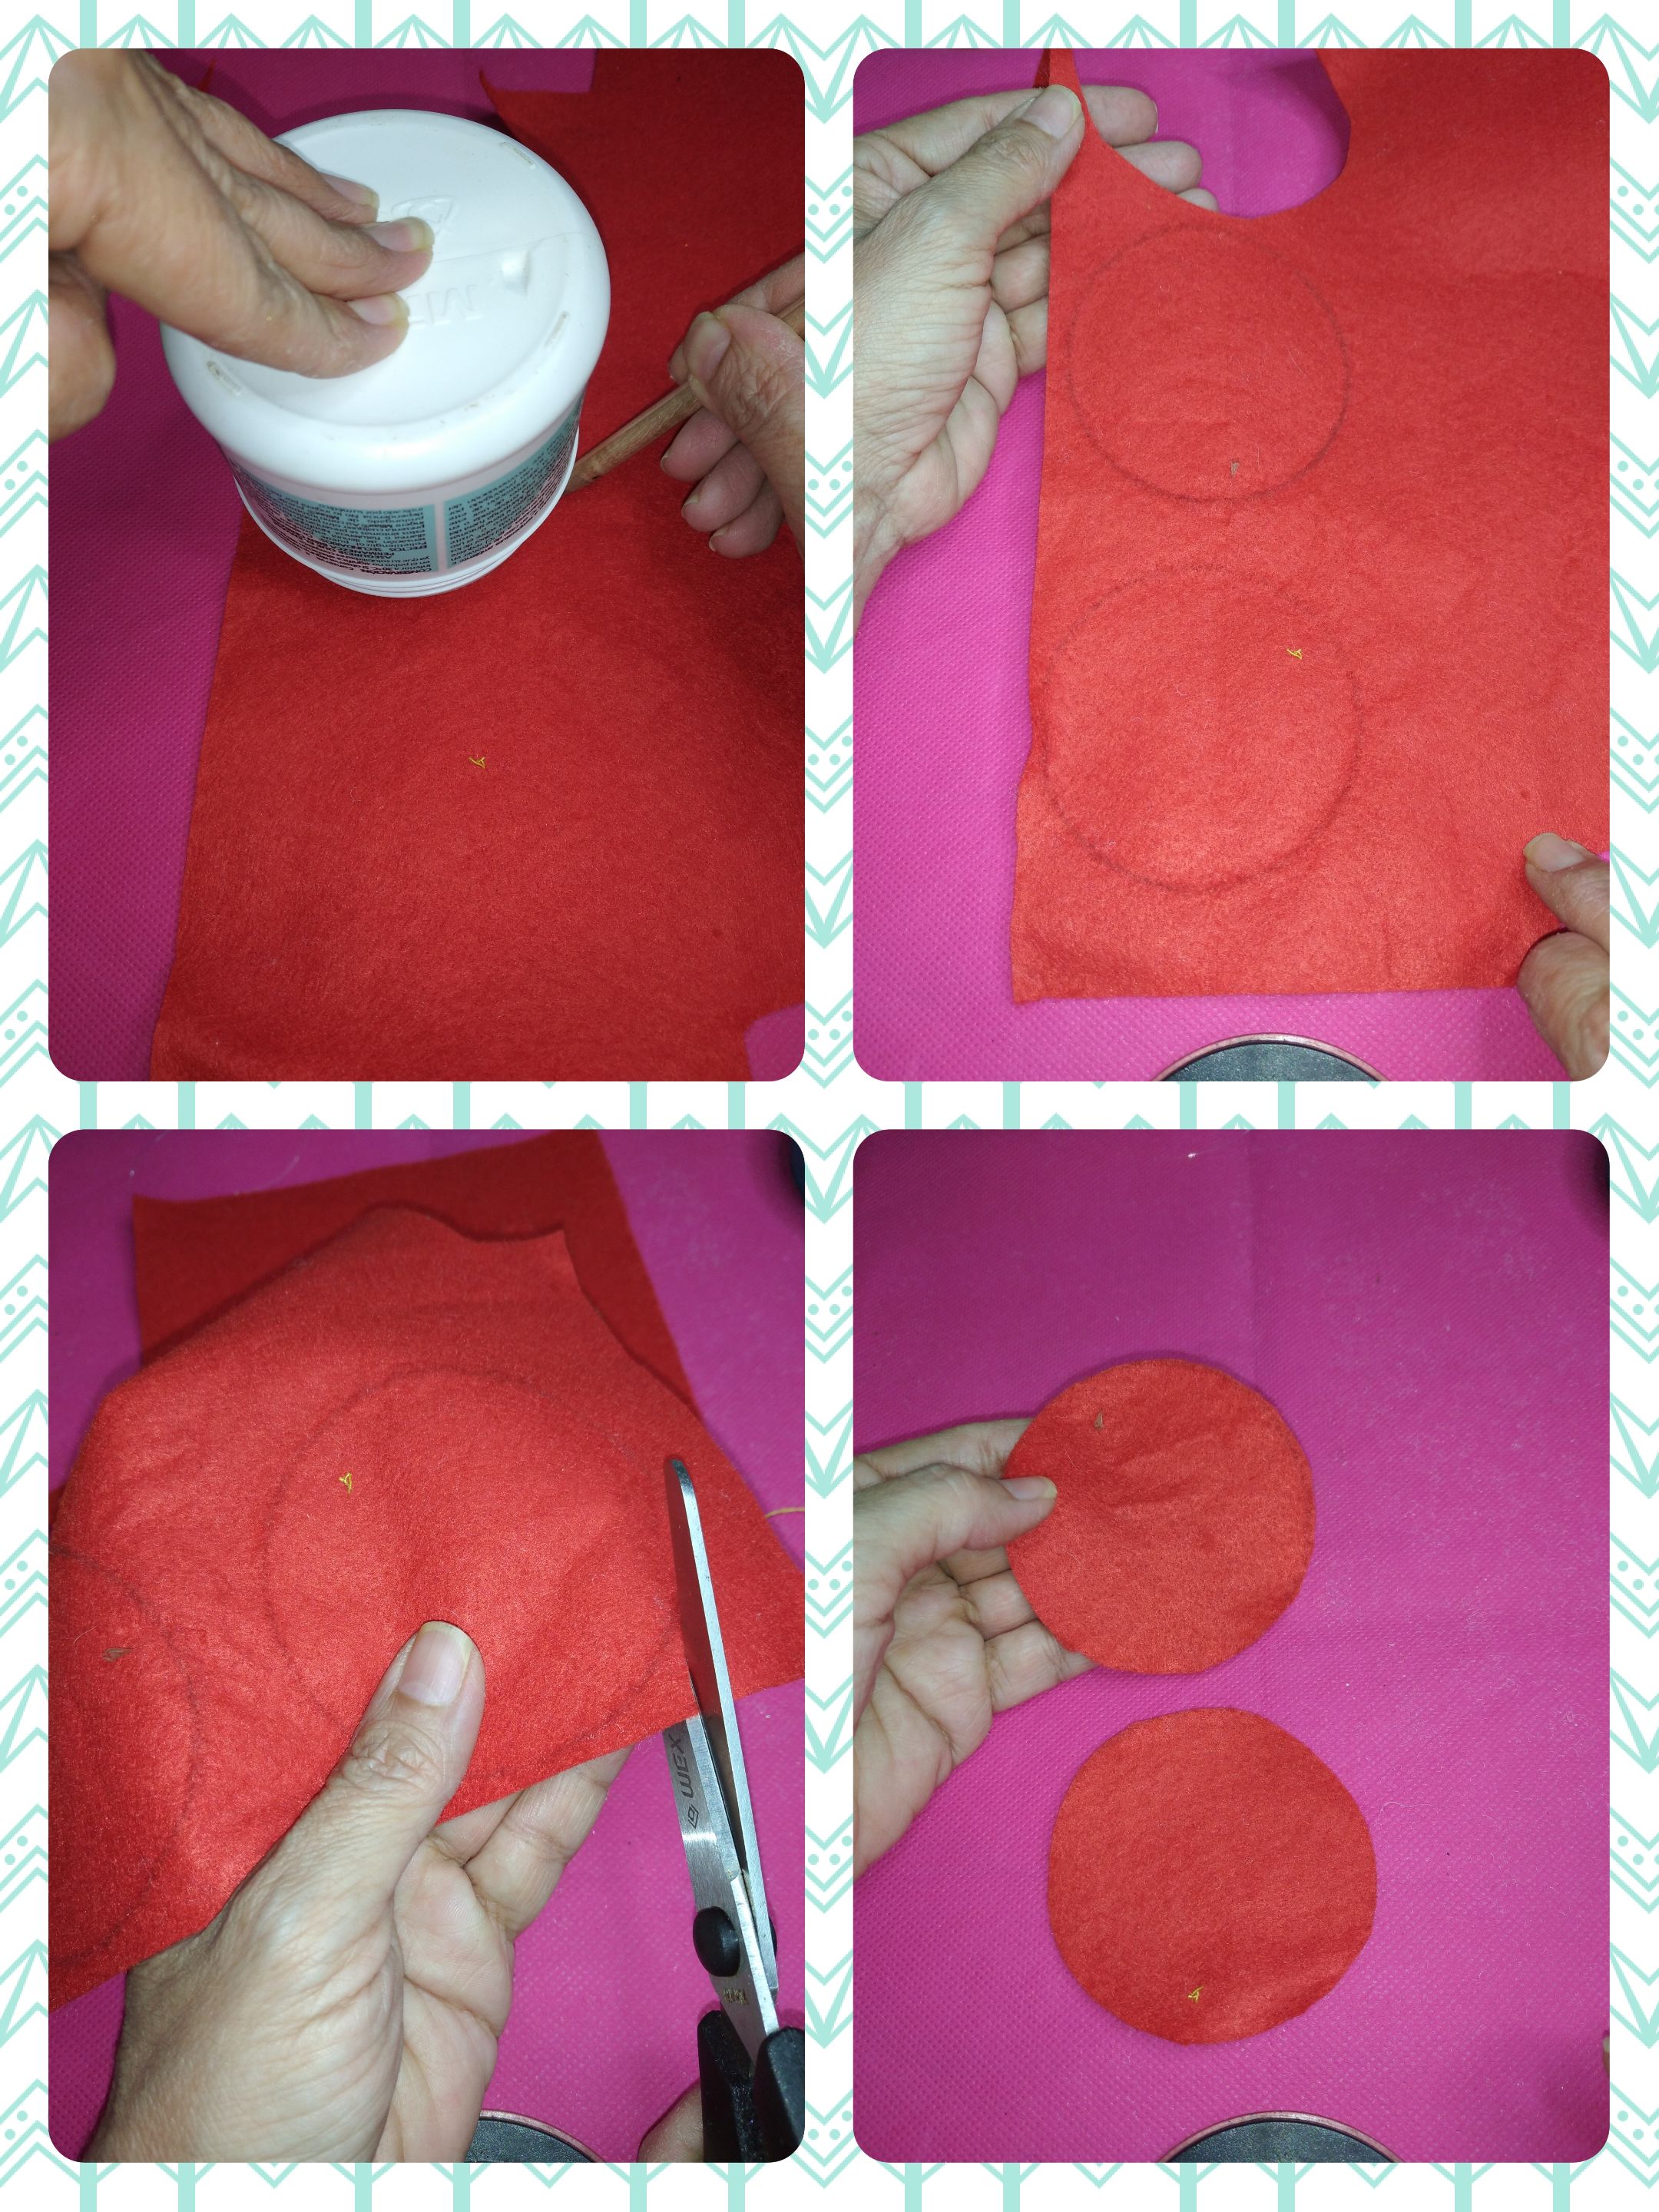
Now we will make the flower that will decorate our cactus. We take the container to make two circles that we will draw on the piece of red felt and cut out.
</div>
<div class="pull-right">
### <center> </center>
Ahora realizaremos la flor que adornará nuestro cactus. Tomamos el envase para realizar dos circulos que trazaremos en el trozo de fieltro rojo y recortamos.
</div>
---
<div class="text-justify">
<div class="pull-left">
### <center> </center>
- Then we take one and fold twice to make two cuts in each fold and we have the same size.
- We open the circle and in each half we are going to make two cuts to form 6 divisions that will be to form the flower petals.
</div>
<div class="pull-right">
### <center> </center>
- Luego tomamos uno y doblamos dos veces para realizar dos cortes en cada doblez y nos queden del mismo tamaño.
- Abrimos el círculo y en cada mitad vamos a realizar dos cortes para formar 6 divisiones que será para formar los pétalos de la flor.
</div>
---

<div class="text-justify">
<div class="pull-left">
### <center> </center>
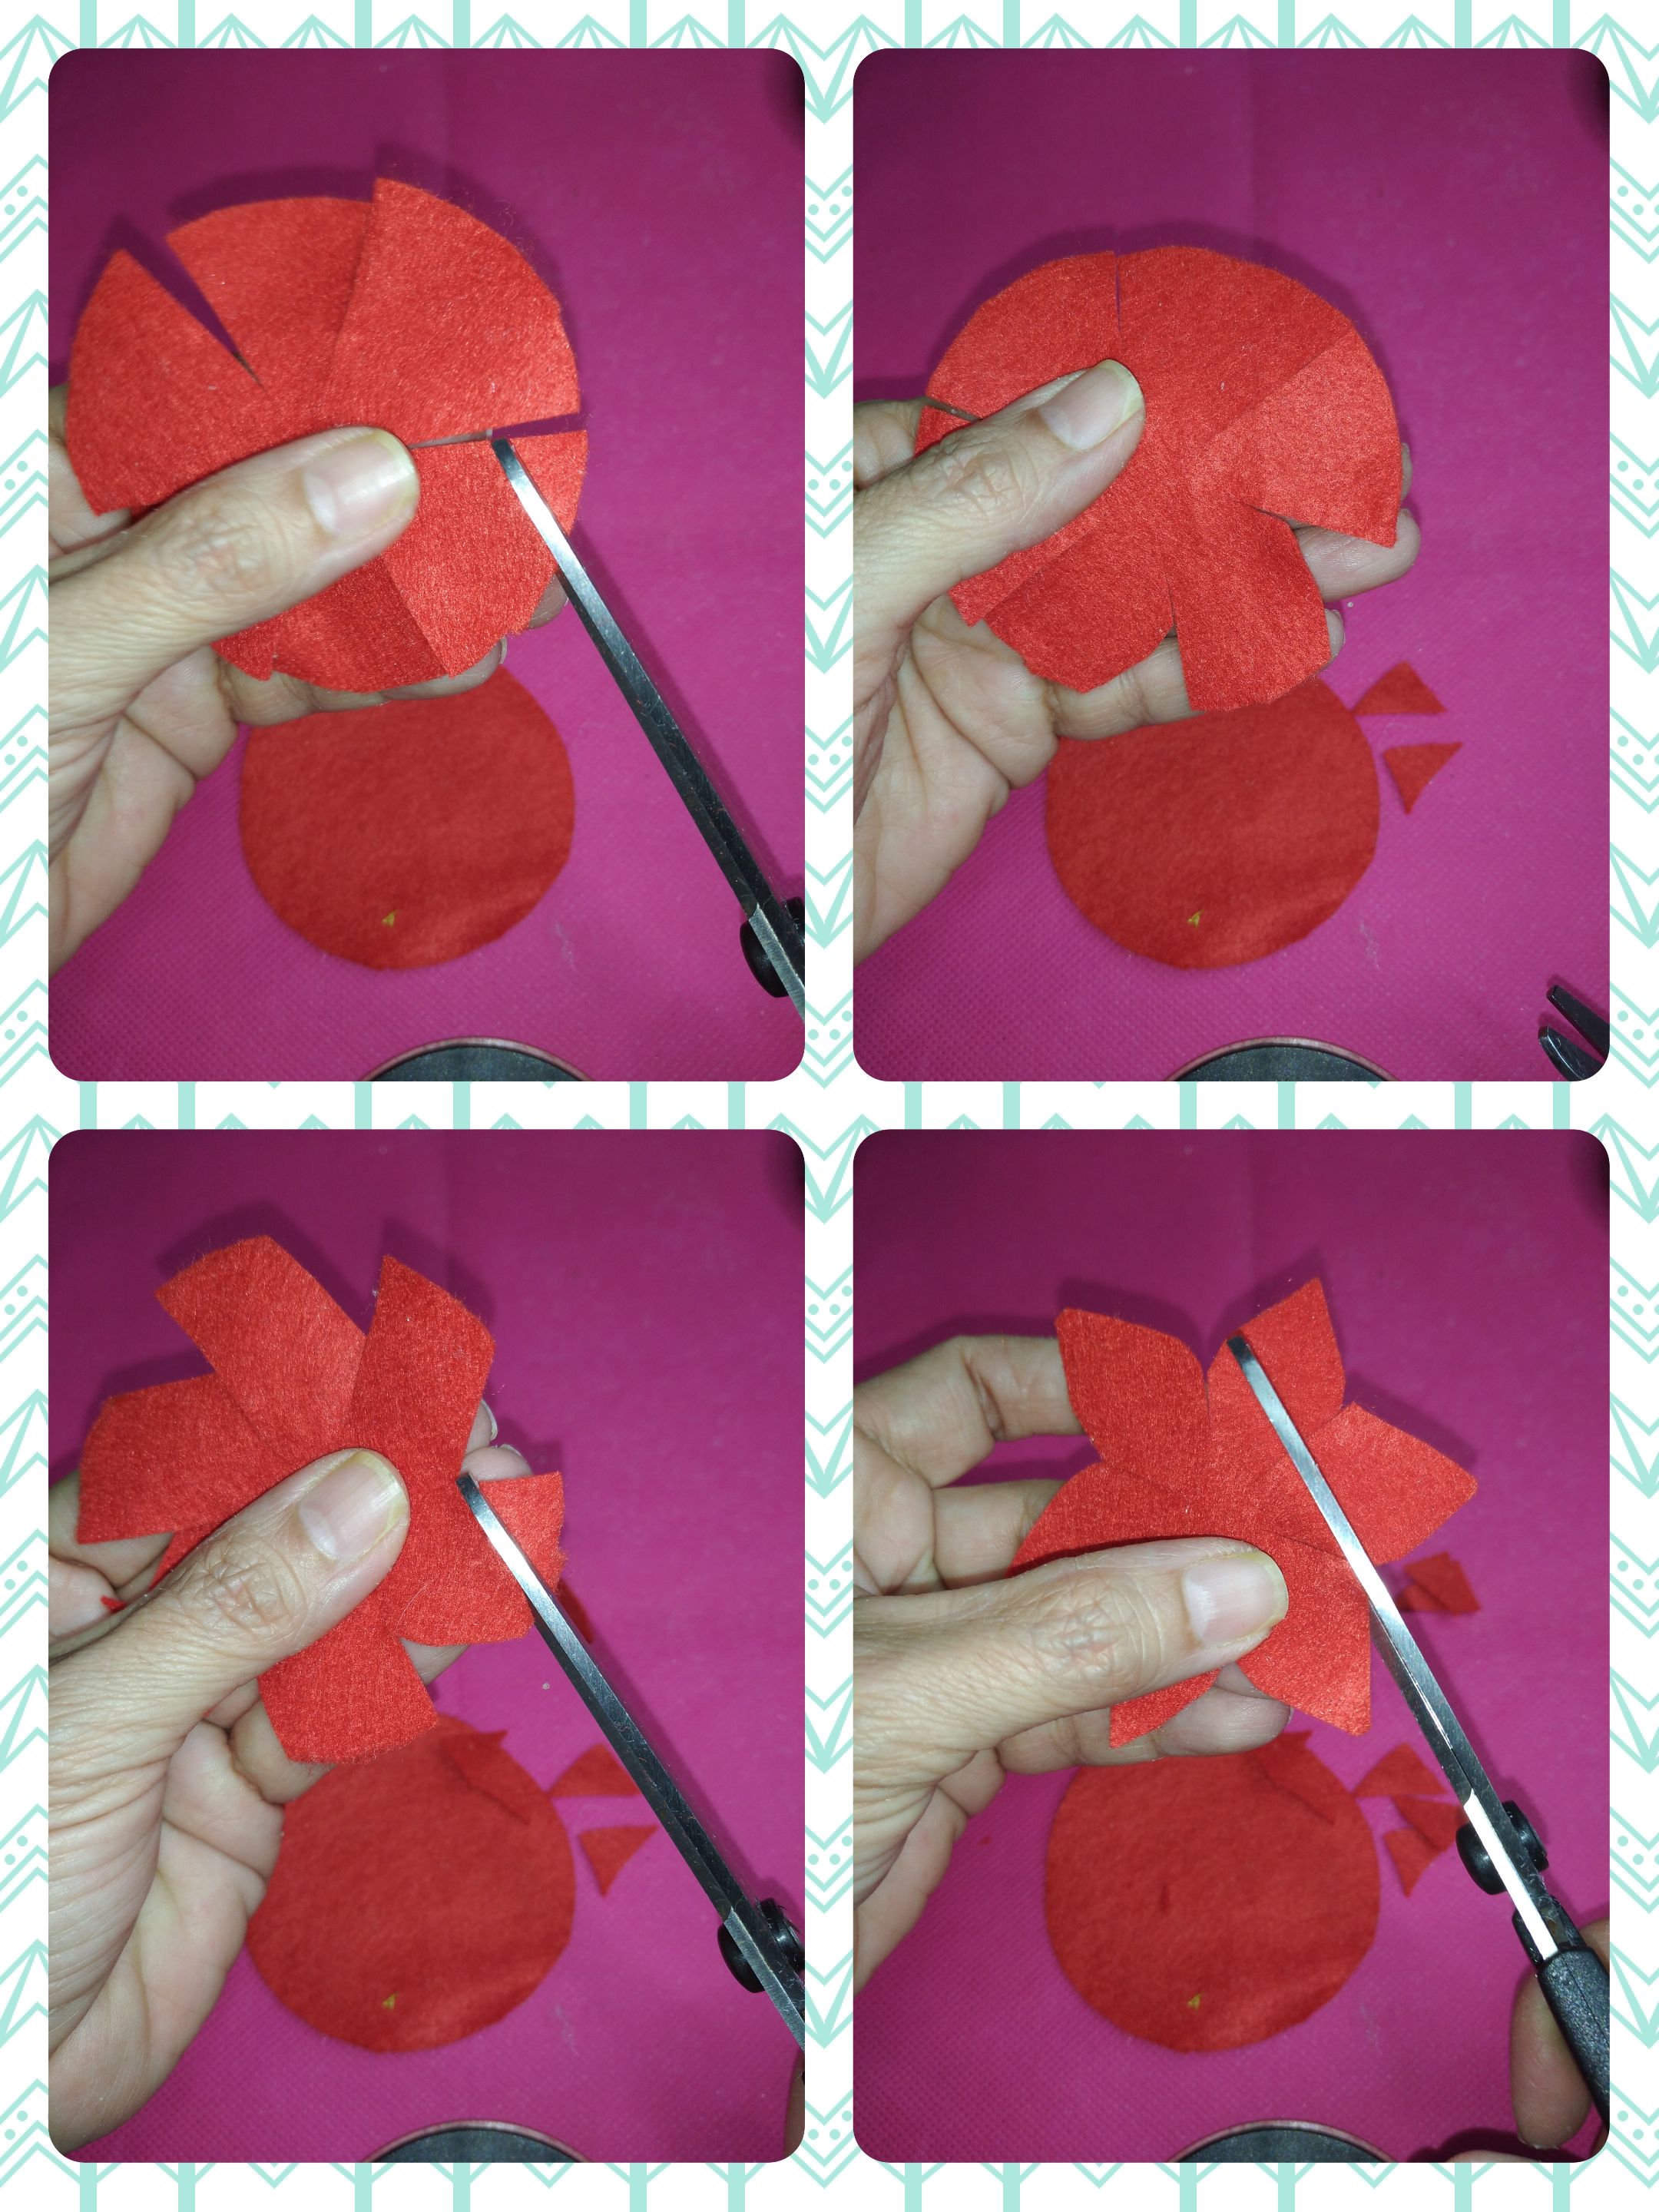
Now we make each petal by making a cut from the center to the middle of the petal. We will do it in the 6 on the right side. then we turn and cut in the same way until we form the 6 petals.
</div>
<div class="pull-right">
### <center> </center>
Ahora realizamos cada pétalo haciendo un corte desde el centro hasta la mitad del pétalo. Lo haremos en los 6 del lado derecho. luego volteamos y cortamos de igual manera hasta formar los 6 pétalos.
</div>
---
<div class="text-justify">
<div class="pull-left">
### <center> </center>
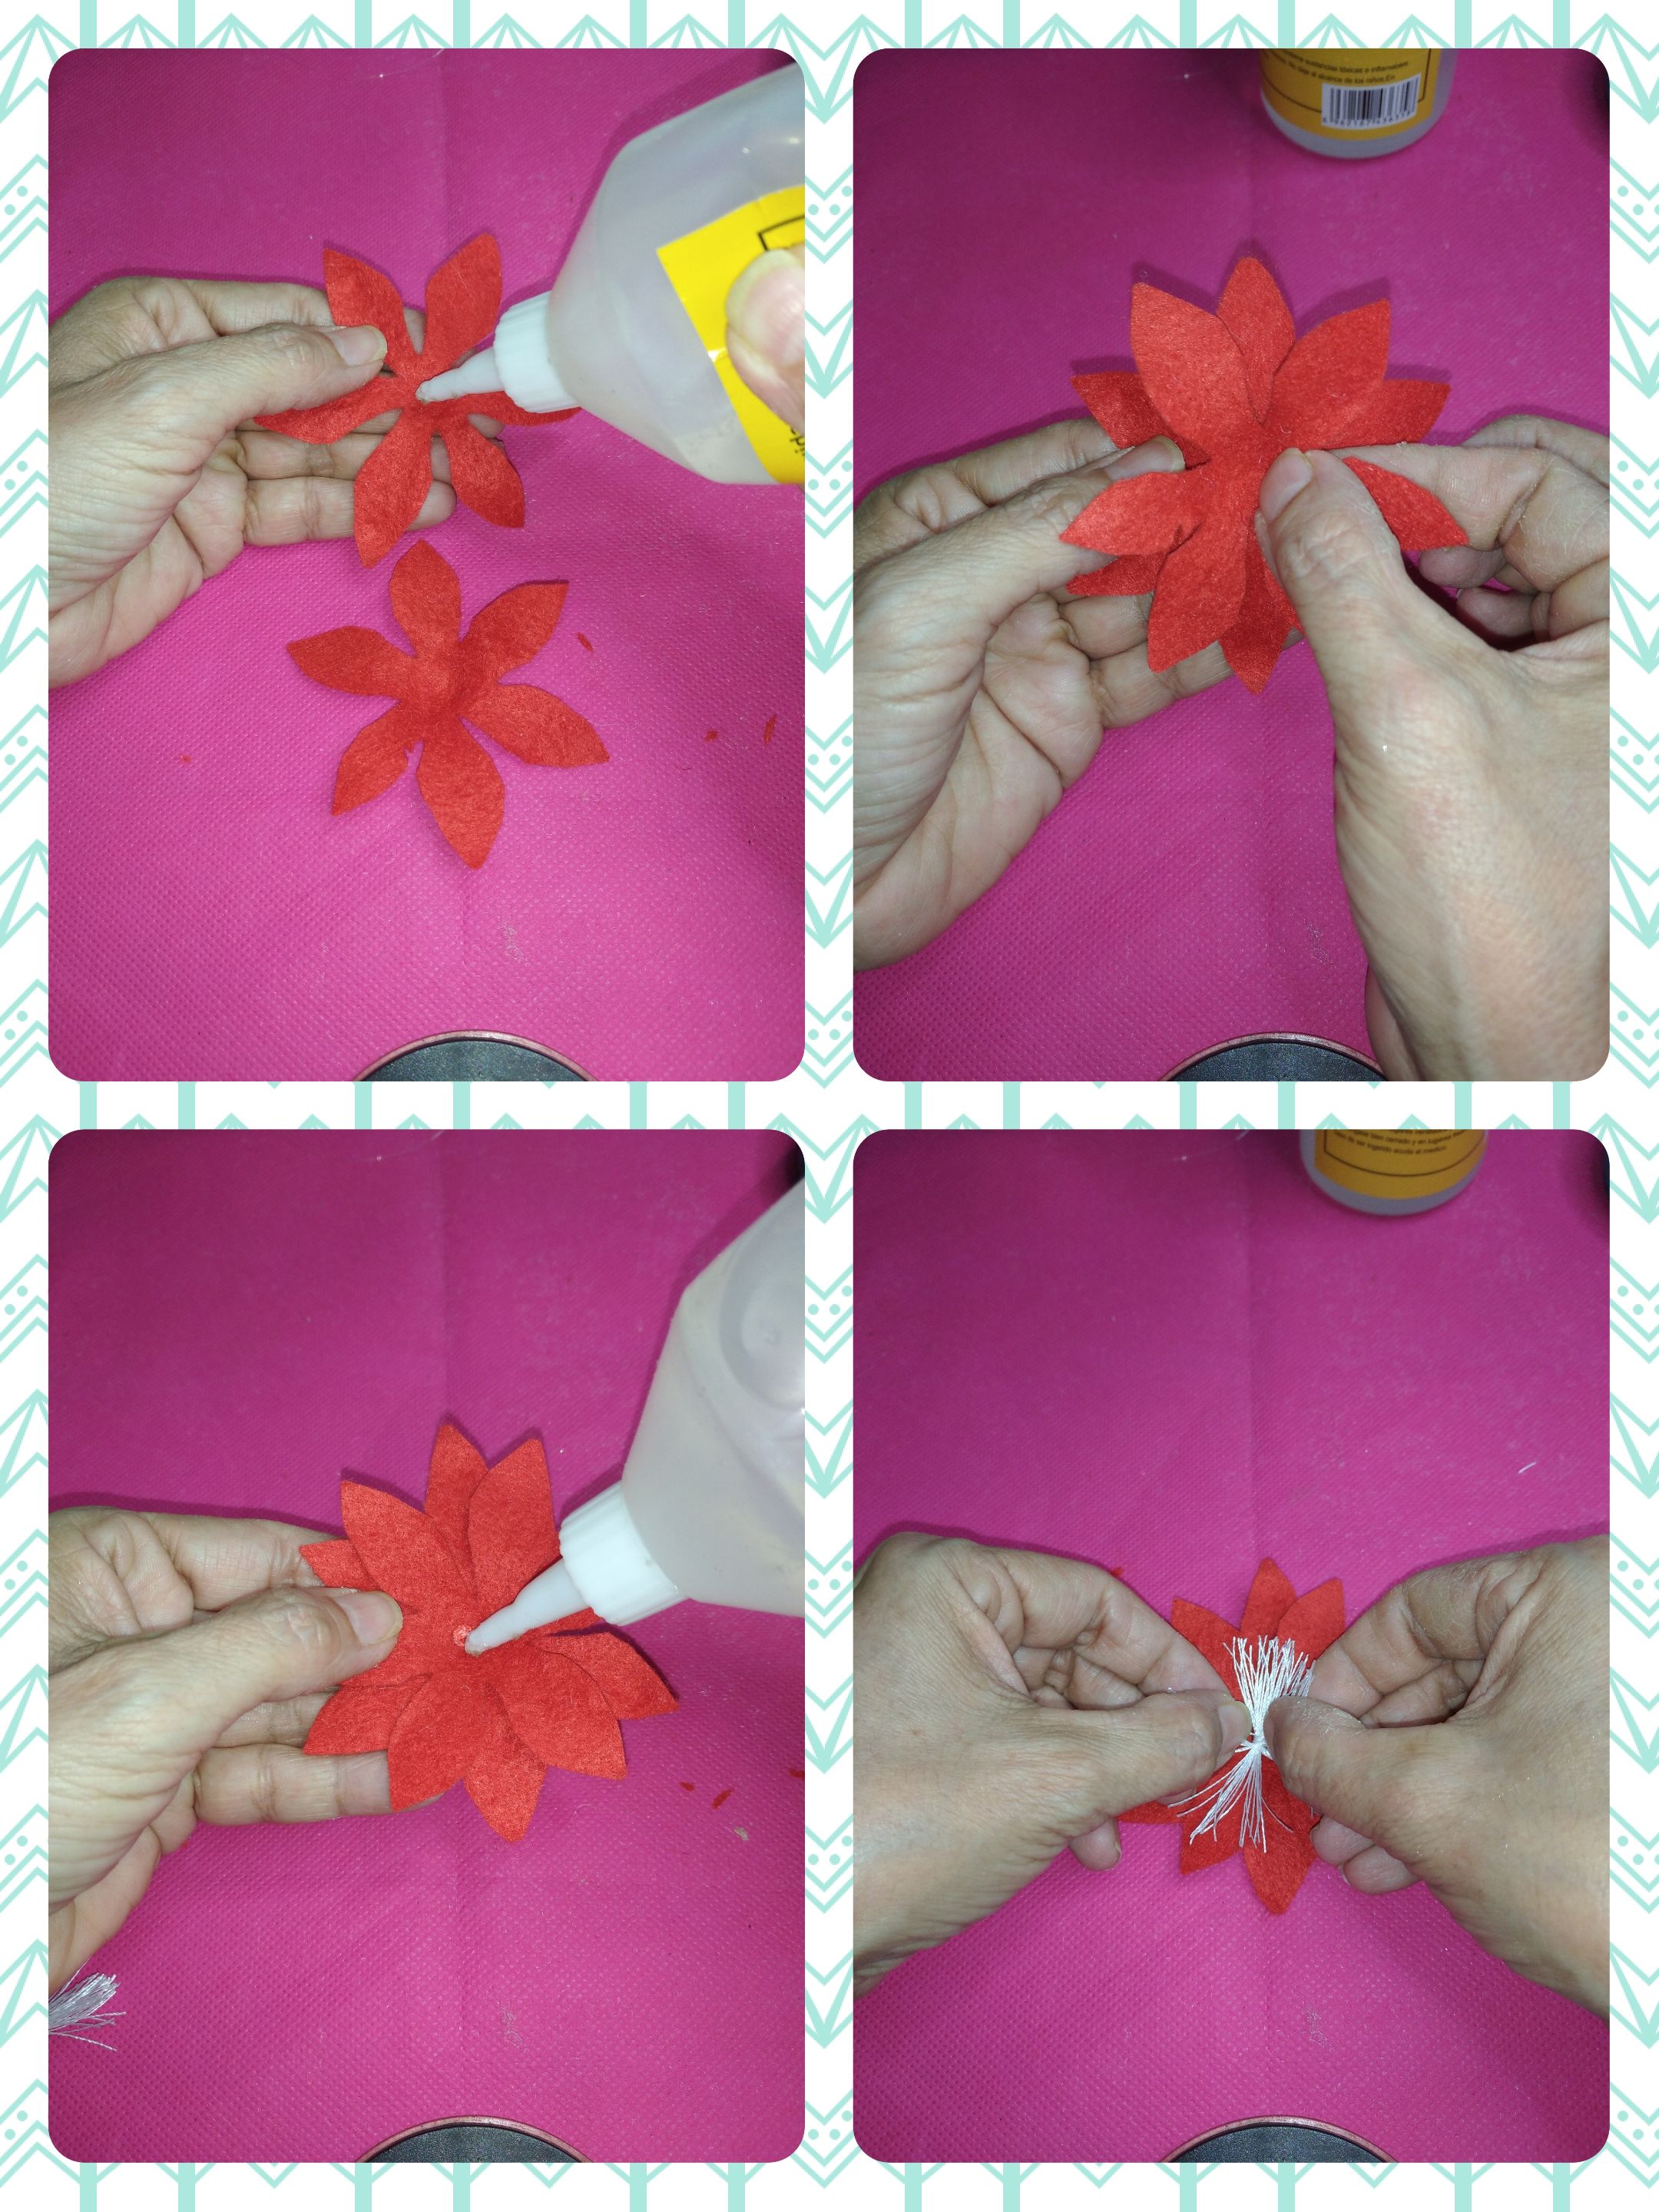
We take the central part of the flower and pull each of the petals to stretch a little. We carry out the same procedure with the other flower.
</div>
<div class="pull-right">
### <center> </center>
Tomamos la parte central de la flor y halamos cada uno de los pétalos para estirar un poco. Realizamos el mismo procedimiento con la otra flor.
</div>
---

<div class="text-justify">
<div class="pull-left">
### <center> </center>
To make the pistils, we wind white thread in three of our fingers, we will make 16 turns then we make a few turns in the center and we tie. We cut each of the ends.
</div>
<div class="pull-right">
### <center> </center>
Para hacer los pistilos, enrollamos hilo blanco en tres de nuestros dedos, daremos 16 vueltas luego realizamos unas vueltas en el centro y anudamos. Cortamos cada uno de los extremos.
</div>
---

<div class="text-justify">
<div class="pull-left">
### <center> </center>
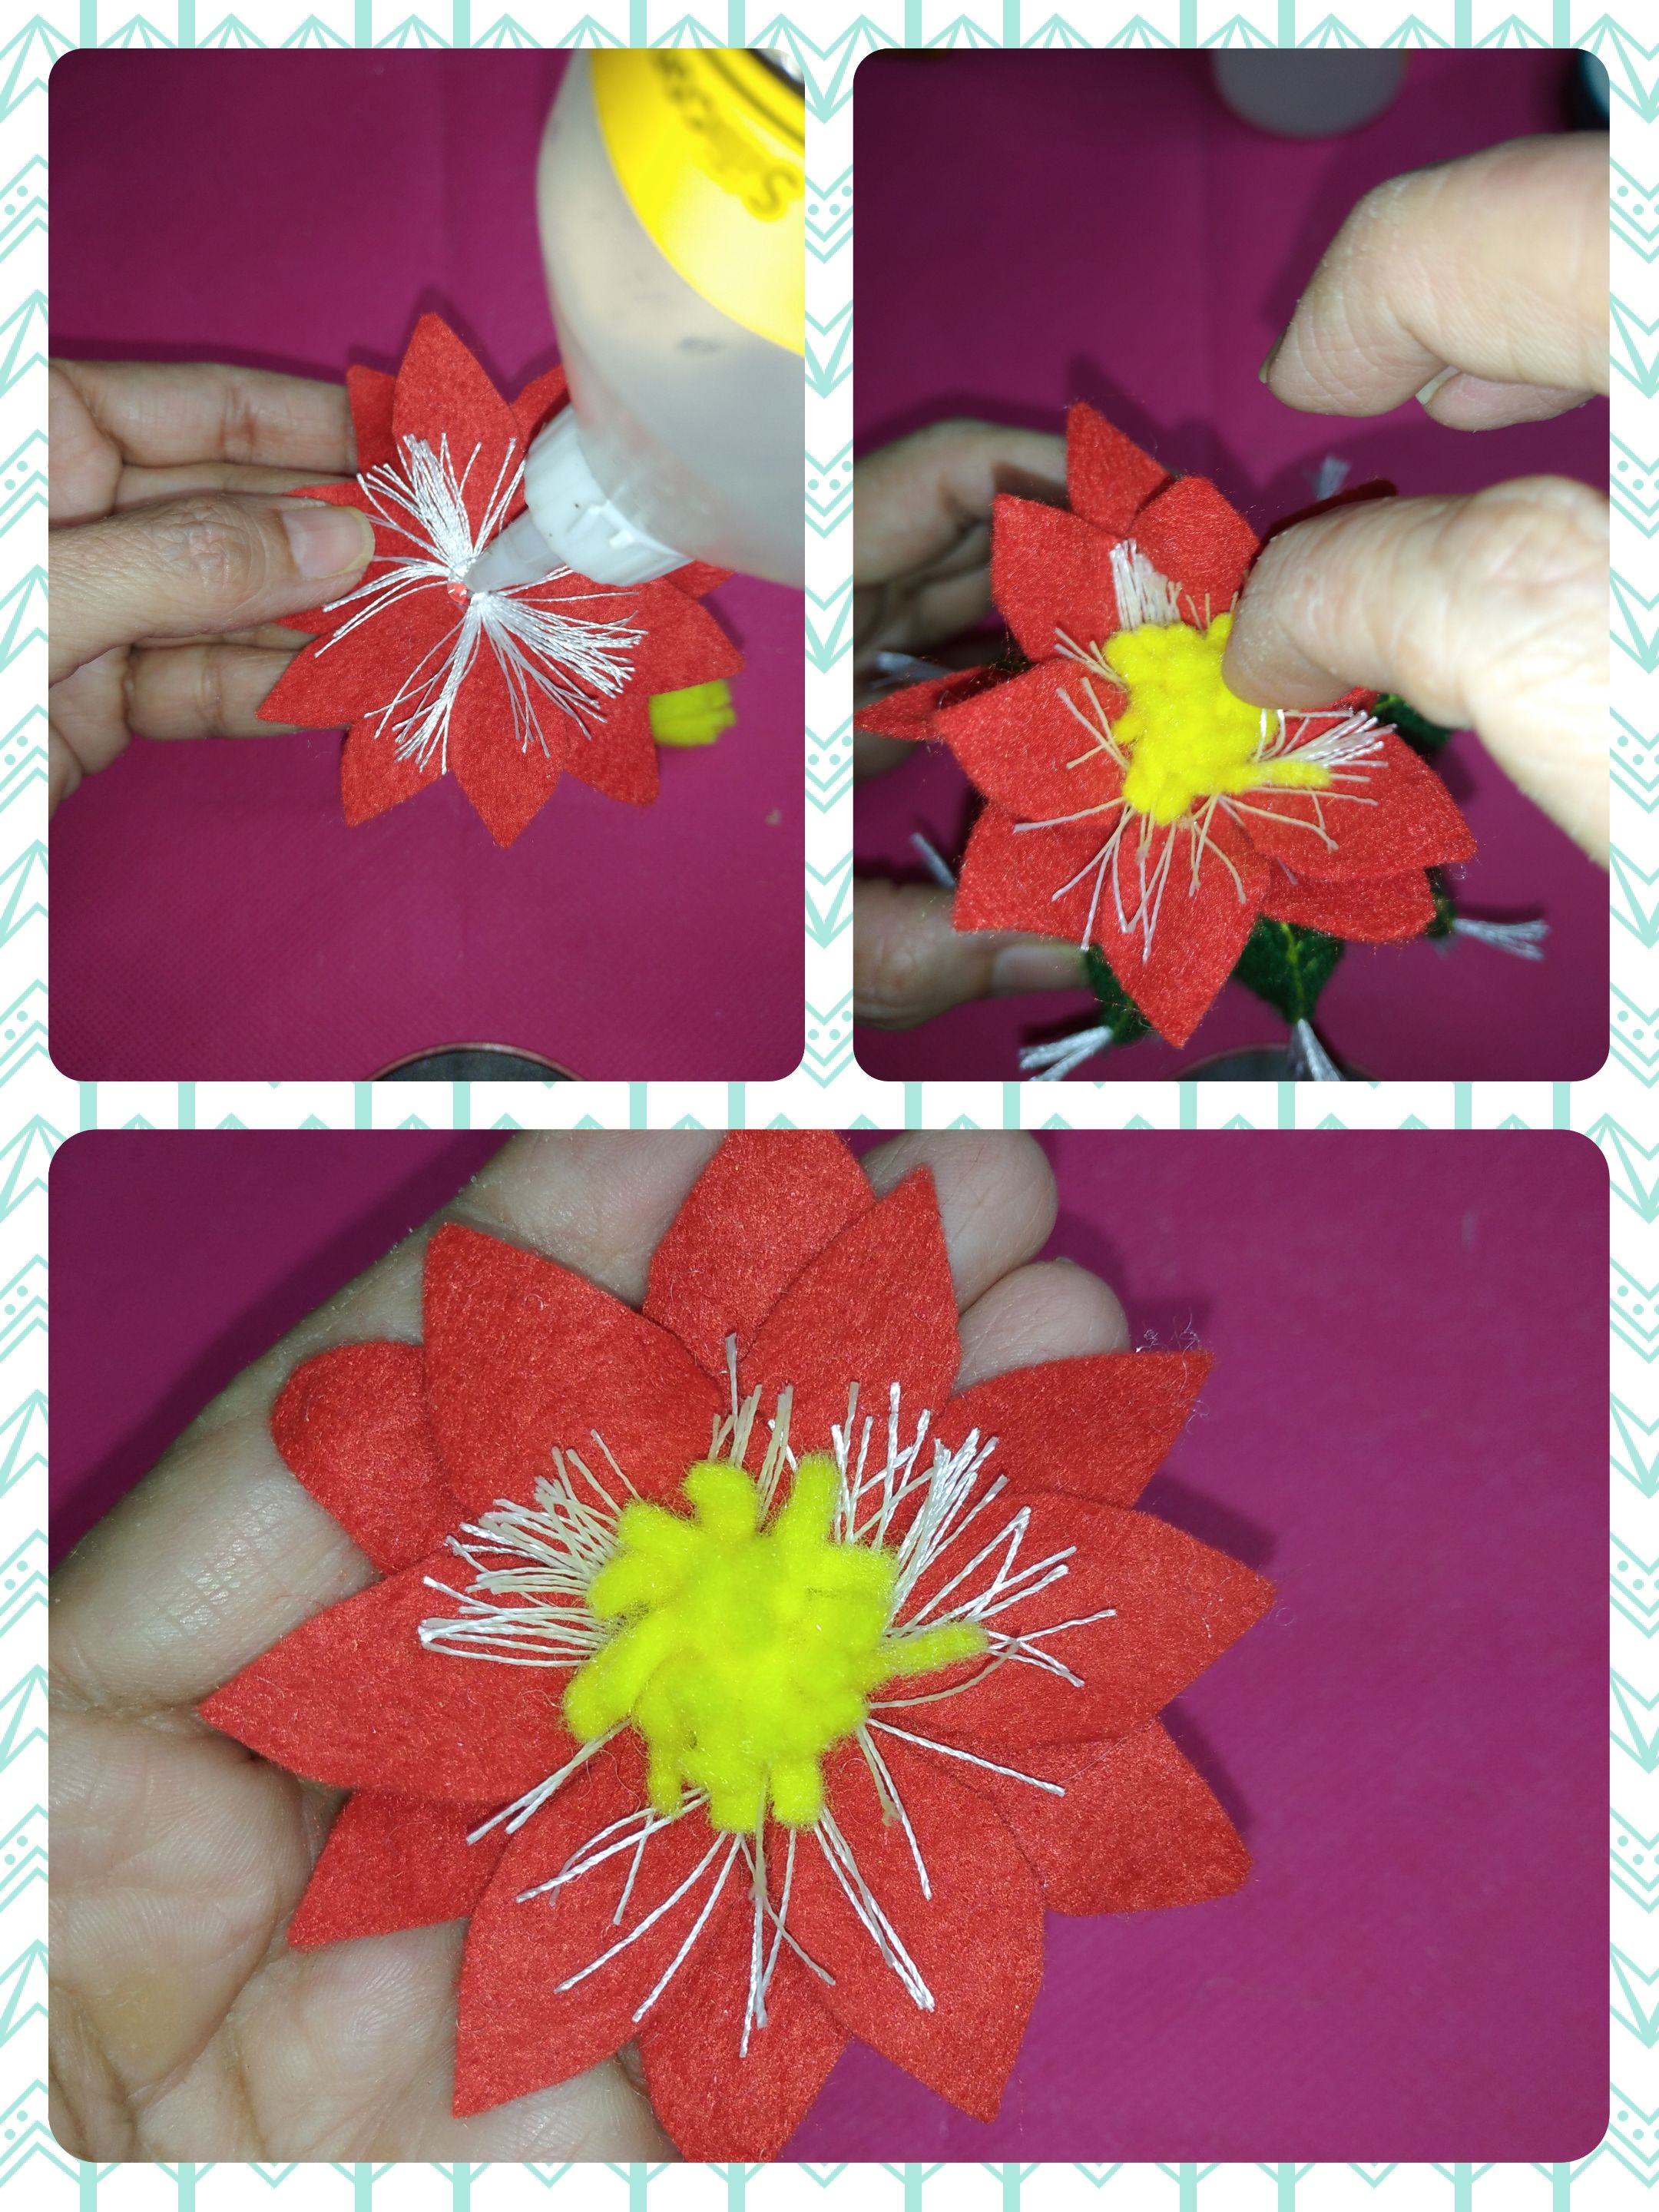
With liquid silicone we glue each flower and then in the center we glue the pistils.
</div>
<div class="pull-right">
### <center> </center>
Con silicón líquido pegamos cada flor y luego en el centro pegamos los pistilos.
</div>
---
<div class="text-justify">
<div class="pull-left">
### <center> </center>
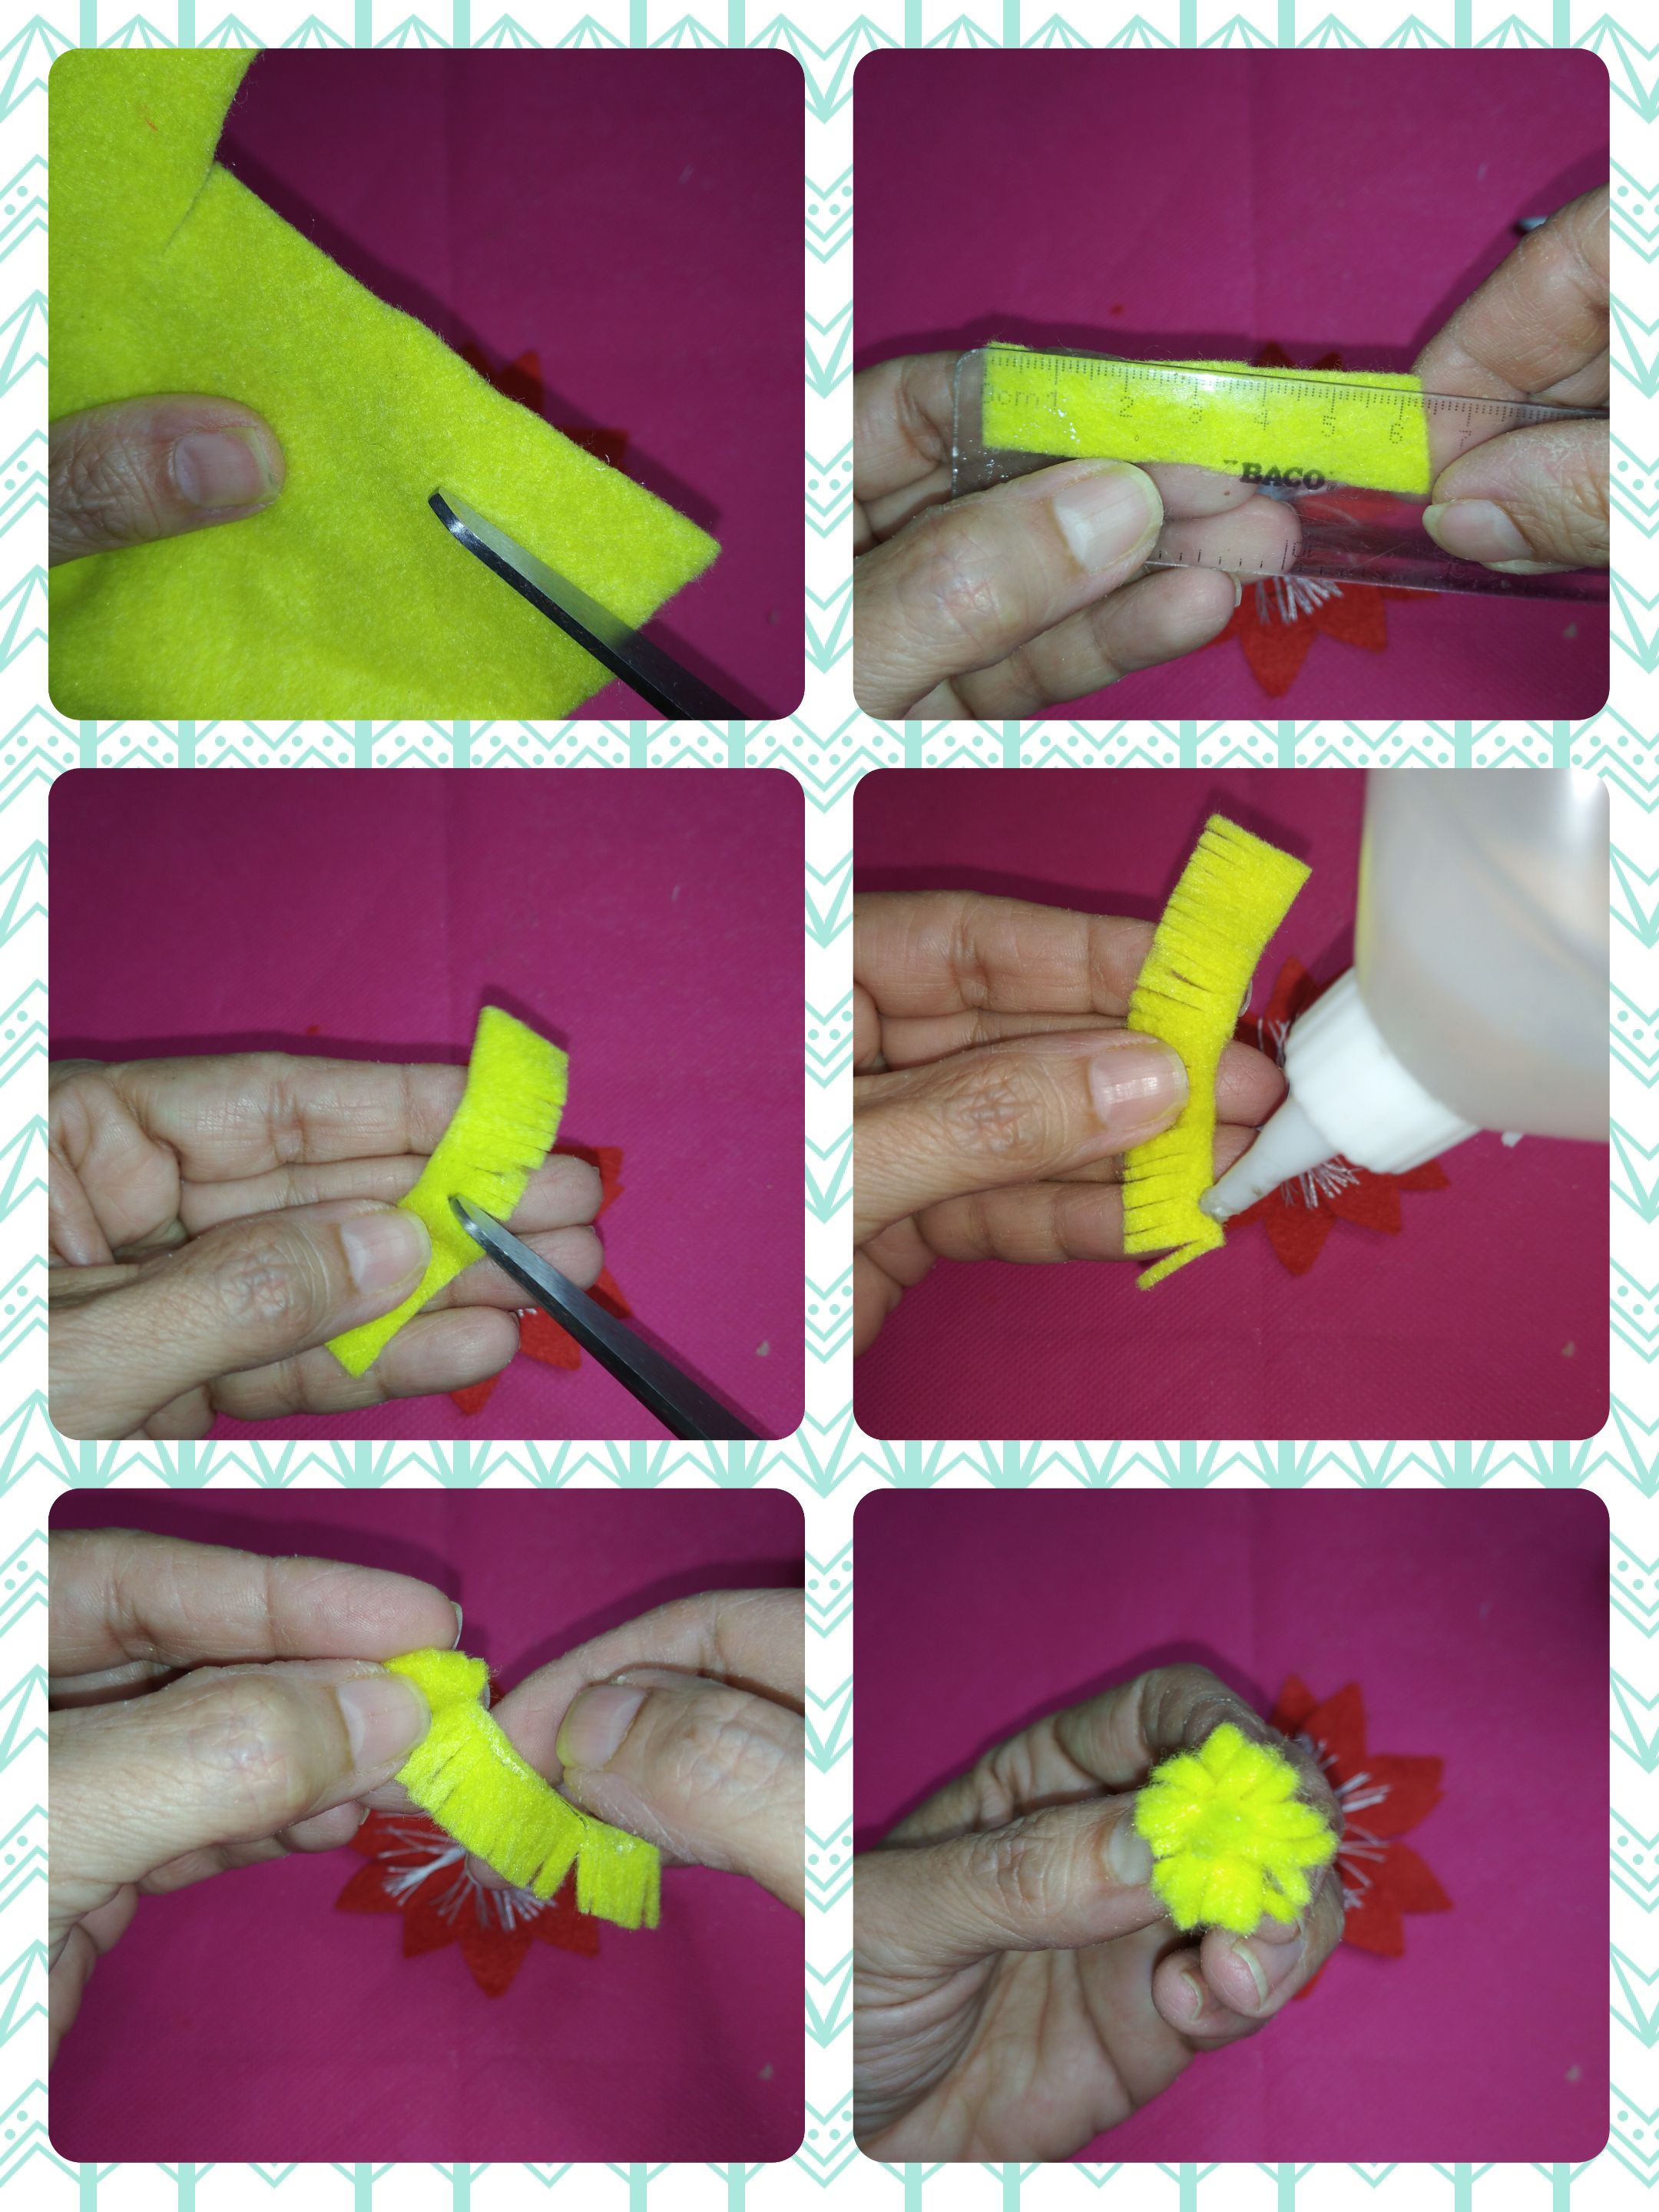
To make the stamens, cut a piece of yellow felt 6 cm long by 1 cm wide and make cuts of approximately 1 mm along the length of the felt. Then we pour silicone on the uncut part and roll up.
</div>
<div class="pull-right">
### <center> </center>
Para realizar los estambres, cortamos un trozo de fieltro amarillo de 6 cm de largo pr 1 cm de ancho y realizamos cortes de 1 mm aproximadamente a lo largo del fieltro. Luego echamos silicón por la parte sin corte y enrollamos.
</div>
---
<div class="text-justify">
<div class="pull-left">
### <center> </center>
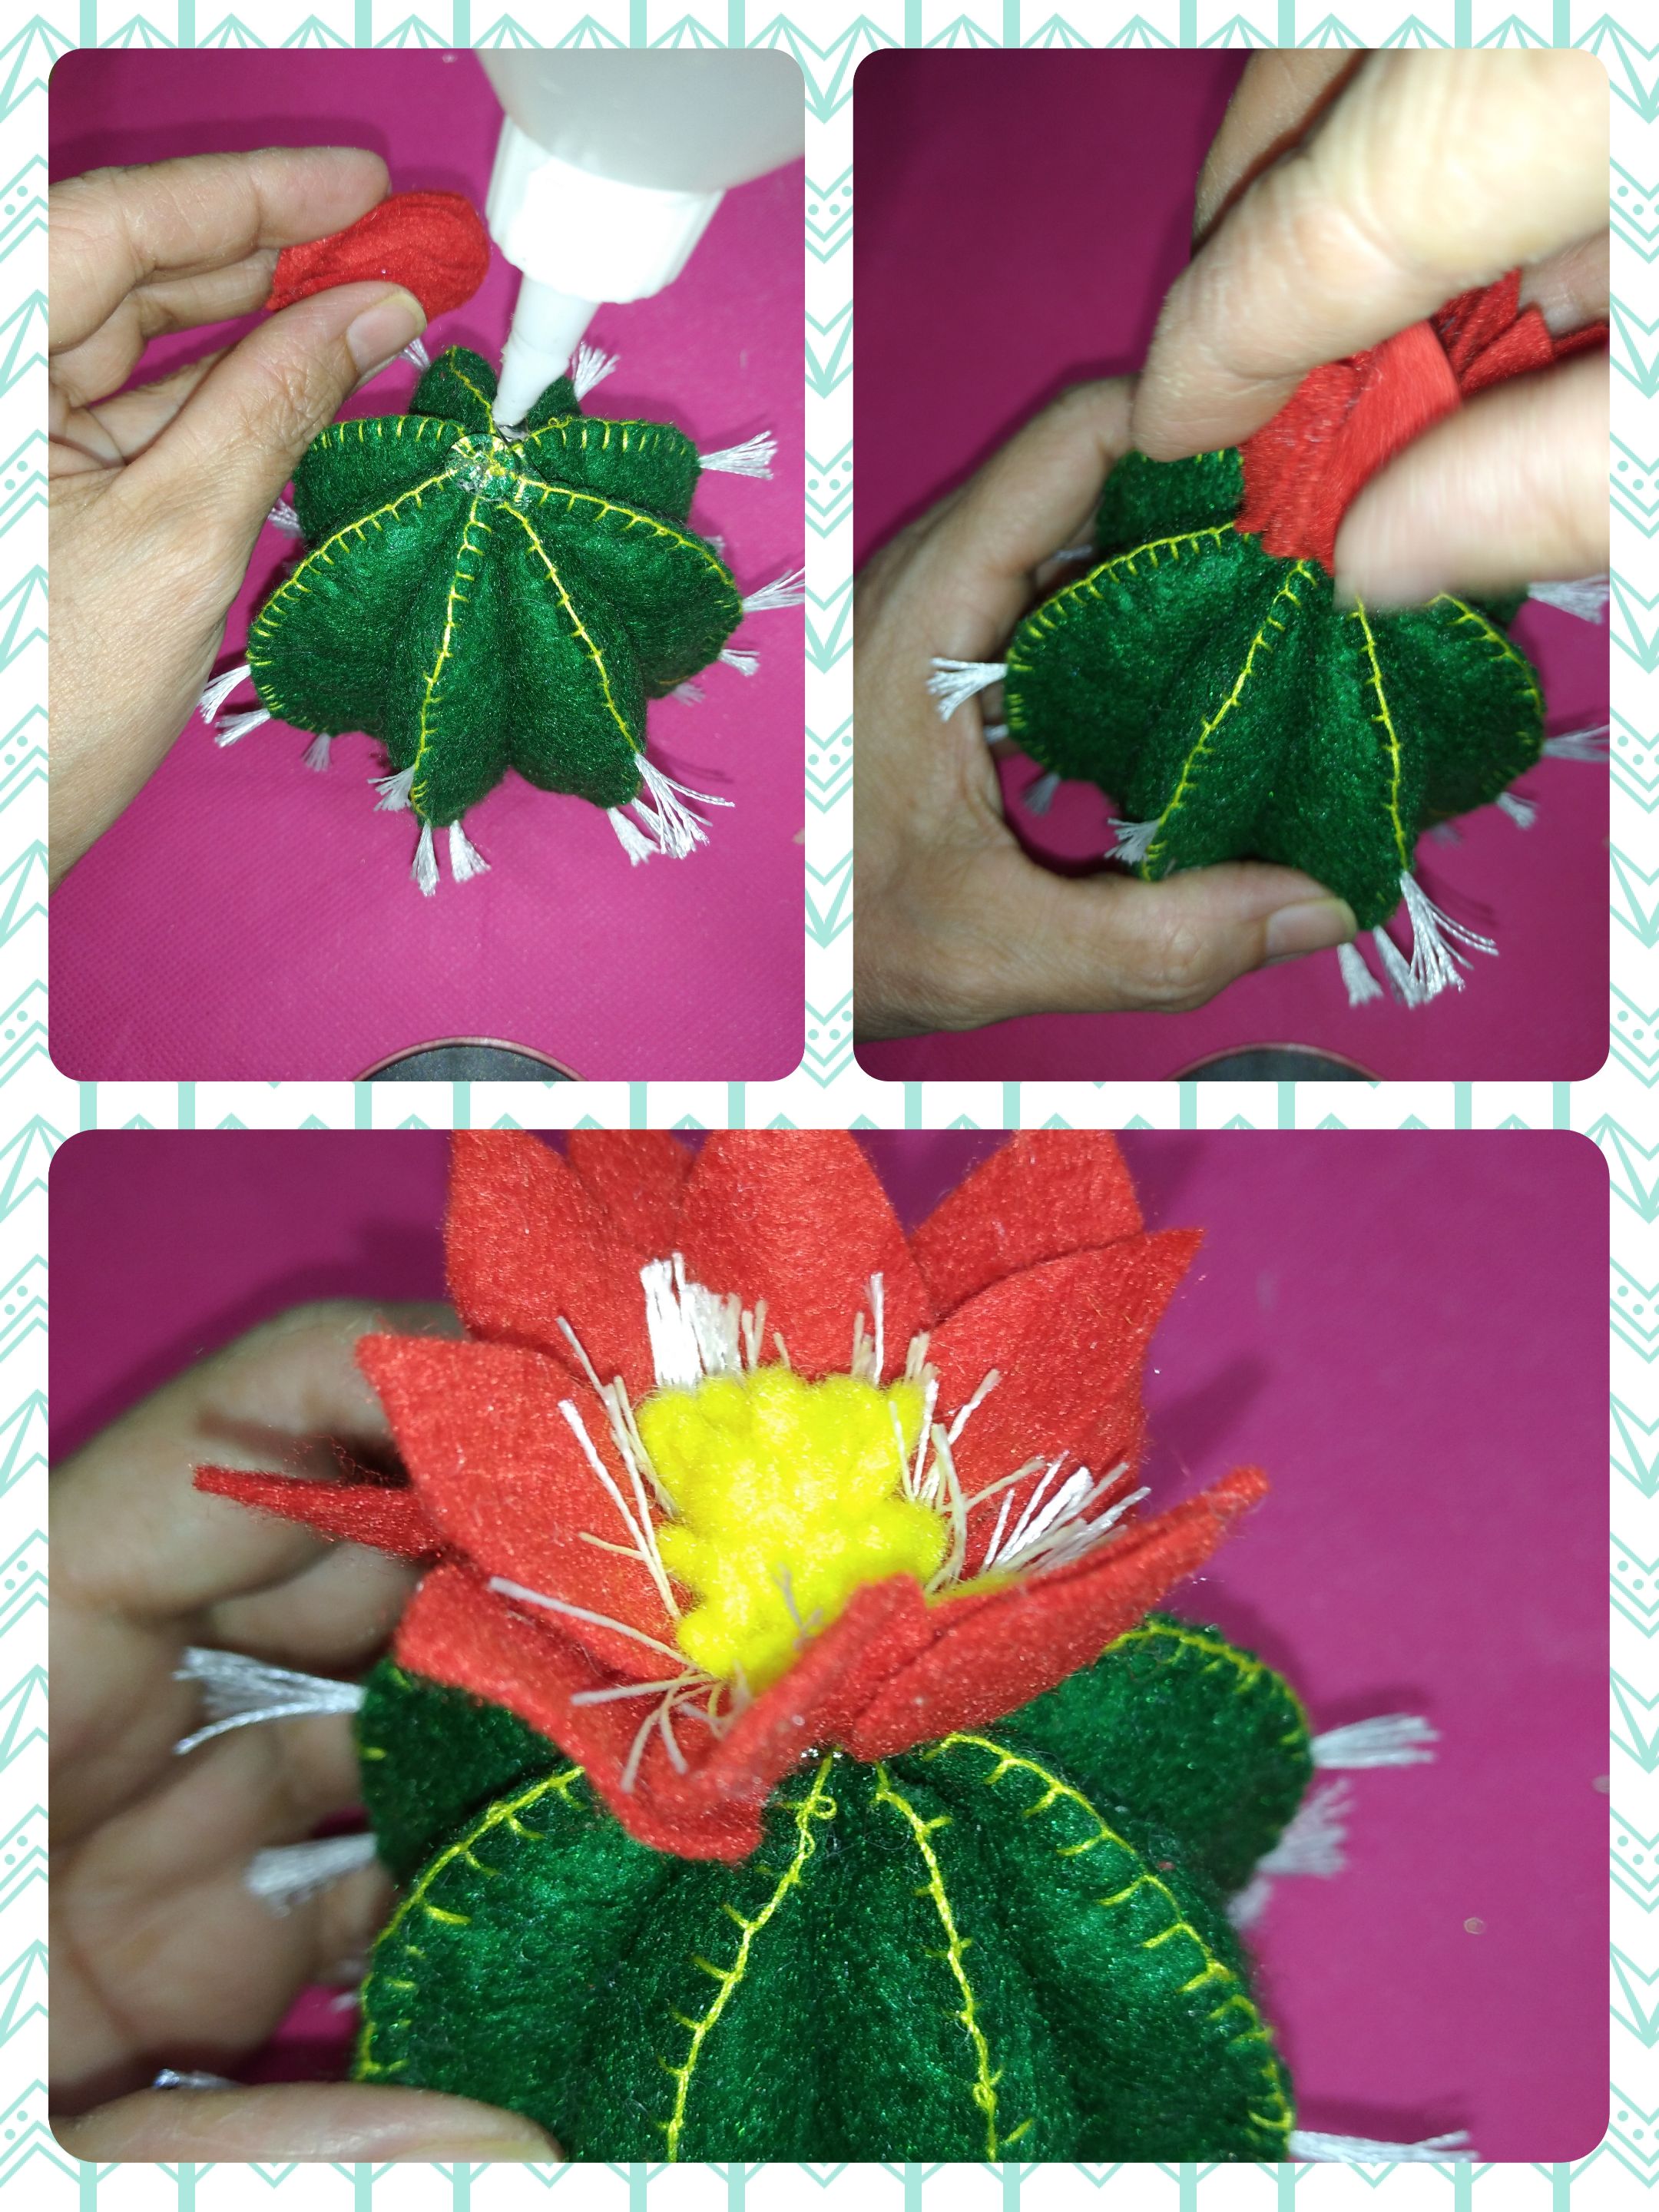
We paste on the flower with silicone and we already have the flower that we will paste on our cactus, placing a considerable amount so that it does not come off.
</div>
<div class="pull-right">
### <center> </center>
Pegamos sobre la flor con silicón y ya tenemos formada la flor que pegaremos sobre nuestro cactus colocando una cantidad considerable para que no se despegue.
</div>
---
<div class="text-justify">
<div class="pull-left">
### <center> </center>
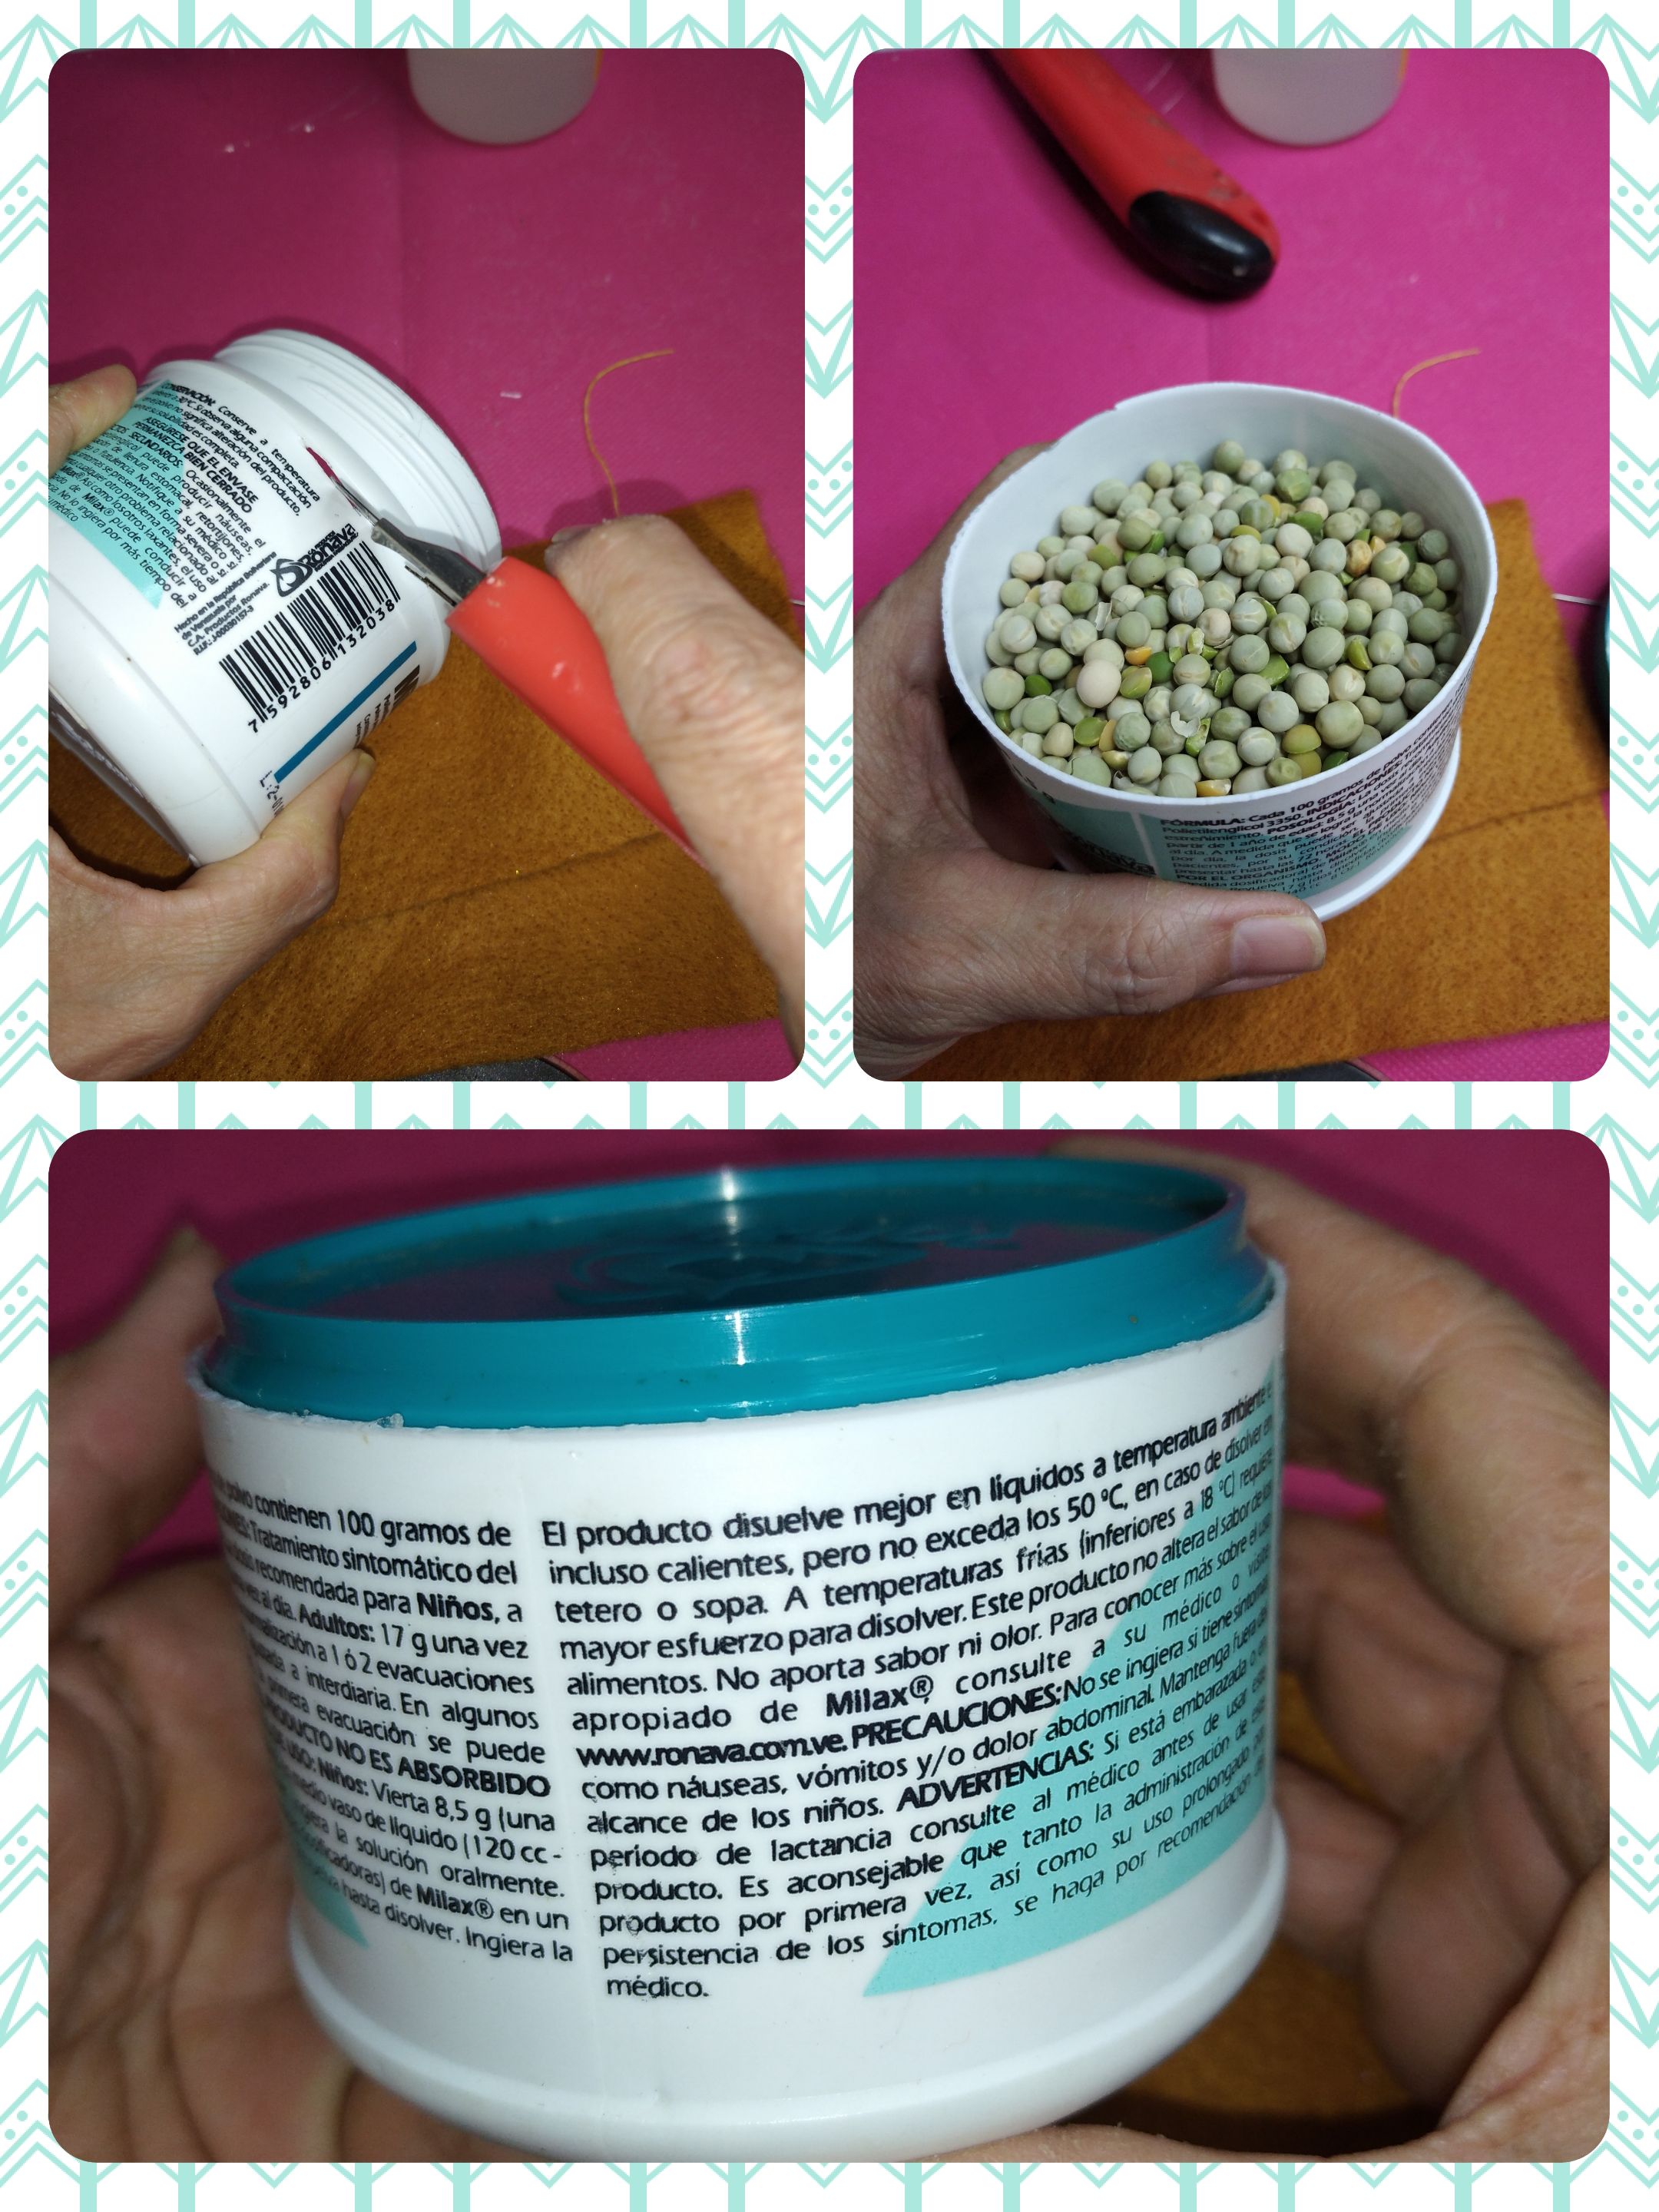
And last but not least, we make the pot where we will place our cactus.
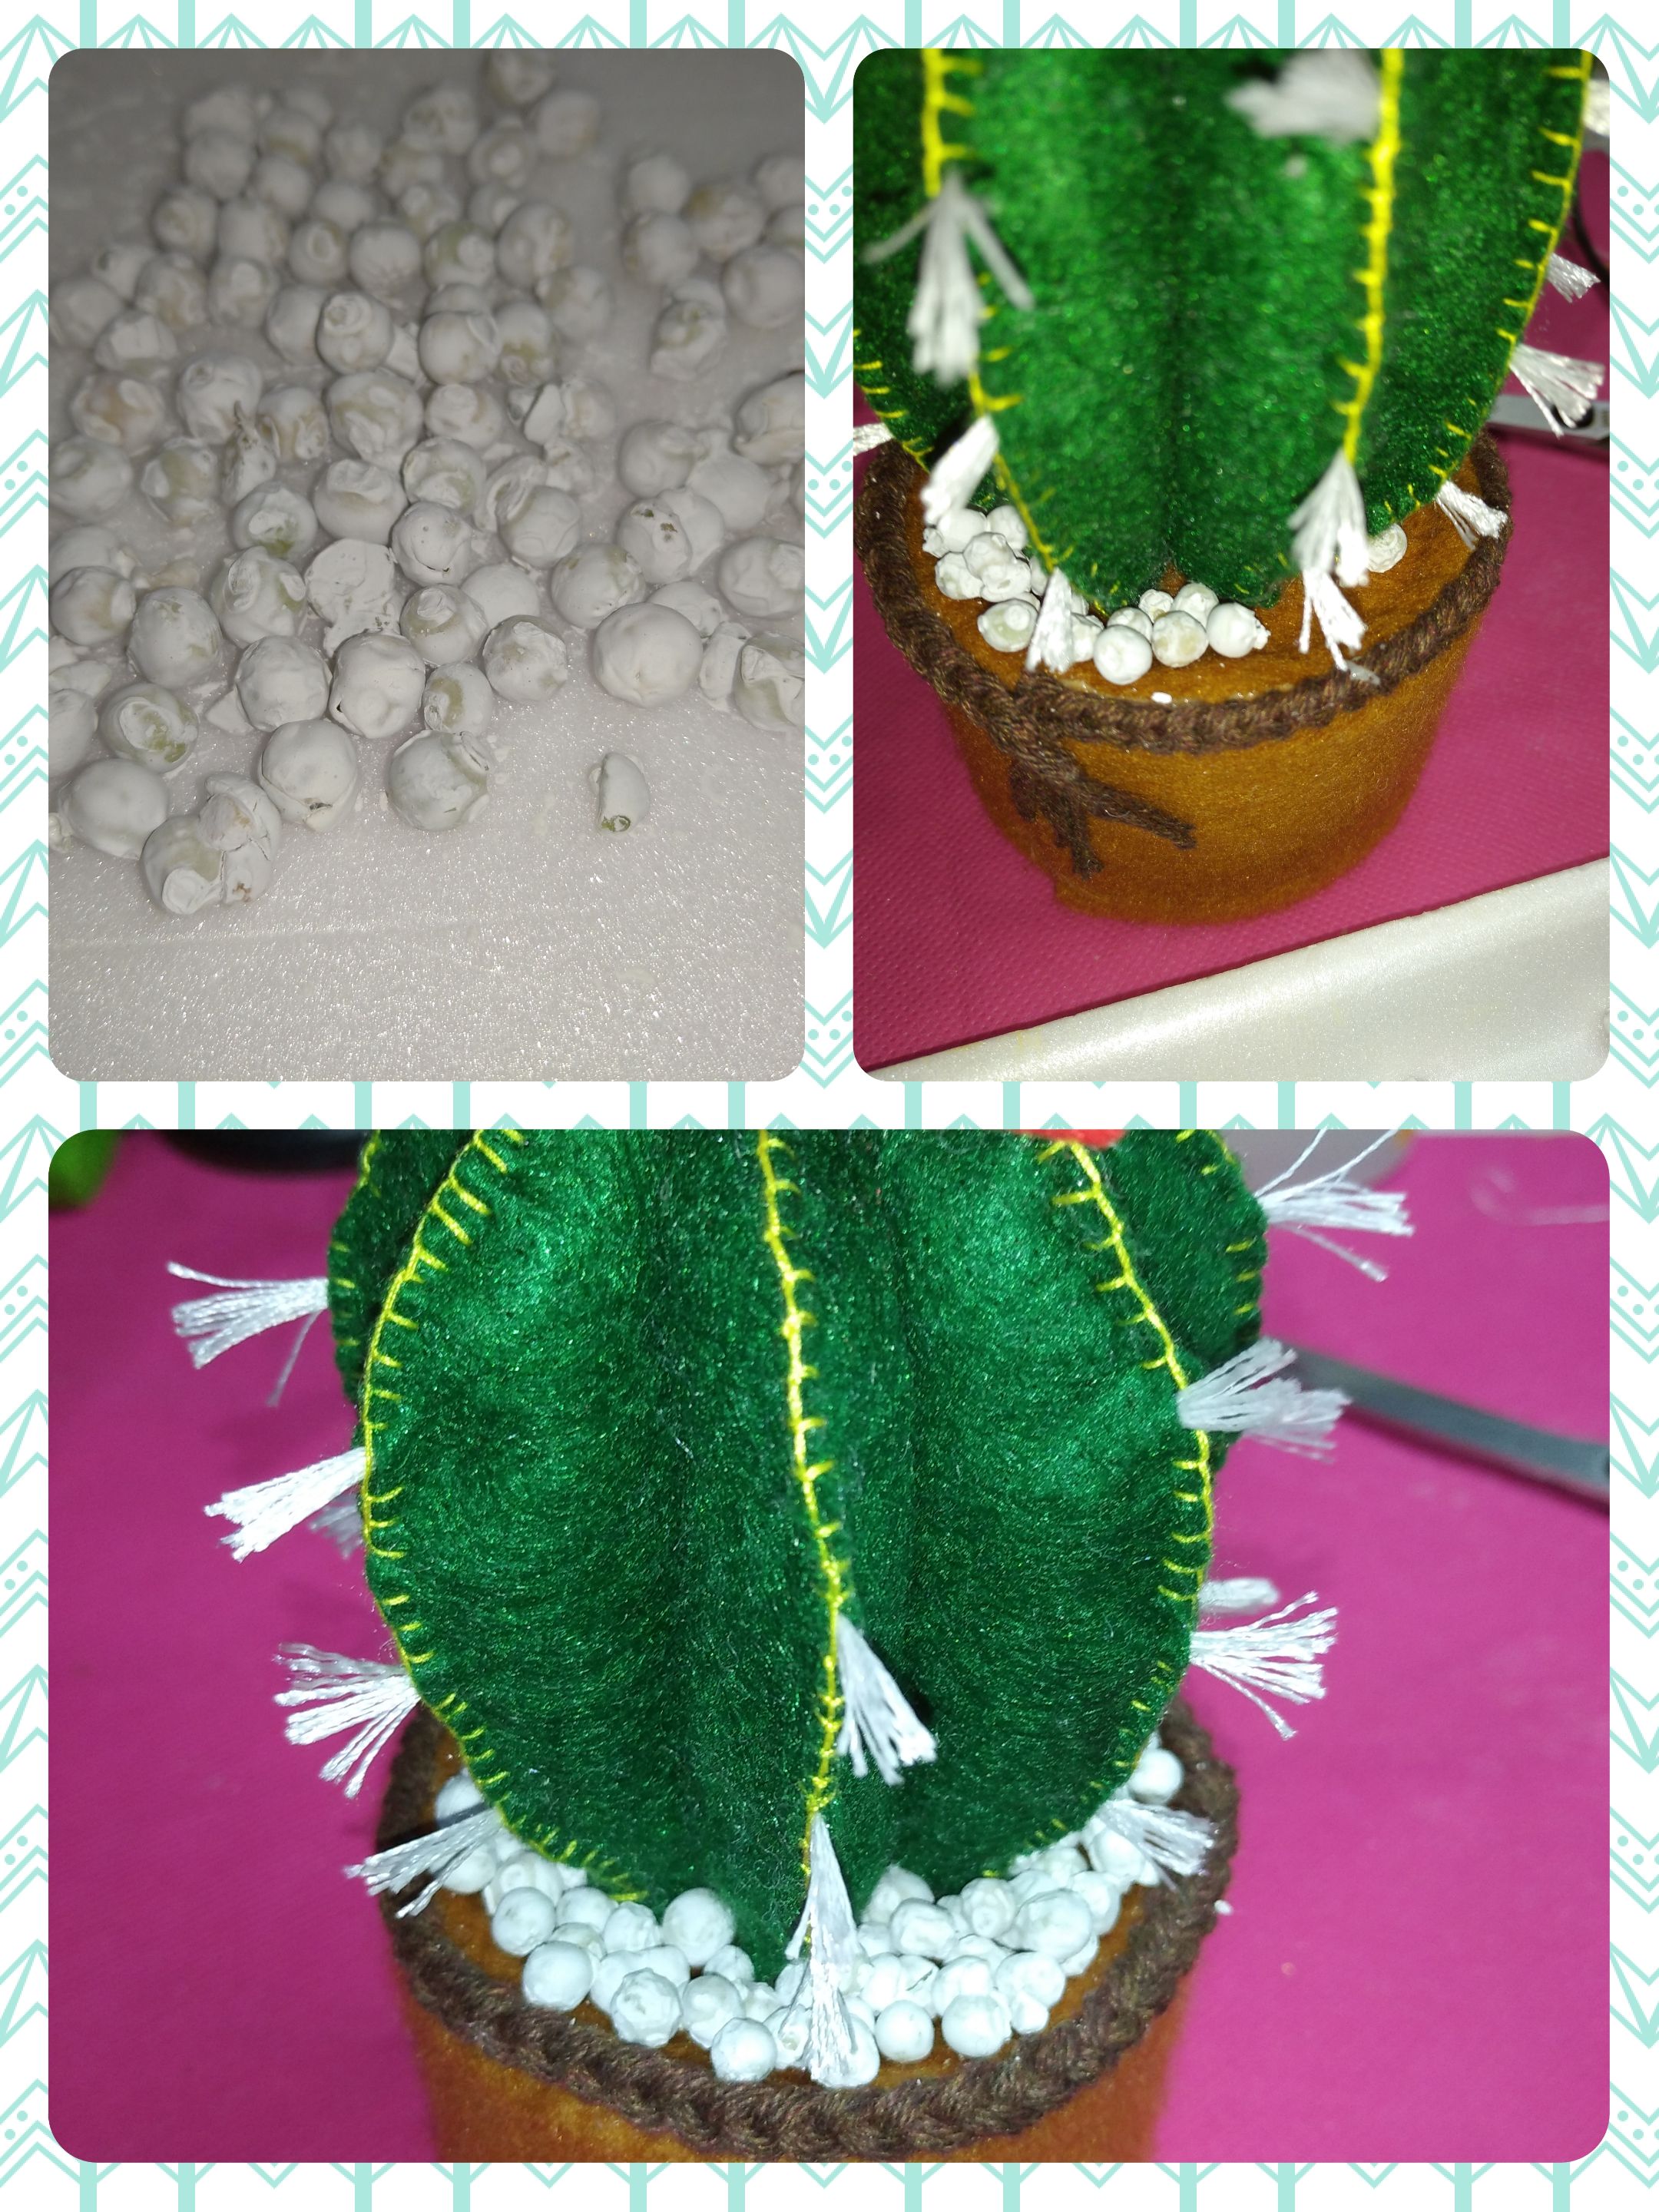
We take the medicine container and remove the upper part with a cutter. Then we fill with whatever we have on hand to give it weight and stay firm. I used pea kernels. Then with the lid of the same container I sealed it with silicone.
</div>
<div class="pull-right">
### <center> </center>
Y por último y no menos importante, realizamos la maceta donde colocaremos nuestro cactus.
Tomamos el envase de medicamento y eliminamos la parte superior con un cortador. Luego rellenamos con lo que tengamos a mano para darle peso y se mantenga firme. Yo utilicé granos de arvejas. Luego con la tapa del mismo envase lo sellé con silicón.
</div>
---
<div class="text-justify">
<div class="pull-left">
### <center> </center>
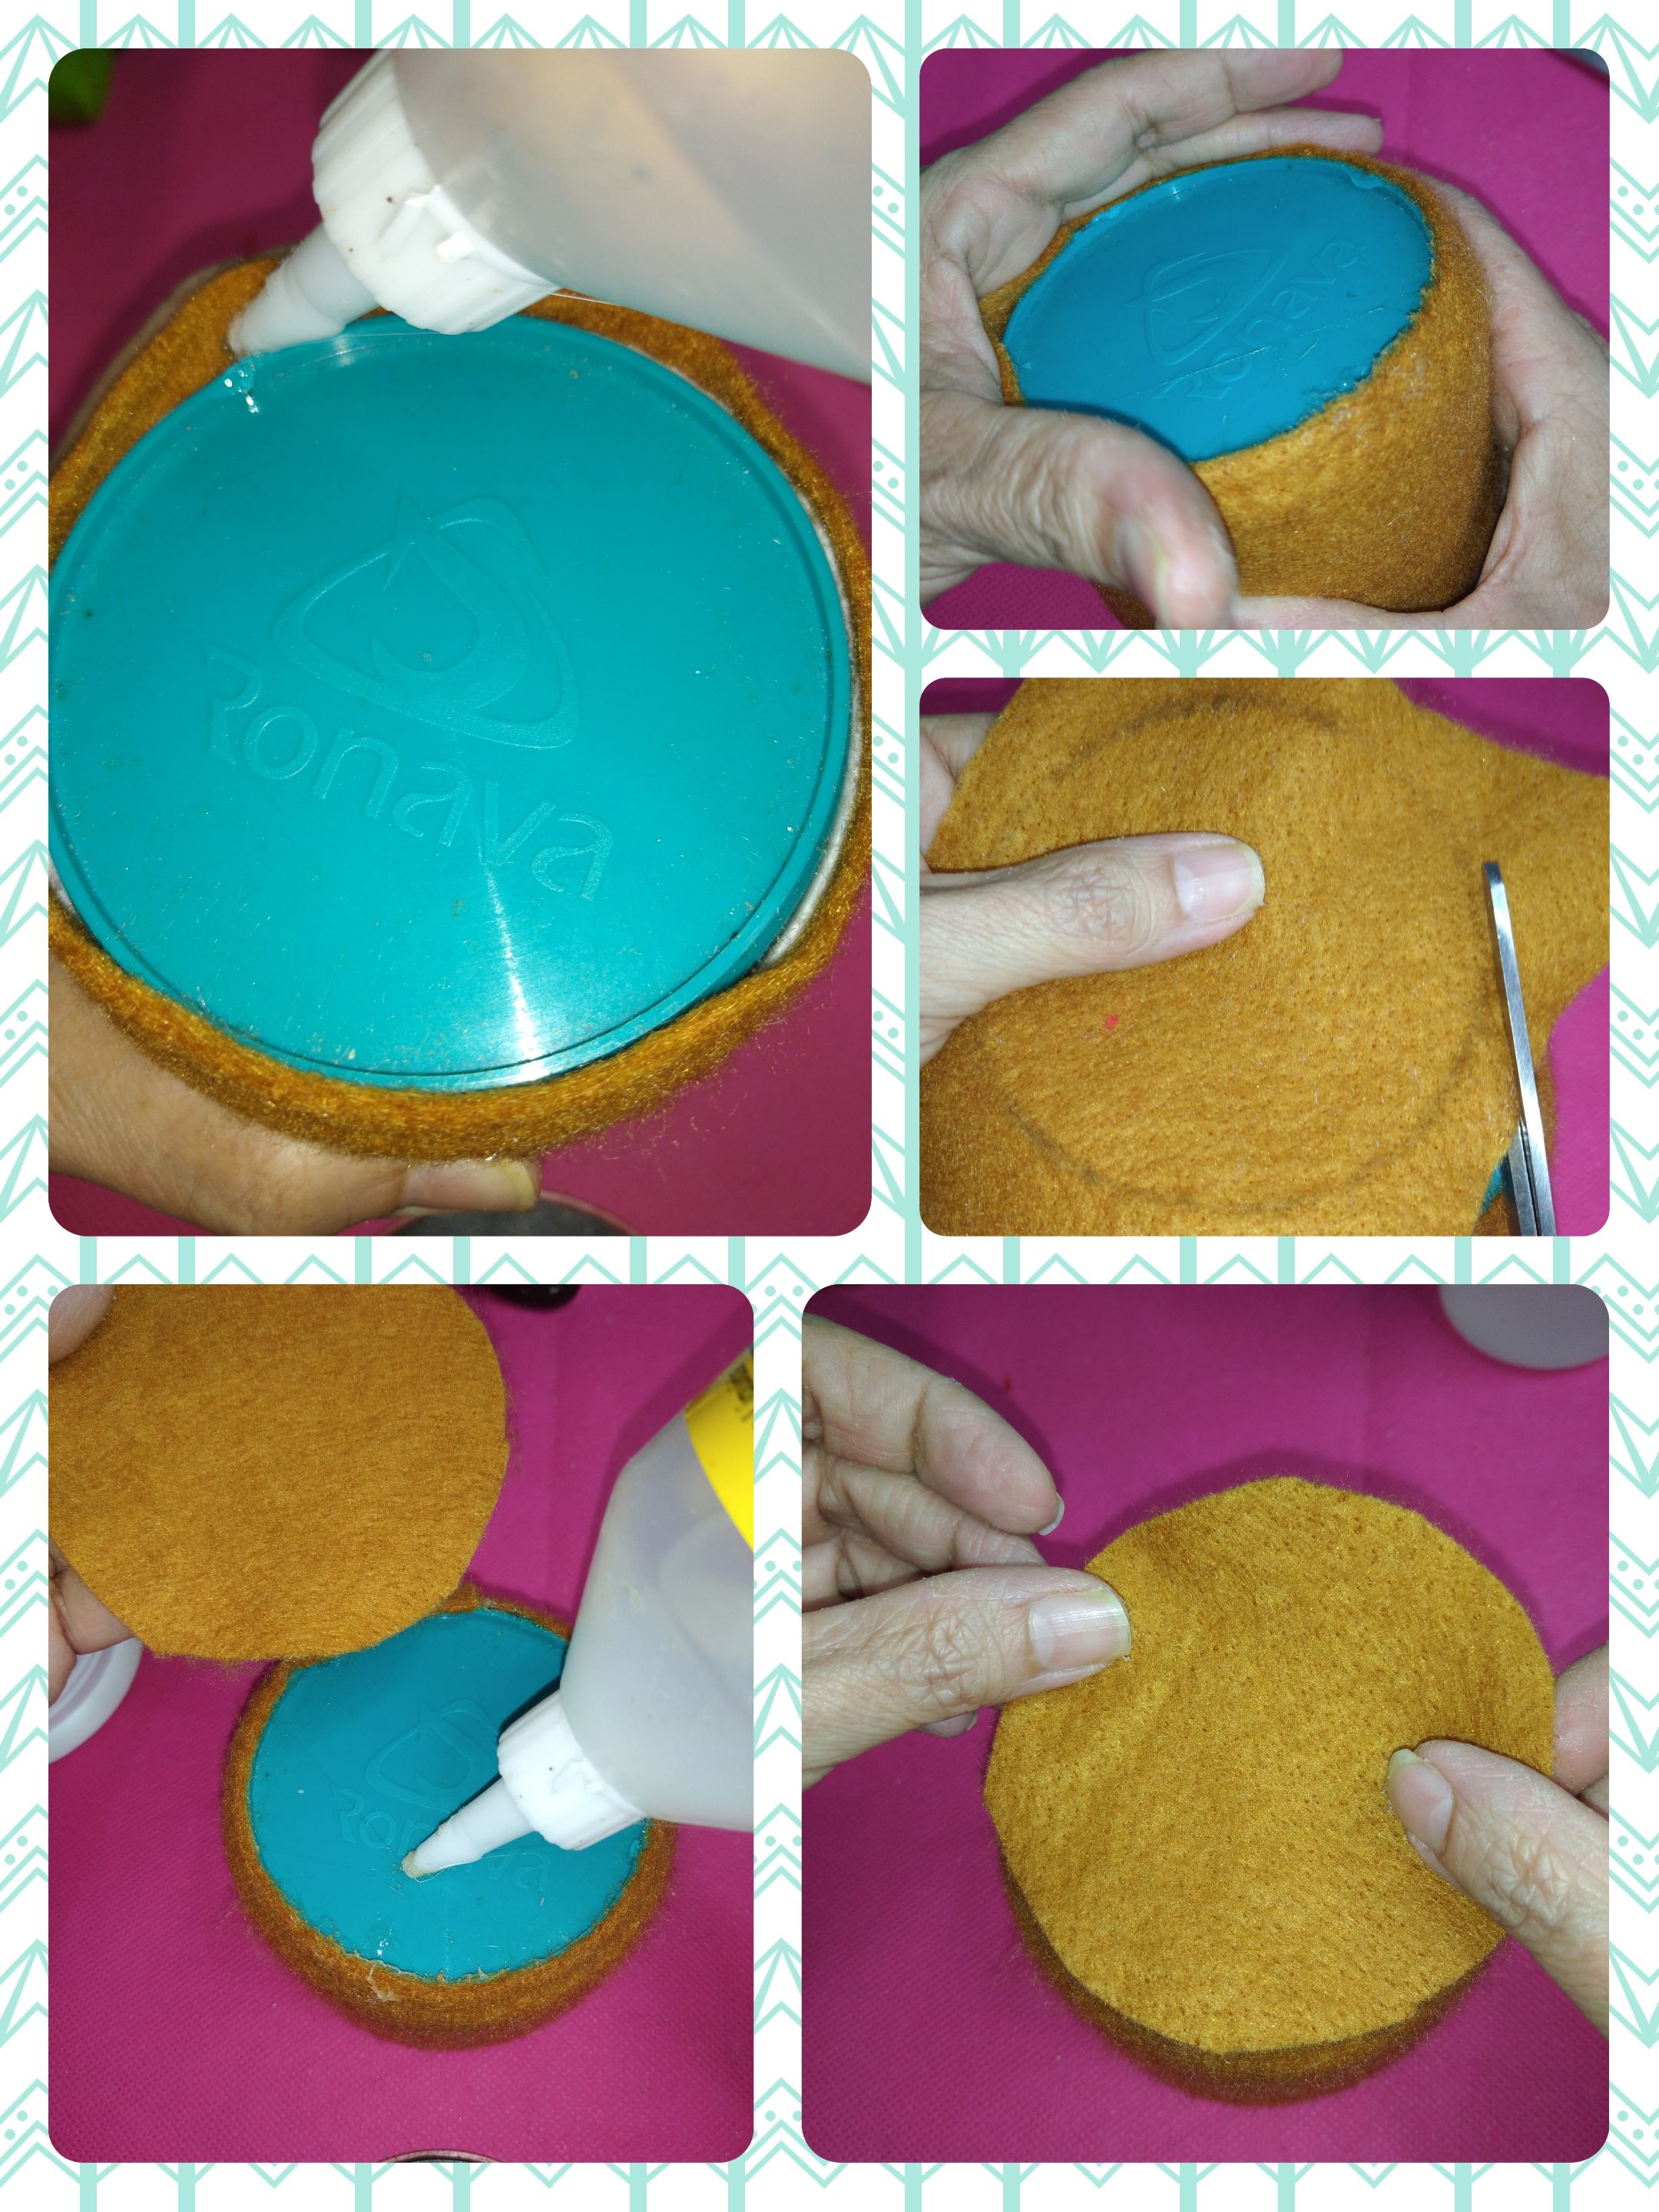
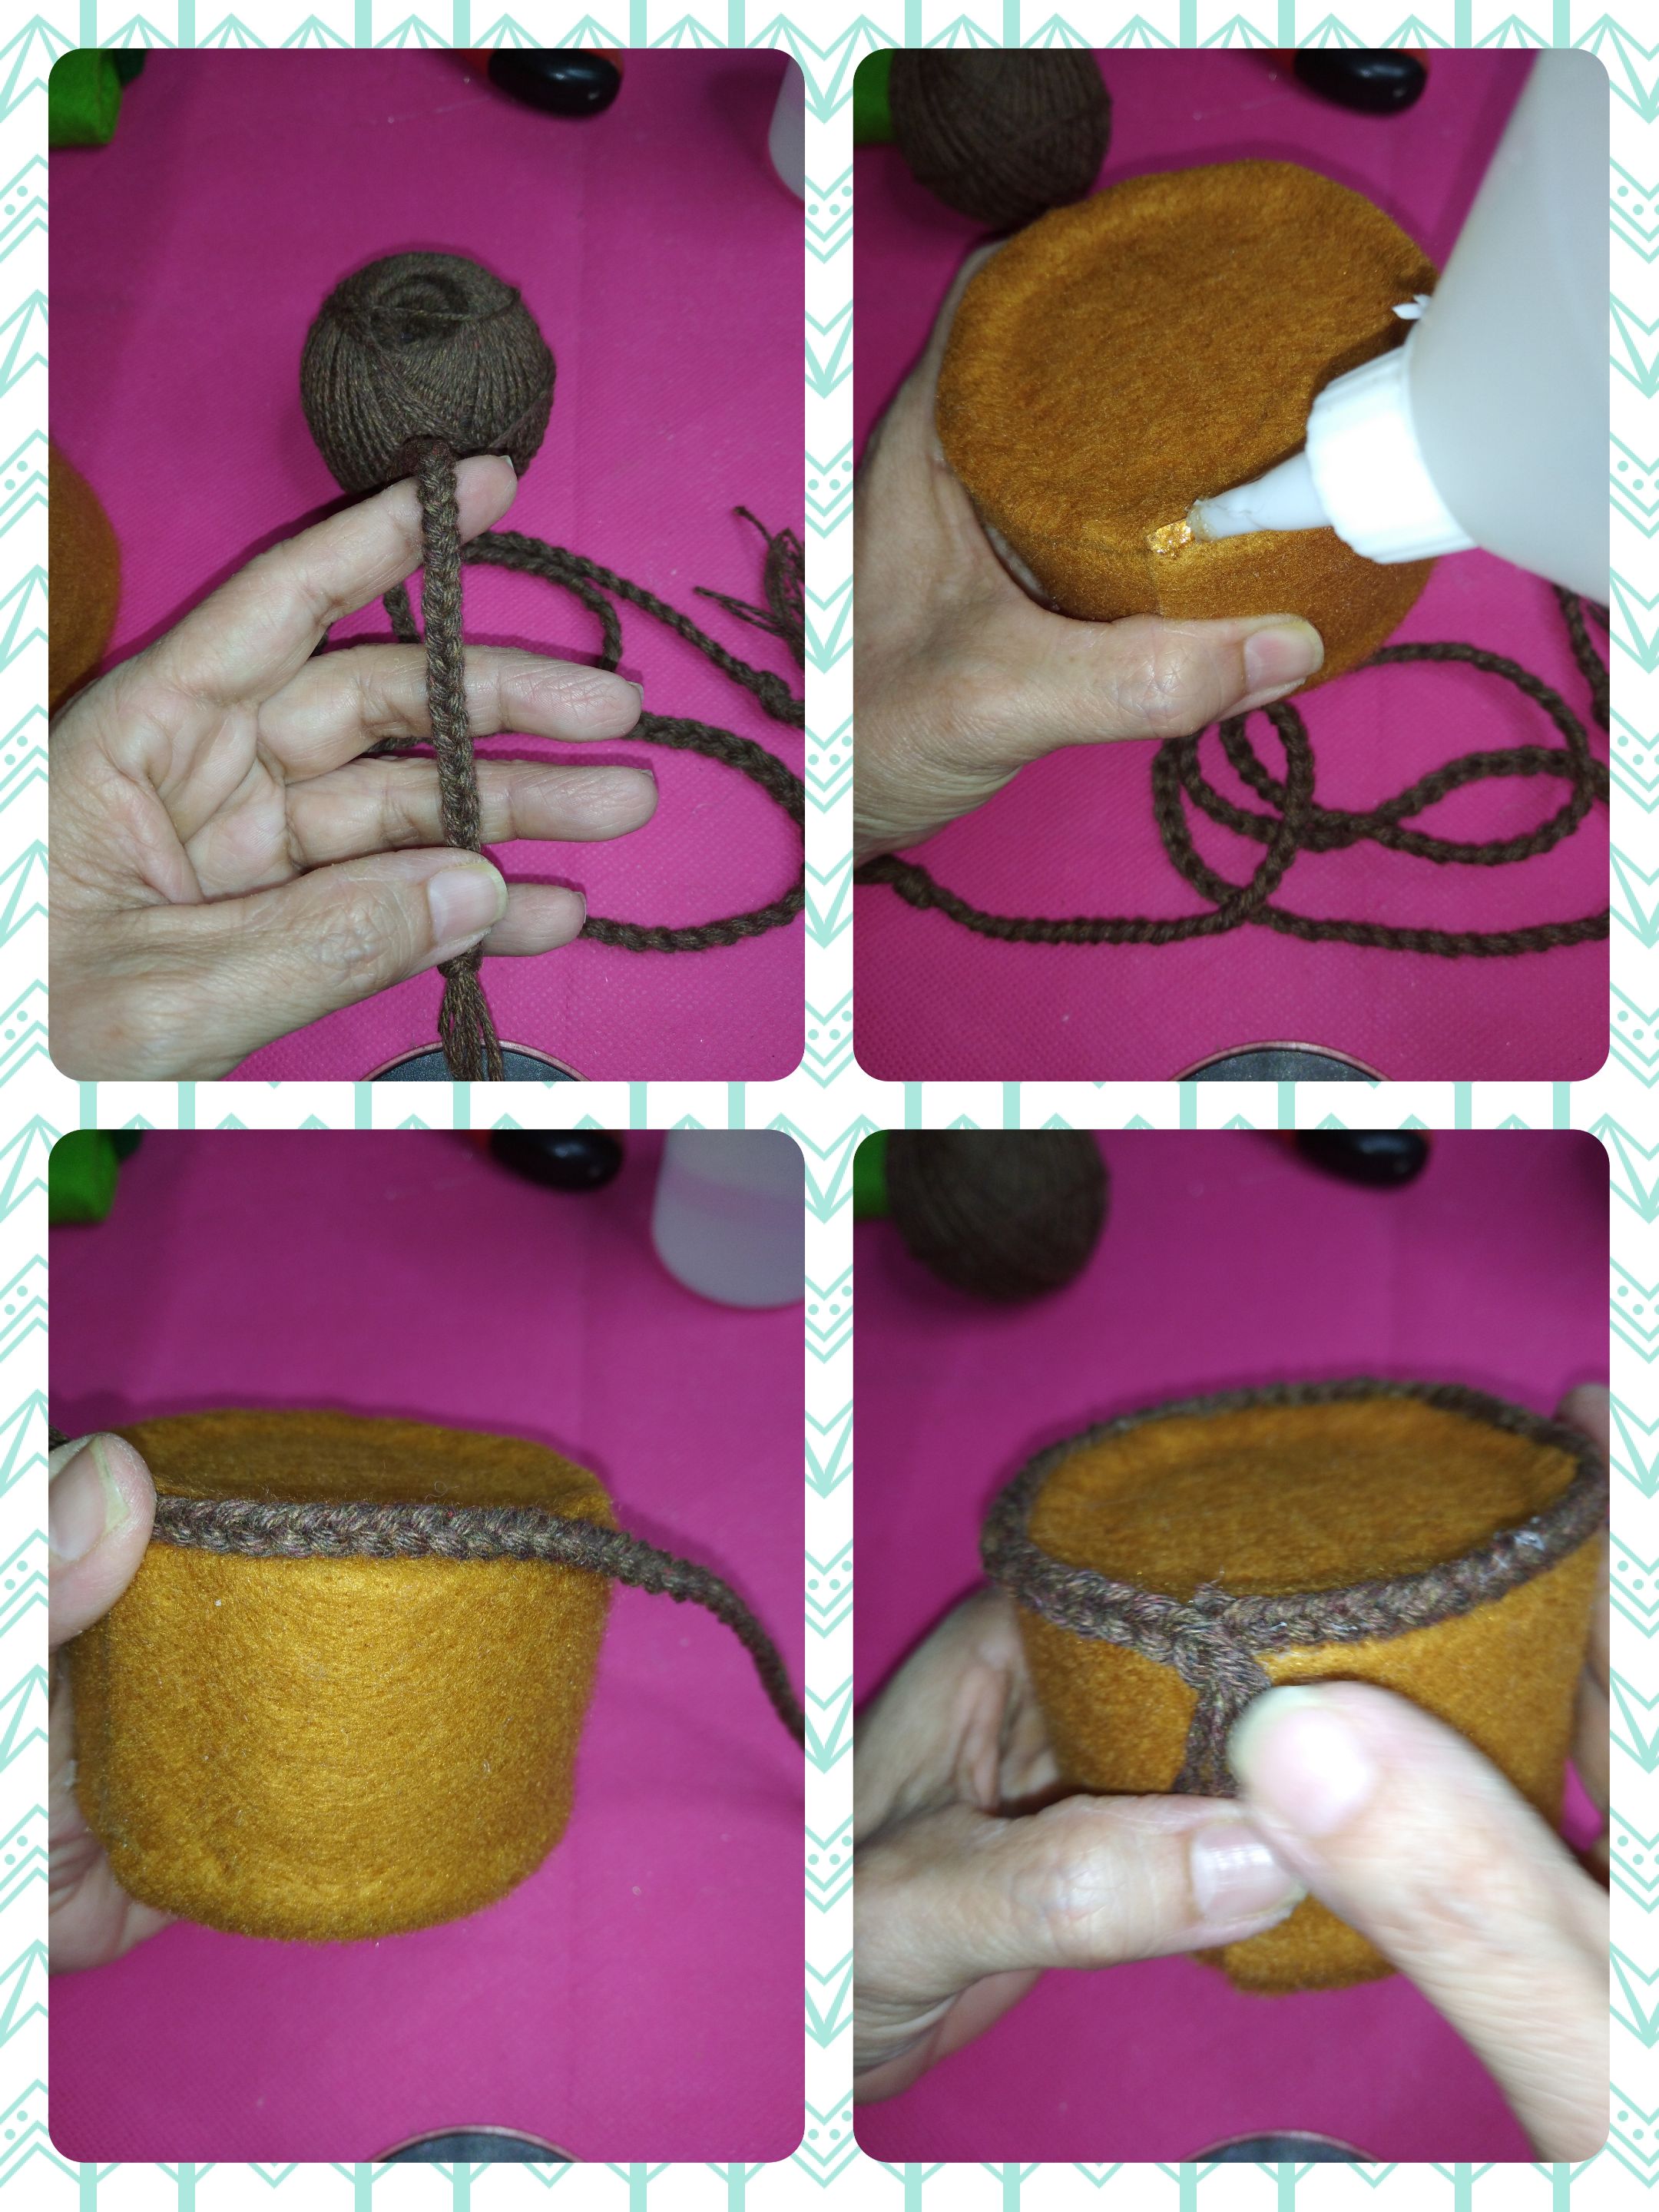
Then I lined it with brown felt, placing silicone as I went lining. I cut the excess felt and made a circle to cover the upper part.
</div>
<div class="pull-right">
### <center> </center>
Luego lo forré con fieltro de color marrón colocando silicón a medida que iba forrando. Corté los excesos de fieltro y realicé un círculo para tapar la parte superior.
</div>
---

<div class="text-justify">
<div class="pull-left">
### <center> </center>
With brown wick thread I cut 12 20 cm strands and made a braid that I then glued around the entire contour of the pot to give it a better finish.
</div>
<div class="pull-right">
### <center> </center>
Con hilo pabilo de color marrón corté 12 hebras de 20 cm y realicé una trenza que luego pegué por todo el contorno de la maceta para darle mejor acabado.
</div>
---
<div class="text-justify">
<div class="pull-left">
### <center> </center>
The pot and the cactus are ready, it only remains to glue them. Placing a sufficient amount of silicone both in the center of the pot and inside the cactus, I joined them and let them dry for 3 hours.
</div>
<div class="pull-right">
### <center> </center>
Ya lista la maceta y el cactus, sólo queda por pegarlos. Colocando una cantidad suficiente de silicón tanto en el centro de la maceta como por el interior del cactus las uní y dejé secar por un tiempo de 3 horas.
</div>
---
<div class="text-justify">
<div class="pull-left">
### <center> </center>
And to culminate, and this idea was a last minute idea, I painted a few grains of peas with white paint to simulate stones and place them at the base of the pot.
</div>
<div class="pull-right">
### <center> </center>
Y para culminar y ya esta idea fue de último instante, pinté unos cuantos granos de arvejas con pintura blanca para simular piedras y colocar en la base de la maceta.
</div>
---
<div class="text-justify">
<div class="pull-left">
### <center> </center>
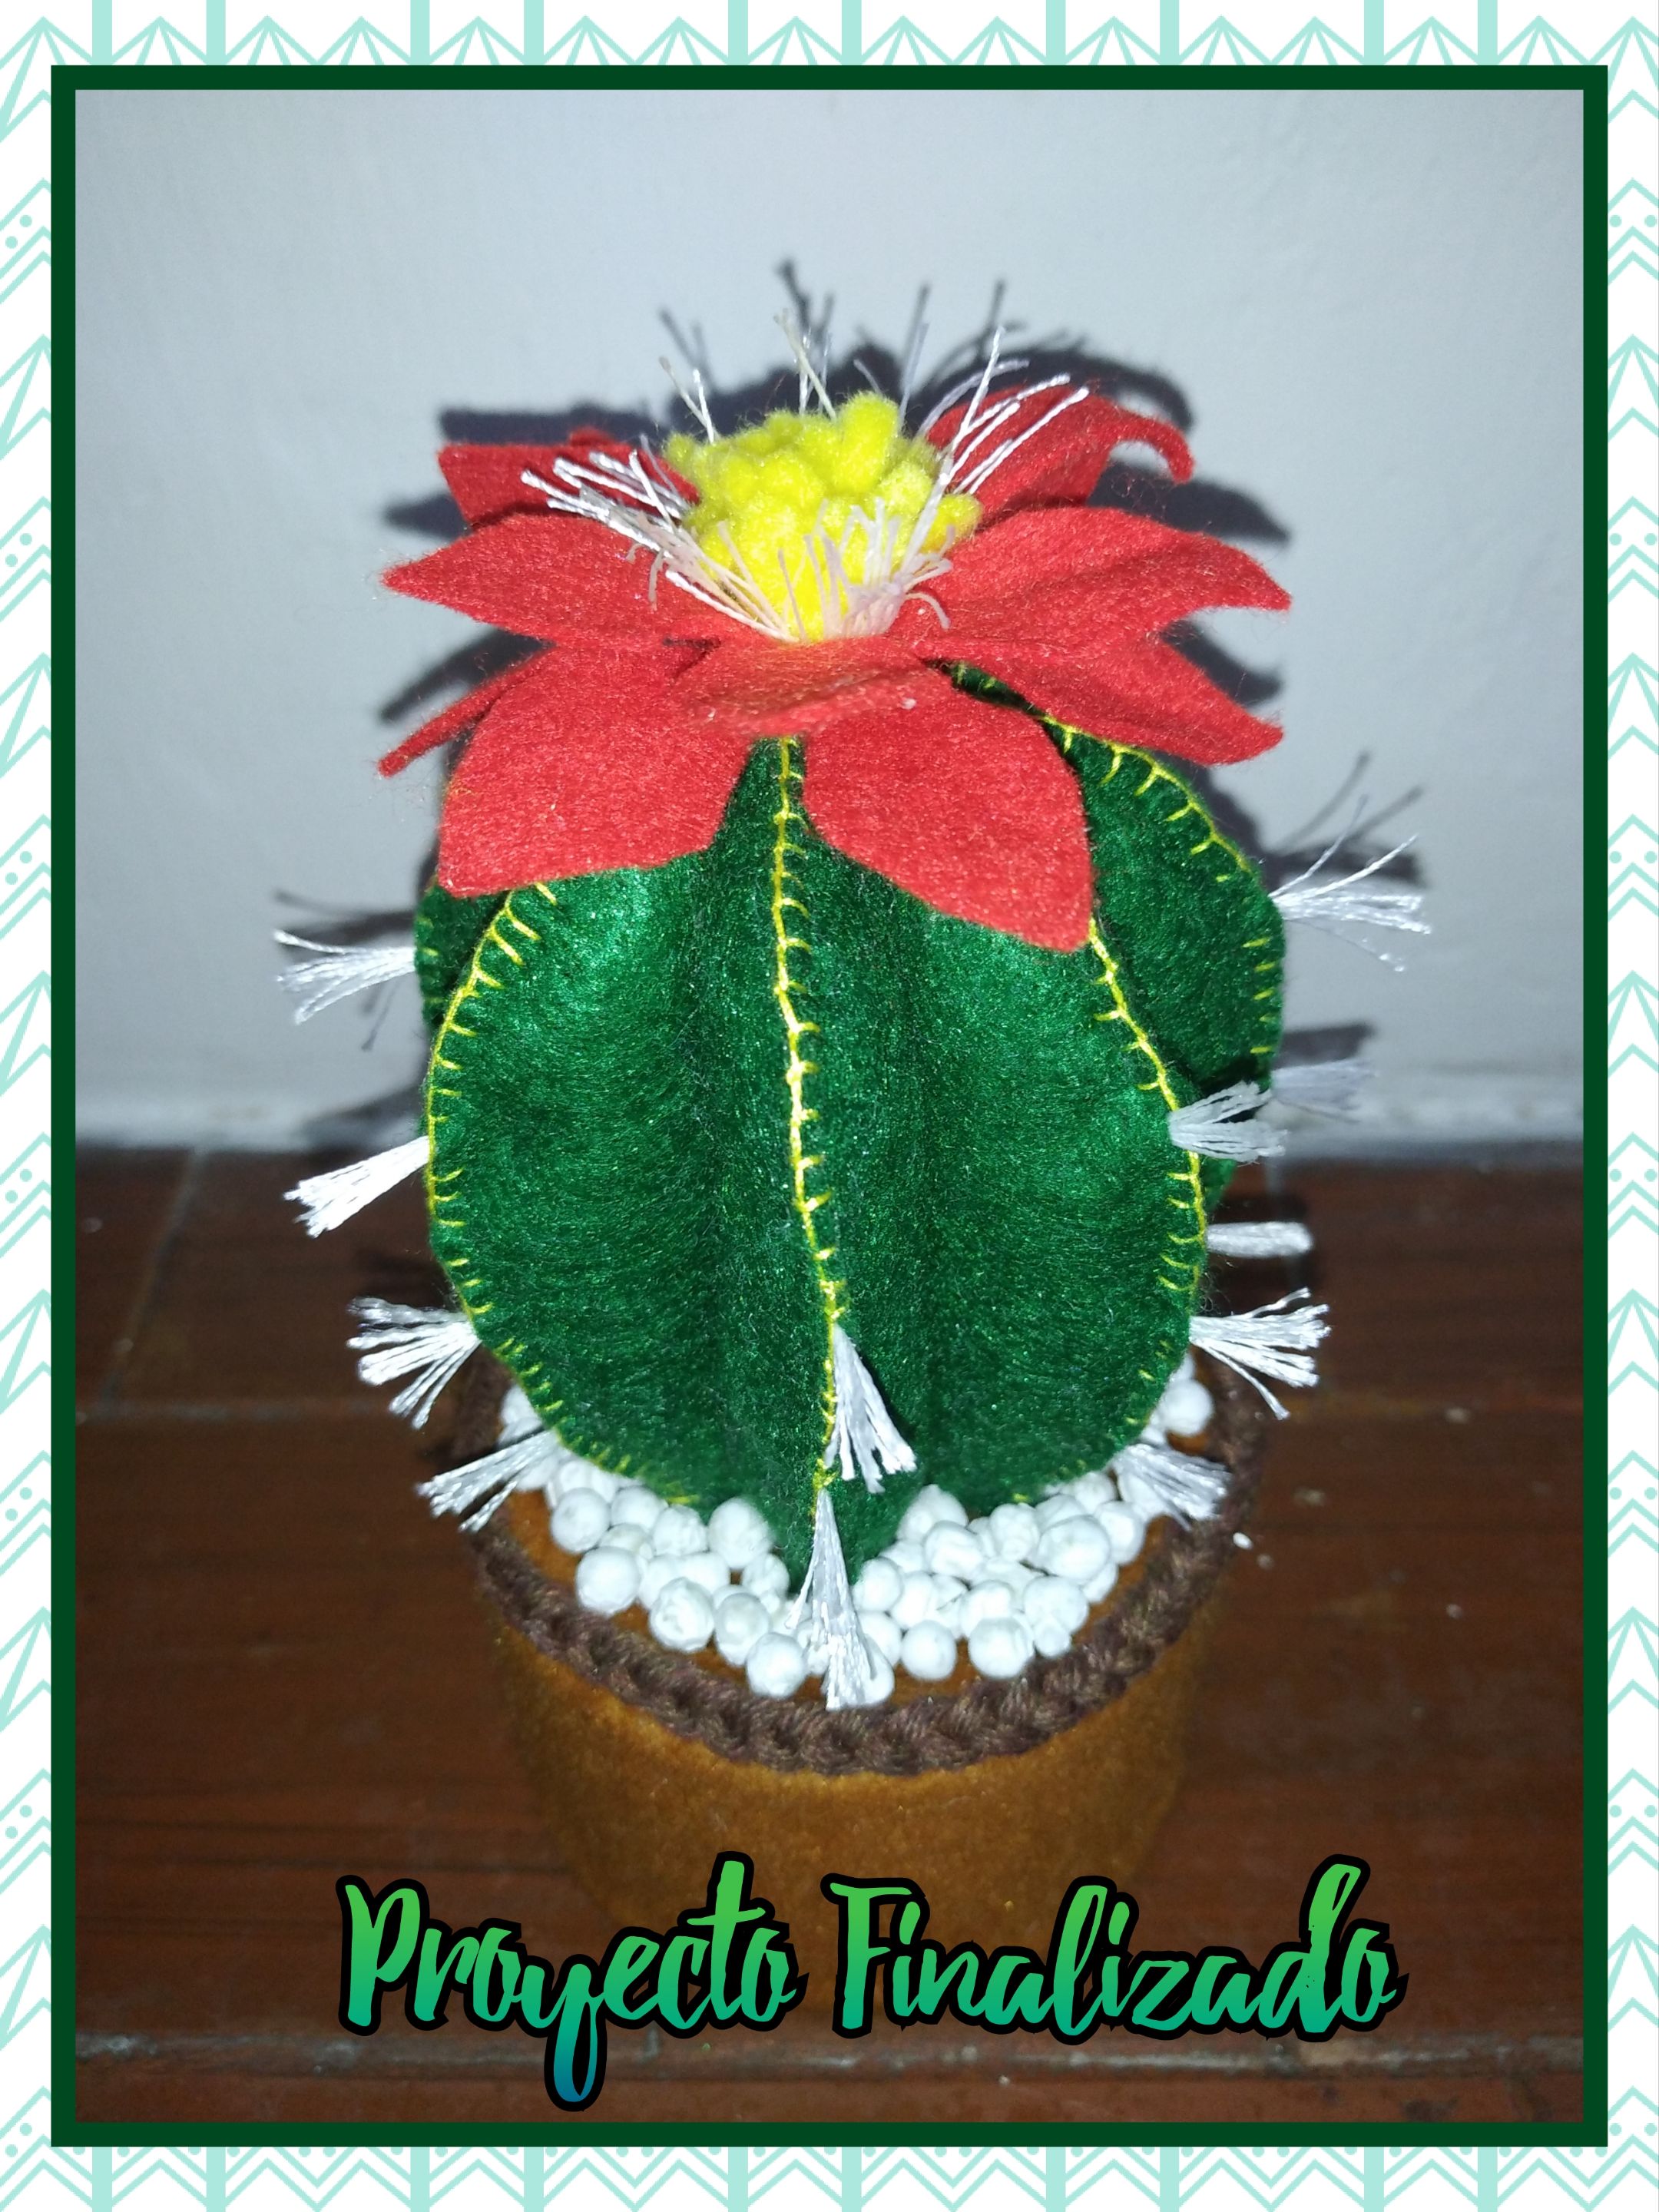
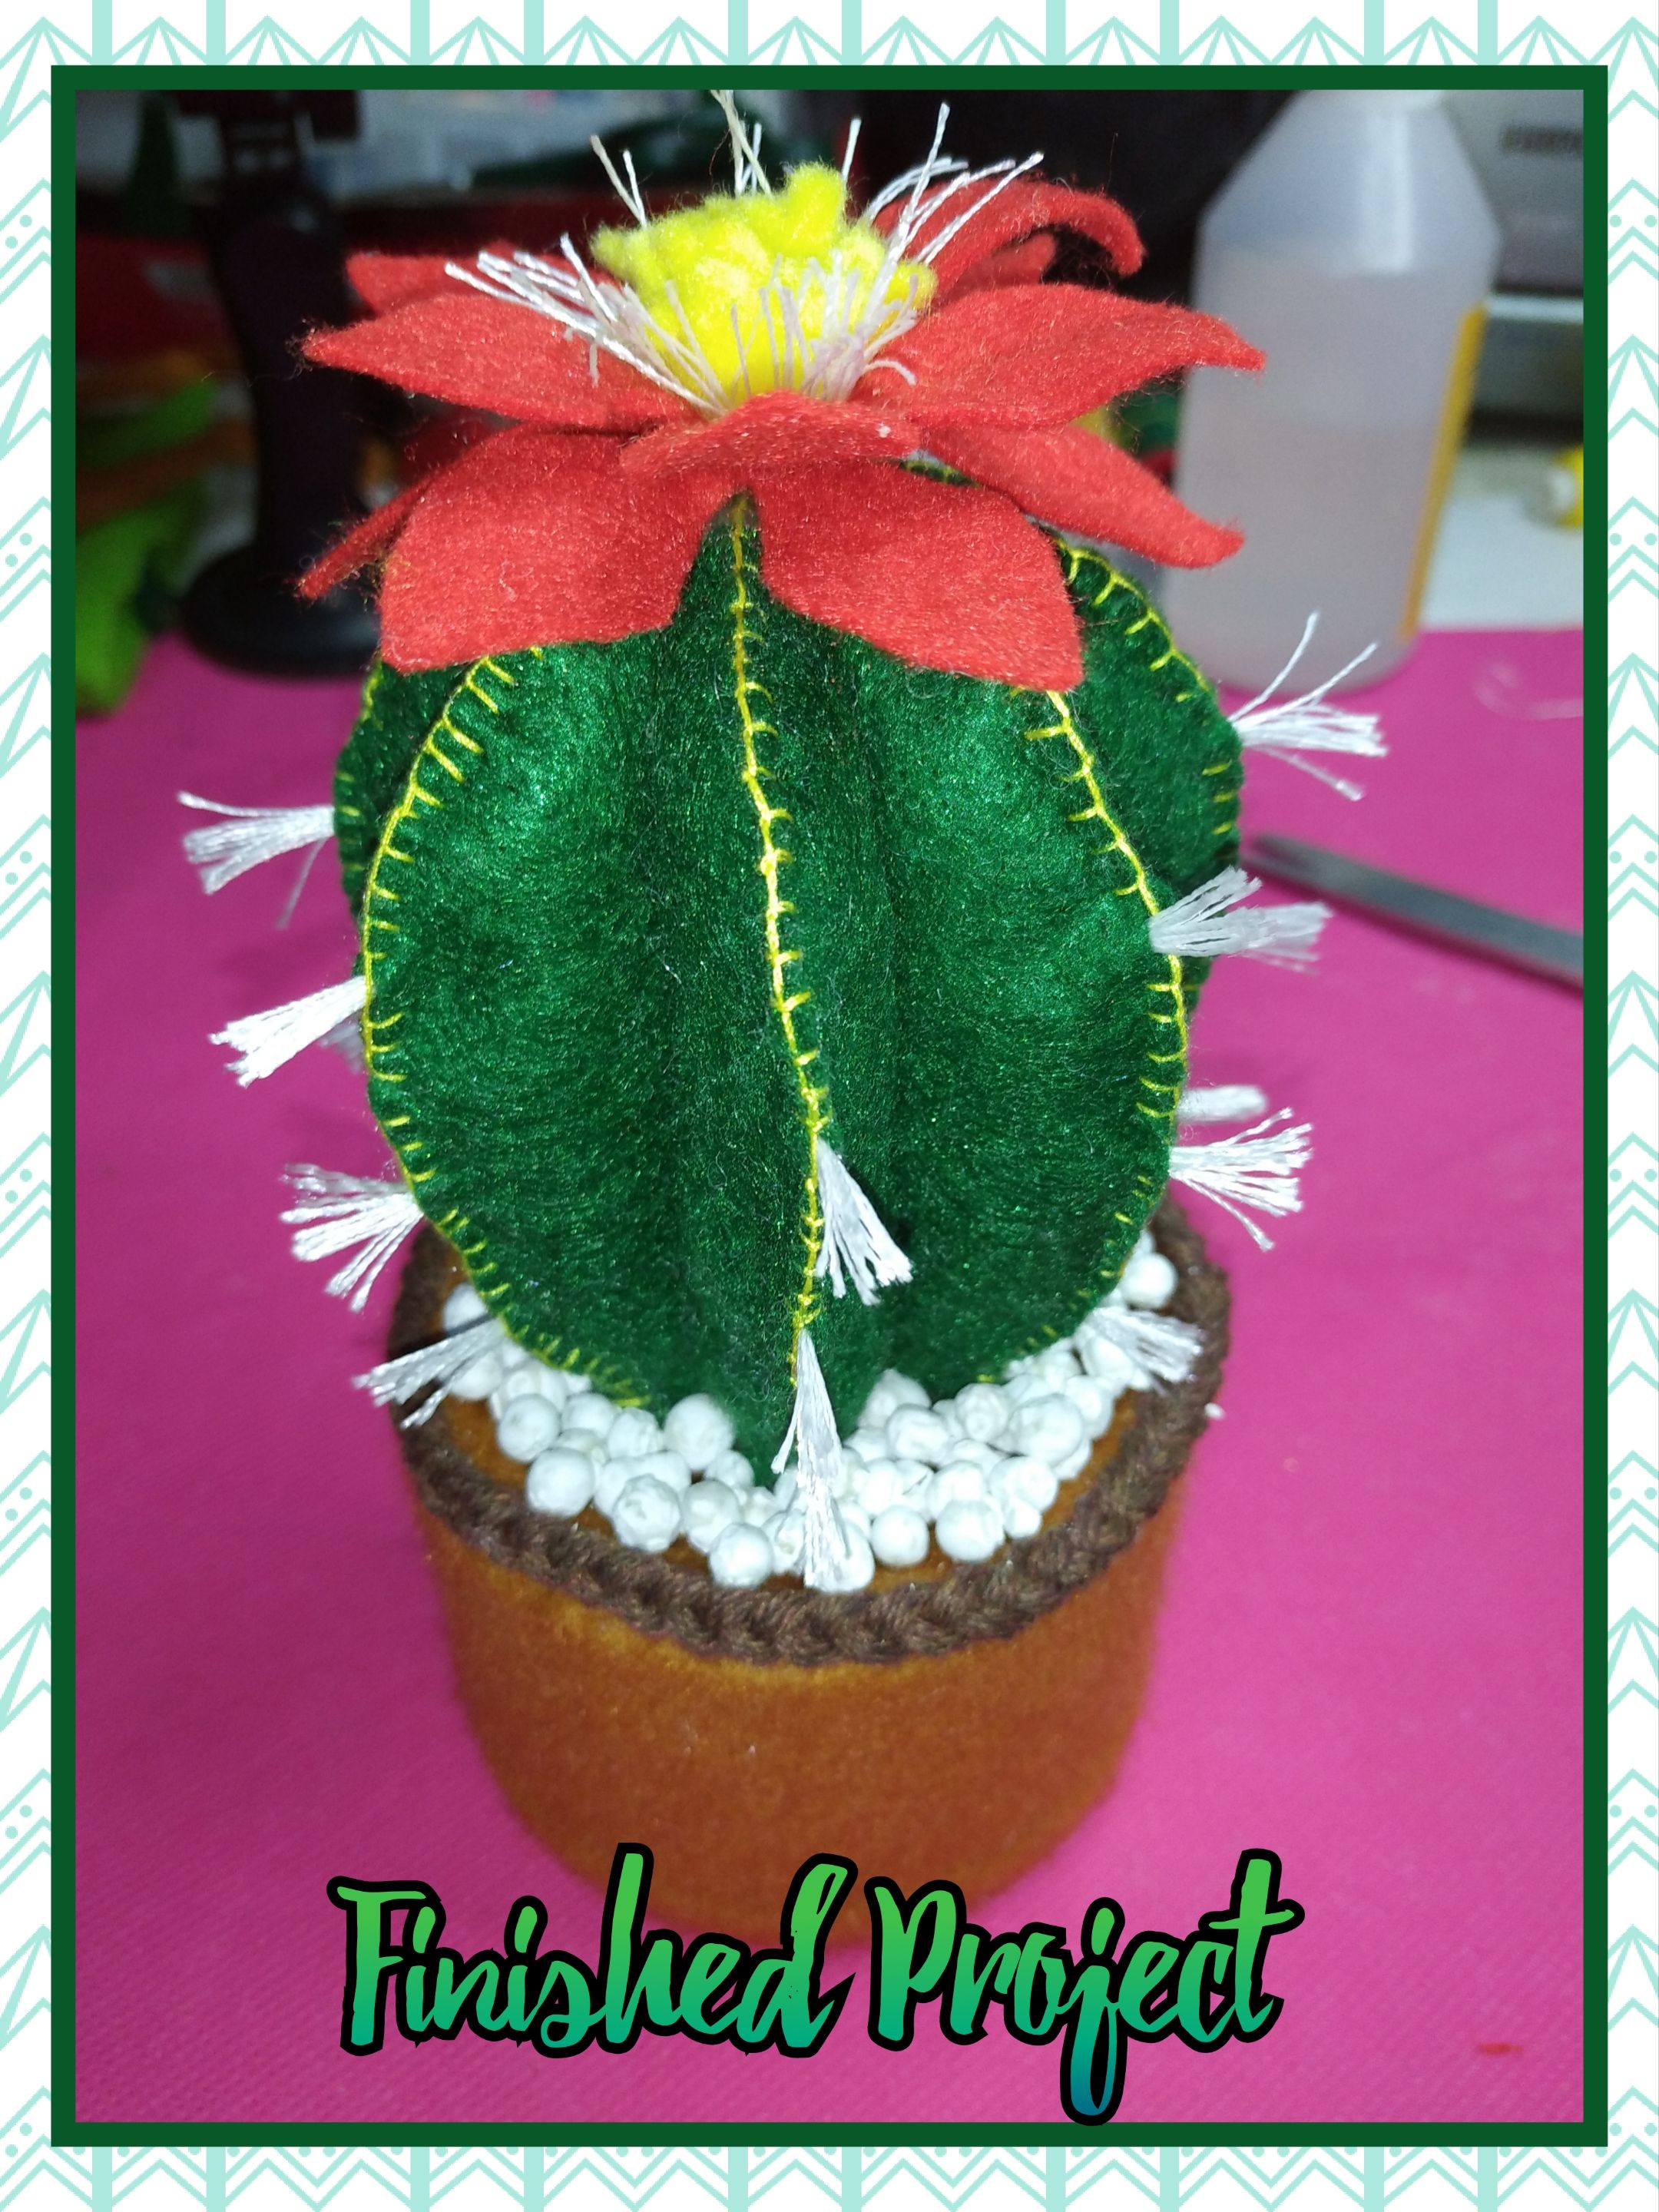
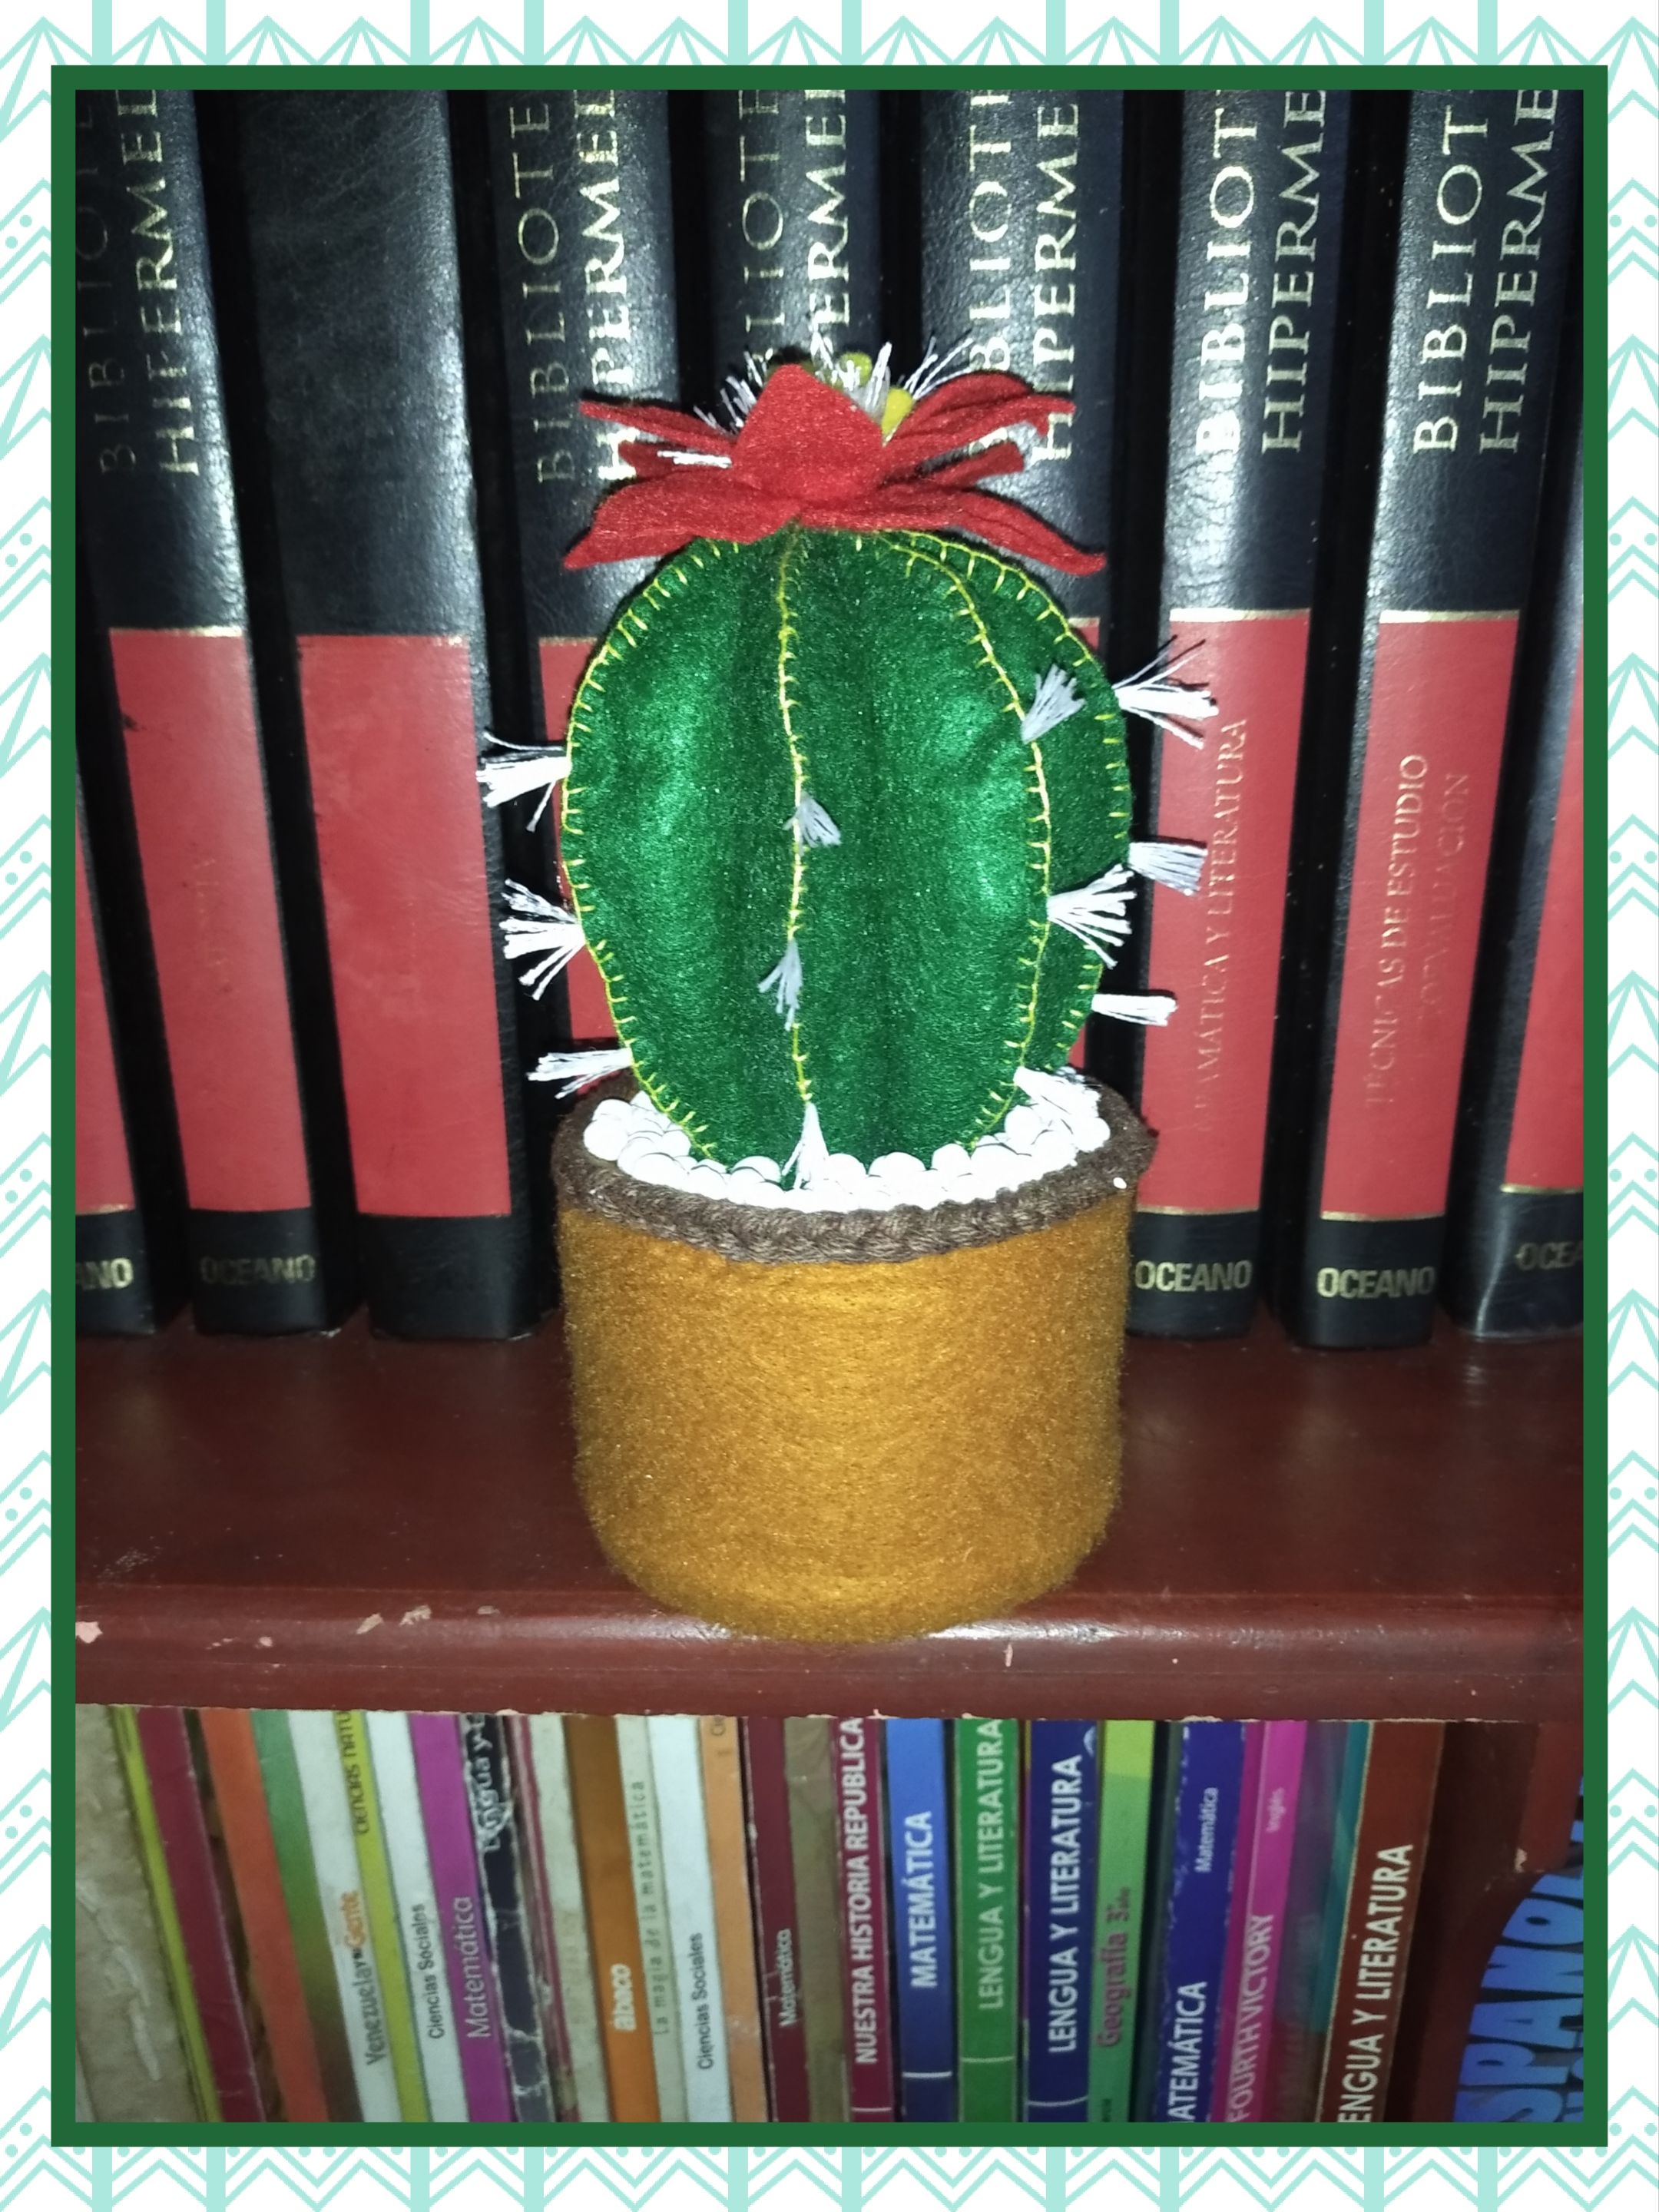
You see how it is possible to transform waste into decorative objects and that they also bring us a degree of happiness, since if we make a synergy between the environmental and the spiritual we can have results like this. A decorative object that you will undoubtedly want to make to decorate your library, your desk, make a small artificial garden, made with recycled material and that, in addition to filling a space in your environment, will fill it with joy and beauty. I hope you liked it. See you next time.
</div>
<div class="pull-right">
### <center> </center>
Ves cómo es posible la transformación de desechos en objetos decorativos y que además nos aportan un grado de felicidad, ya que si realizamos una sinergia entre lo ambiental y lo espiritual podemos tener resultados como este. Un objeto decorativo que sin duda vas a querer realizar para adornar tu biblioteca, tu escritorio, realizar un pequeño jardín artificial, realizado con material reciclado y que además de llenar un espacio en tu ambiente lo va a llenar de alegría y belleza. Espero que te haya gustado. Nos vemos en la próxima.
</div>
---
### <center> Todas las fotos son de mi autoría, tomadas con mi teléfono POCO M3
Para la edición de las fotos utilicé Polish y Canva para la portada.
Utilicé https://translate.google.com para la traducción
</center>
</div>
---