#### What Will I Learn?
On the said tutorial, you will learn different techniques after reading it.
- You will learn how to code the program of a combination of different running LED light styles.
- You will learn how to come up with a creative and qualitative project
- Your skill will be enhance in terms of coding programs
#### Requirements
**Actual Application**
✔ Arduino UNO
✔ Breadboard
✔ LED Lights
✔ Jumper Wires
*Software Application*
✔ Fritzing
✔ ArduinoDroid Mobile Application
*Brief Discussion of the materials*
> [**Arduino**](https://en.m.wikipedia.org/wiki/Arduino) -- is a kind of microcontroller kit for building digital devices and interactive objects that can sense and control object in the physical world. It is also an open source computer hadware and software company use for desugning automated projects.
[**Breadboard**](http://wiring.org.co/learning/tutorials/breadboard/) -- it is used for testing circuits before applyig to the real world. Or a device for temporary circuit making and designing.
[**LED**](https://en.m.wikipedia.org/wiki/Light-emitting_diode) -- is a semiconductor device that emits light when activated. The process of electroluminescence happened as the elctrons combined with the electron.
[**Jumper Wires**](https://en.m.wikipedia.org/wiki/Jump_wire) -- is a kind of cable or electrical wire used to interconnect the components in a breadboard or other prototype. It is simply thin object that has a pin at each end
#### Difficulty
- Basic
#### Tutorial Contents
<center>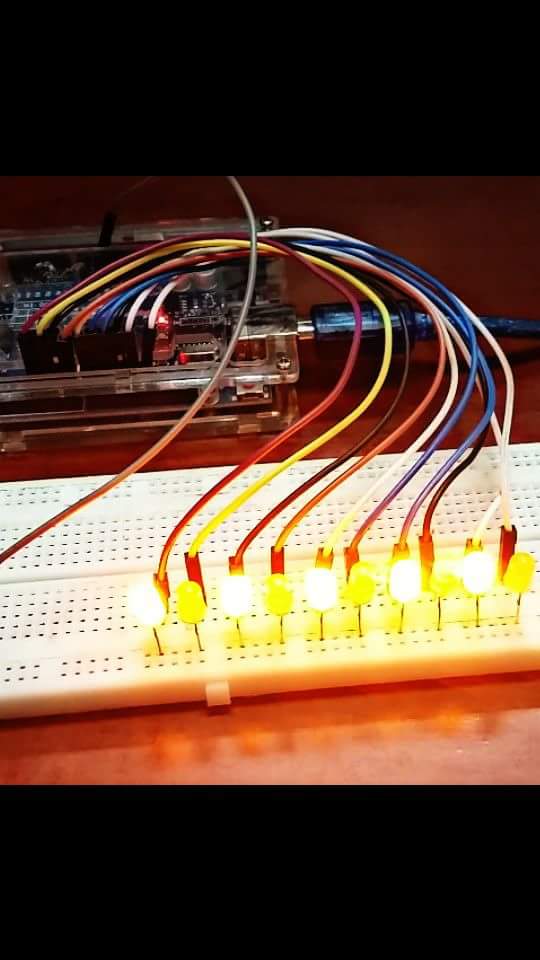</center>
This article will be covering about the combination of animation for activating an LED lights. The step by step process are shown below with the corresponding images. The said project composes with 4 different styles of animating the activation of LED lights. The following are: bouncing, odd-even, mid-tail, and vice-versa running.
> Bouncing -- an animation in running lights that activates like a ball bouncing back and fort.
Odd-Even -- also a kind of animation wherein the activation of LED's are alternating between odd and even numbers.
Mid-Tail -- a kind of animation wherein the activation of LED lights converge at the middle and goes back on its tail.
Vice-Versa -- an animation technique wherein the running lights flows at one direction head to tail that's why it is called vice-versa.
### Part I.
Before we go to the actual application of our project, we will have it first in a software designing using Fritzing, if you don't have this software application yet feel free to tap the highlighted word [*here*](http://fritzing.org/download/) for free installation.
> Let's proceed.
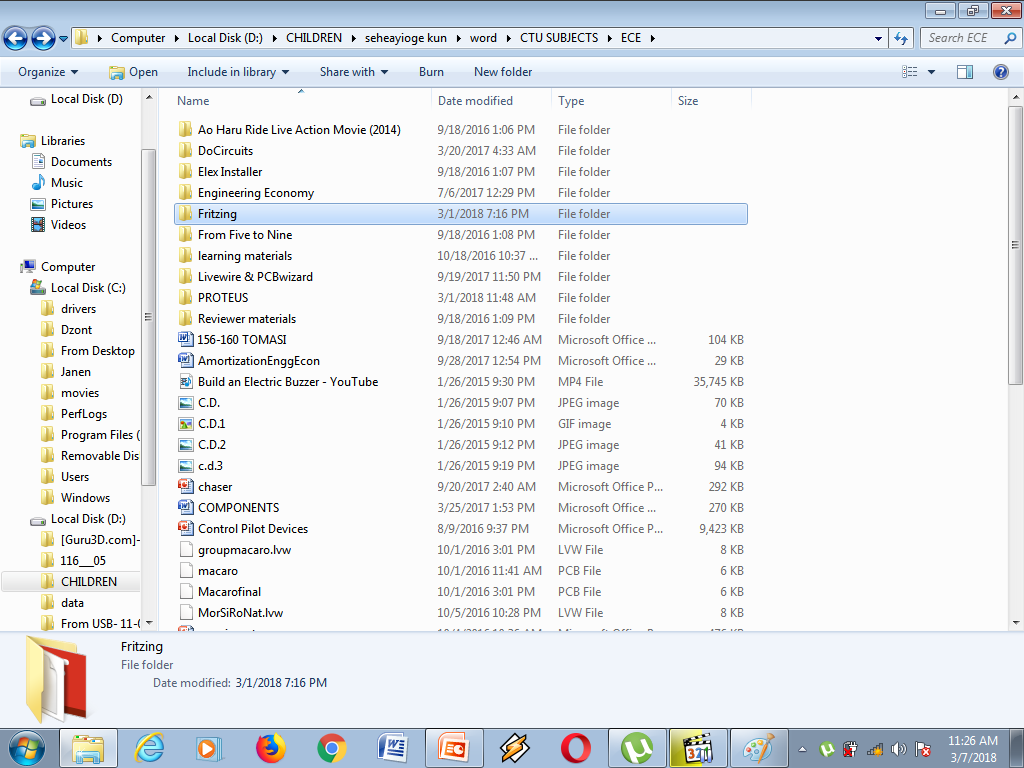
First, click the Fritzing folder on your libraries. And then proceed directly by tapping the fritzing file.
After, the fritzing software will start to load.

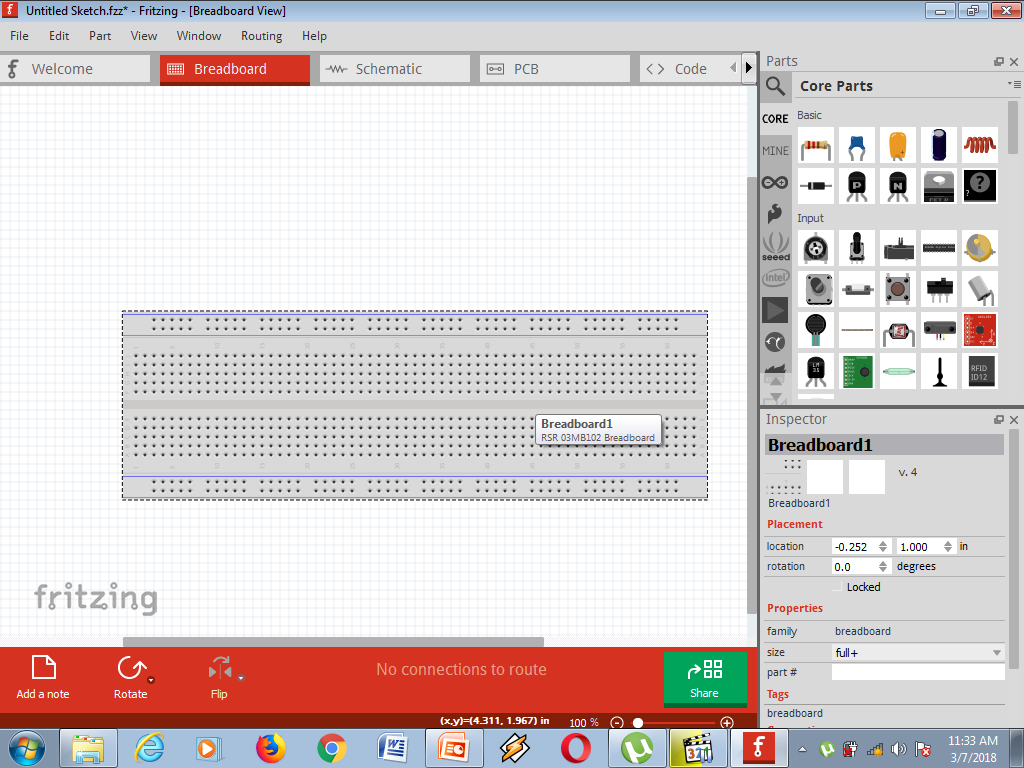
After finishing to load, you will come up with this feature shown below. And If you can see the word breadboard, tap to proceed.

You will be directly access to this sketching sheet. In this sheet you are free to do your designing about your circuit. You can zoom in and zoom out its appearance by adjusting it. The zoom tab is located at the lower right of the sketching sheet.
Now, start designing your circuit. To start with, gather first all the needed components on your circuit diagram simply by dragging the components from the tool box located at the right side of the tab. You can also see there the search box, it is used for searching the components we want to have.
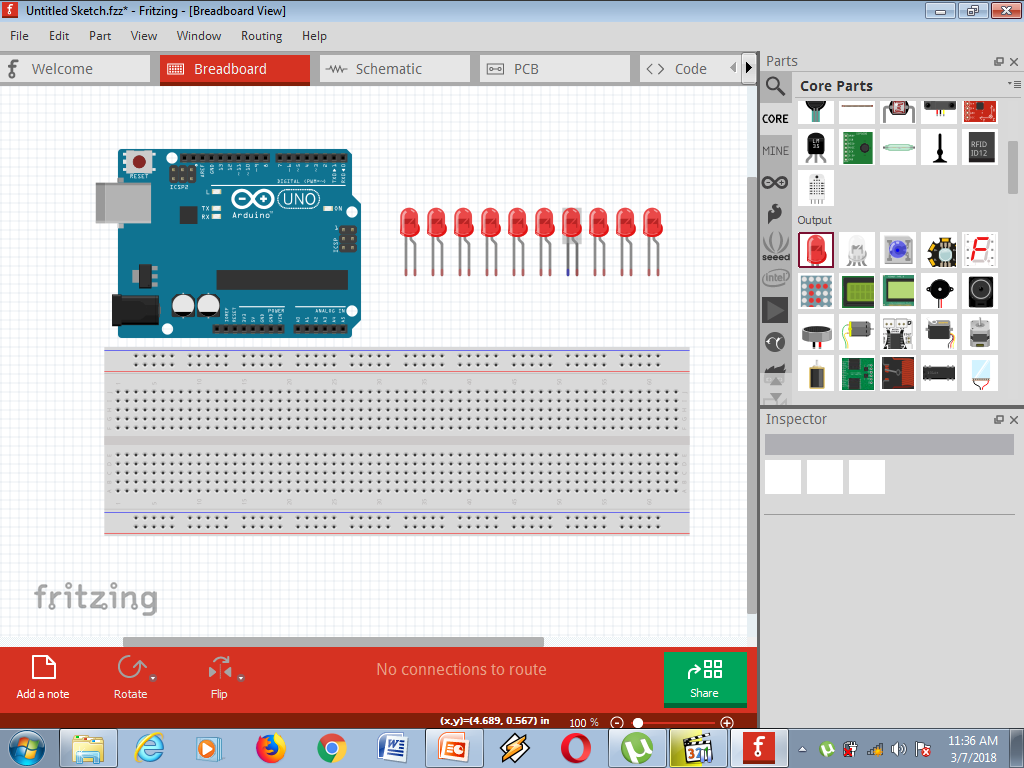
Lastly, start designing your circuit by connecting wires to the components at its designated area of functionality.
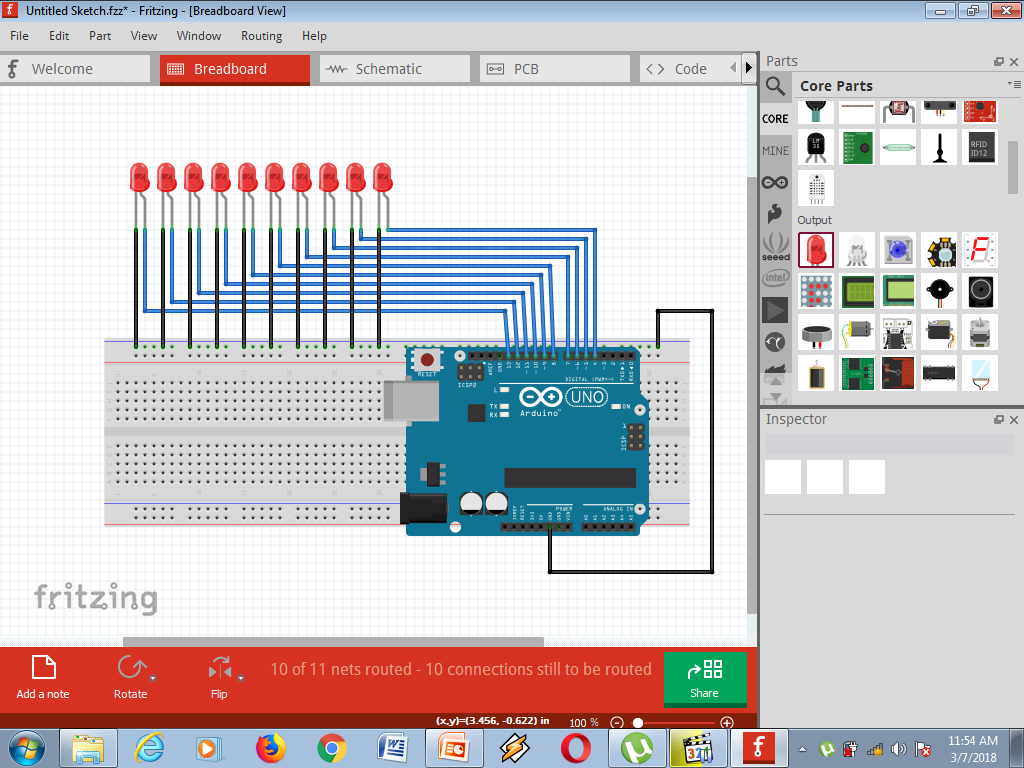
Designing of circuit was already done in the fritzing software application now let us move on to our programming part.
### Part II.
> I prefer to use mobile phones in programming and uploading my codes in arduino because it's handy and easy to carry that's why I put there at the materials used the *ArduinoDroid Application*
ArduinoDroid is a kind of application in mobile phones used for programming codes you've desired to upload in arduino. Click the higlighted word for instant downloading of this application, [ArduinoDroid](http://download.cnet.com/ArduinoDroid-Arduino-IDE/3000-2094_4-76641718.html).
First, start typing your codes.
<center></center>
After you've finished typing, check your compilation by clicking the compile button ☇.
<center>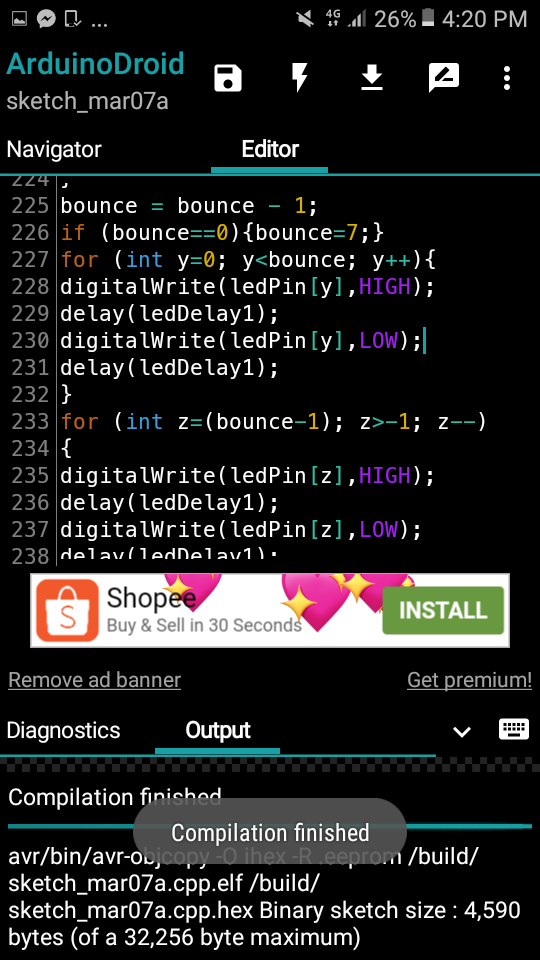</center>
Then, if it doesn't have any error in compiling, start uploading your codes in your arduino board.
<center>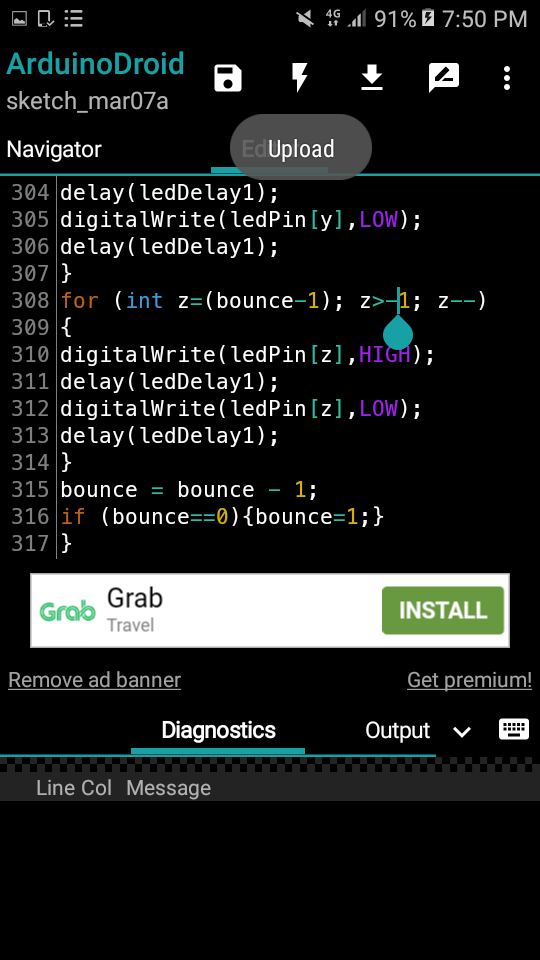</center>
This is the programmed code for my *Running LED Combination*.
```
byte ledPin[] = {4,5,6,7,8,9,10,11,12,13};
unsigned long changeTime;
byte ledPin[] = {4,5,6,7,8,9,10,11,12,13};
unsigned long changeTime;
int bounce = 10;
int BASE = 4 ;
int NUM = 10;
int ledDelay(50);
int ledDelay1(20);
void setup()
{
for (int x=0; x<10; x++){
pinMode (ledPin[x],OUTPUT);
}
changeTime = millis();
for (int i = BASE; i < BASE + NUM; i ++)
{
pinMode(i, OUTPUT);
}
}
void loop()
{
for (int i = BASE; i < BASE + NUM; i ++)
{
digitalWrite(i, HIGH);
delay(ledDelay);
}
for (int i = BASE; i < BASE + NUM; i ++)
{
digitalWrite(i, LOW);
delay(ledDelay);
}
for (int i = BASE + NUM ; i >= BASE; i --)
{
digitalWrite(i, HIGH);
delay(ledDelay);
}
for (int i = BASE + NUM ; i >= BASE; i --)
{
digitalWrite(i, LOW);
delay(ledDelay);
}
for (int i = BASE; i < BASE + NUM; i ++)
{
digitalWrite(i, HIGH);
digitalWrite(i + 1, HIGH);
digitalWrite(i, LOW);
delay(ledDelay);
}
for (int i = BASE + NUM ; i >= BASE; i --)
{
digitalWrite(i, HIGH);
digitalWrite(i - 1, HIGH);
digitalWrite(i, LOW);
delay(ledDelay);
}
for (int i = BASE + NUM; i >= BASE; i --)
{
digitalWrite(i, LOW);
delay(ledDelay*2);
}
int total= BASE*2 + NUM-1;
for (int i = BASE; i < BASE + NUM/2; i ++)
{
digitalWrite(i, HIGH);
digitalWrite(total - i, HIGH);
delay(ledDelay);
digitalWrite(i, LOW);
digitalWrite(total - i, LOW);
}
for (int i = BASE + NUM/2; i >= BASE; i --)
{
digitalWrite(i, HIGH);
digitalWrite(total - i, HIGH);
delay(ledDelay);
digitalWrite(i, LOW);
digitalWrite(total - i, LOW);
}
for (int i = BASE; i < BASE + NUM/2; i ++)
{
digitalWrite(i, HIGH);
digitalWrite(total - i, HIGH);
delay(ledDelay);
}
for (int i = BASE; i < BASE + NUM/2; i ++)
{
digitalWrite(i, LOW);
digitalWrite(total - i, LOW);
delay(ledDelay);
}
for (int i = BASE + NUM/2; i >= BASE; i --)
{
digitalWrite(i, HIGH);
digitalWrite(total - i, HIGH);
delay(ledDelay); // delay
}
for (int i = BASE + NUM/2; i >= BASE; i --)
{
digitalWrite(i, LOW);
digitalWrite(total - i, LOW);
delay(ledDelay);
}
for (int i = BASE; i < BASE + NUM; i ++)
{
digitalWrite(i, HIGH);
}
delay(ledDelay*5);
for (int i = BASE; i < BASE + NUM; i ++)
{
digitalWrite(i, LOW);
}
delay(ledDelay*5);
for (int i = BASE; i < BASE + NUM; i ++)
{
digitalWrite(i, HIGH);
}
delay(ledDelay*5);
for (int i = BASE; i < BASE + NUM; i ++)
{
digitalWrite(i, LOW);
}
delay(ledDelay*5);
for (int i = BASE; i < BASE + NUM; i ++)
{
digitalWrite(i, HIGH);
}
delay(ledDelay*5);
for (int i = BASE; i < BASE + NUM; i ++)
{
digitalWrite(i, LOW);
}
delay(ledDelay*2);
for (int i = BASE; i < BASE + NUM; i ++)
{
digitalWrite(i, HIGH);
}
delay(ledDelay*2);
for (int i = BASE; i < BASE + NUM; i ++)
{
digitalWrite(i, LOW);
}
delay(ledDelay*2);
for(int i=0;i<3;i++){
for (int i = BASE; i < BASE + 2; i ++)
{
digitalWrite(i, HIGH);
digitalWrite(i+2, HIGH);
digitalWrite(i+4, HIGH);
digitalWrite(i+6, HIGH);
digitalWrite(i+8, HIGH);
delay(ledDelay*5);
digitalWrite(i, LOW);
digitalWrite(i+2, LOW);
digitalWrite(i+4, LOW);
digitalWrite(i+6, LOW);
digitalWrite(i+8, LOW);
}
}
delay(ledDelay*5);
for (int y=0; y<bounce; y++){
digitalWrite(ledPin[y],HIGH);
delay(10);
digitalWrite(ledPin[y],LOW);
delay(10);
}
for (int z=(bounce-1); z>-1; z--)
{
digitalWrite(ledPin[z],HIGH);
delay(10);
digitalWrite(ledPin[z],LOW);
delay(10);
}
bounce = bounce - 1;
if (bounce==0){bounce=10;}
for (int y=0; y<bounce; y++){
digitalWrite(ledPin[y],HIGH);
delay(ledDelay1);
digitalWrite(ledPin[y],LOW);
delay(ledDelay1);
}
for (int z=(bounce-1); z>-1; z--)
{
digitalWrite(ledPin[z],HIGH);
delay(ledDelay1);
digitalWrite(ledPin[z],LOW);
delay(ledDelay1);
}
bounce = bounce - 1;
if (bounce==0){bounce=9;}
for (int y=0; y<bounce; y++){
digitalWrite(ledPin[y],HIGH);
delay(ledDelay1);
digitalWrite(ledPin[y],LOW);
delay(ledDelay1);
}
for (int z=(bounce-1); z>-1; z--)
{
digitalWrite(ledPin[z],HIGH);
delay(ledDelay1);
digitalWrite(ledPin[z],LOW);
delay(ledDelay1);
}
bounce = bounce - 1;
if (bounce==0){bounce=8;}
for (int y=0; y<bounce; y++){
digitalWrite(ledPin[y],HIGH);
delay(ledDelay1);
digitalWrite(ledPin[y],LOW);
delay(ledDelay1);
}
for (int z=(bounce-1); z>-1; z--)
{
digitalWrite(ledPin[z],HIGH);
delay(ledDelay1);
digitalWrite(ledPin[z],LOW);
delay(ledDelay1);
}
bounce = bounce - 1;
if (bounce==0){bounce=7;}
for (int y=0; y<bounce; y++){
digitalWrite(ledPin[y],HIGH);
delay(ledDelay1);
digitalWrite(ledPin[y],LOW);
delay(ledDelay1);
}
for (int z=(bounce-1); z>-1; z--)
{
digitalWrite(ledPin[z],HIGH);
delay(ledDelay1);
digitalWrite(ledPin[z],LOW);
delay(ledDelay1);
}
bounce = bounce - 1;
if (bounce==0){bounce=6;}
for (int y=0; y<bounce; y++){
digitalWrite(ledPin[y],HIGH);
delay(ledDelay1);
digitalWrite(ledPin[y],LOW);
delay(ledDelay1);
}
for (int z=(bounce-1); z>-1; z--)
{
digitalWrite(ledPin[z],HIGH);
delay(ledDelay1);
digitalWrite(ledPin[z],LOW);
delay(ledDelay1);
}
bounce = bounce - 1;
if (bounce==0){bounce=5;}
for (int y=0; y<bounce; y++){
digitalWrite(ledPin[y],HIGH);
delay(ledDelay1);
digitalWrite(ledPin[y],LOW);
delay(ledDelay1);
}
for (int z=(bounce-1); z>-1; z--)
{
digitalWrite(ledPin[z],HIGH);
delay(ledDelay1);
digitalWrite(ledPin[z],LOW);
delay(ledDelay1);
}
bounce = bounce - 1;
if (bounce==0){bounce=1;}
}
```
### Part III.
> Let us proceed to the last part of the tutorial which is actual application of the said project.
First, gather all your components needed.
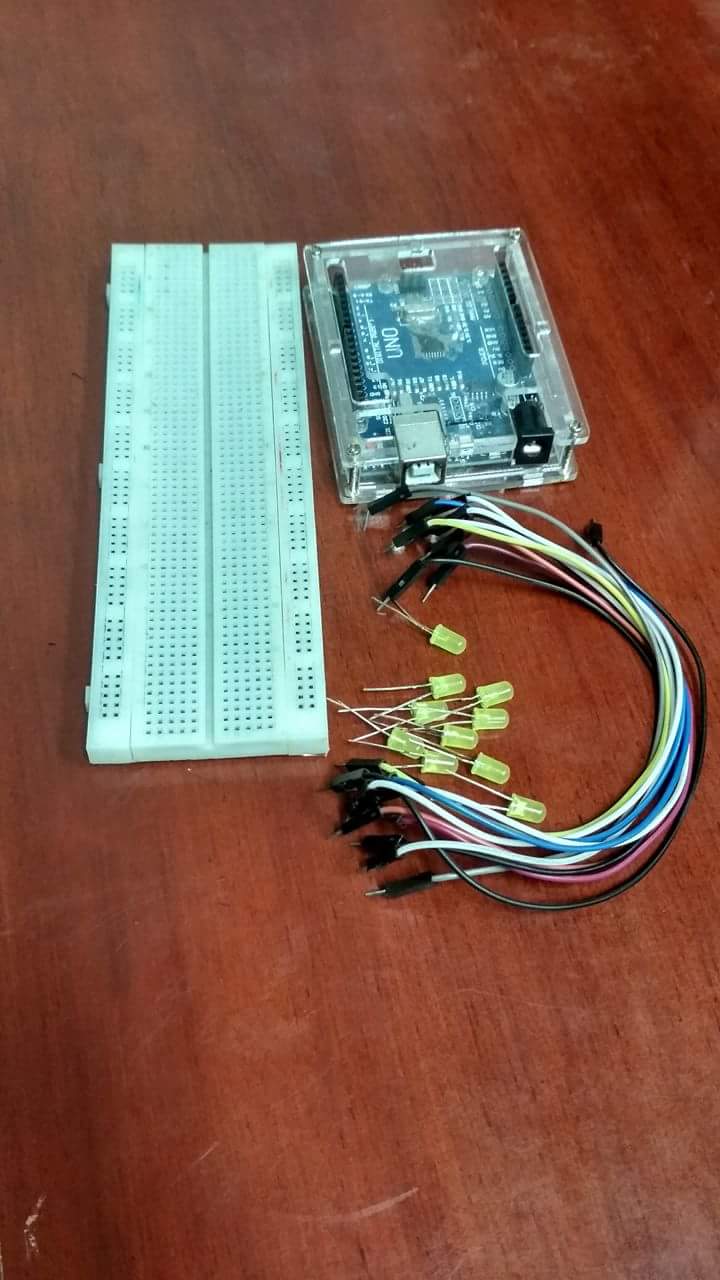
Next, start designing it in your breadboard.
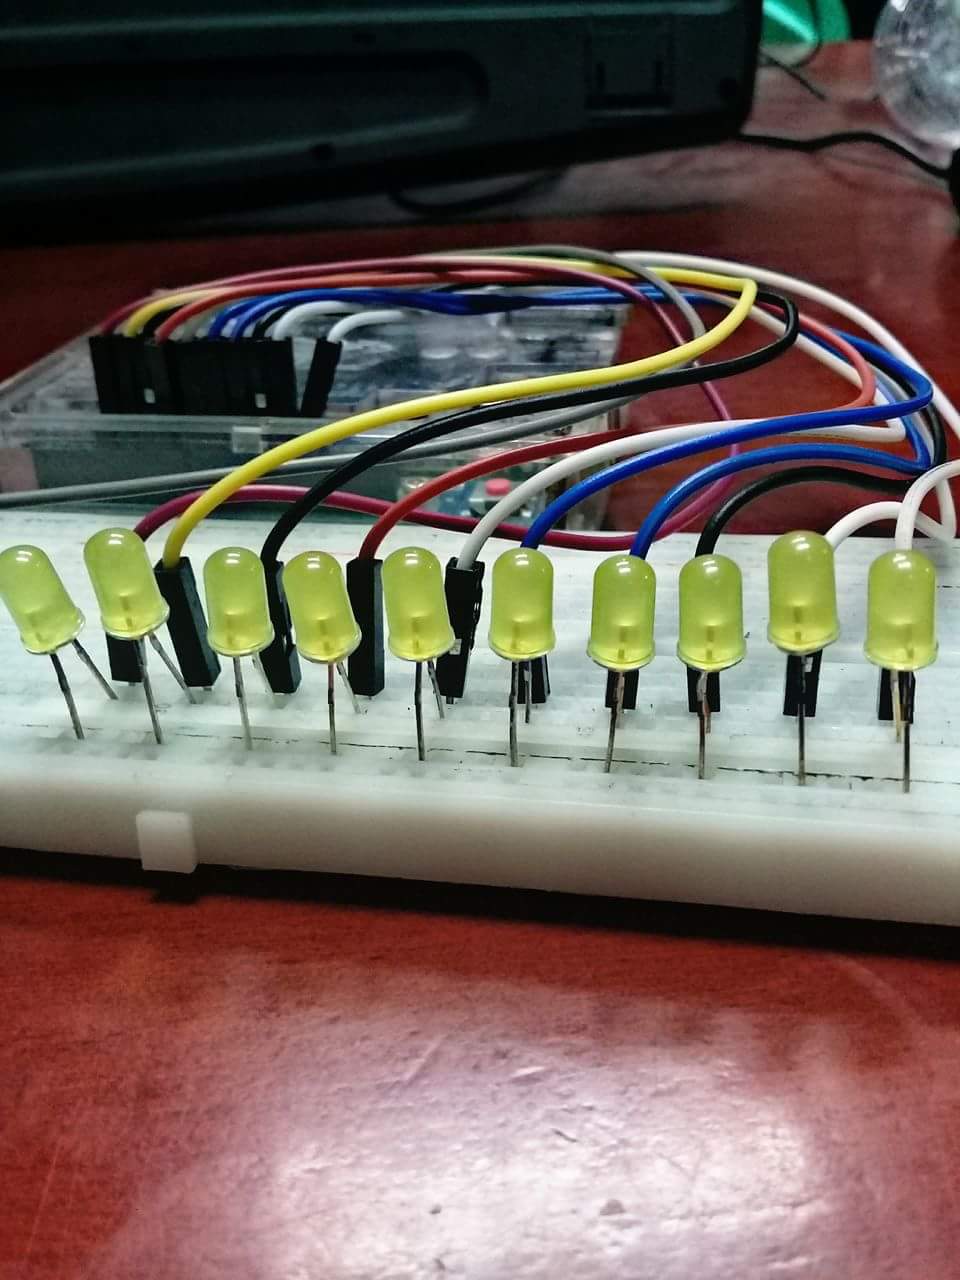
Lastly, test your circuit if it already functional.

To be creative, I get a video of my project in order to show you the operation of my tutorial.
<iframe width="560" height="315" src="https://www.youtube.com/embed/WNuqCaPL-zg" frameborder="0" allow="autoplay; encrypted-media" allowfullscreen></iframe>
#### Curriculum
This is just my first appearance in this community. I hope you will gain knowledge from my tutorial.
<br /><hr/><em>Posted on <a href="https://utopian.io/utopian-io/@morbyjohn/arduino-basic-programming-running-lights-combination">Utopian.io - Rewarding Open Source Contributors</a></em><hr/>