In [[Part 2]](https://steemit.com/craftcms/@sasha.shade/part-2-building-a-website-in-craft-cms-an-introduction-what-s-twig-routes-and-live-preview) we covered some of the basics of using the **Twig** template engine, setting up advanced routes, and of course the eye candy **Live Preview**.
In [[Part 1]](https://steemit.com/craftcms/@sasha.shade/part-1-building-a-website-in-craft-cms-an-introduction-lets-talk-legos) we went over the very basics of Craft CMS, what it is, pricing, sections, assets, globals, entry-types, fields, and field-groups.
In [Part 3] we will help you get the installation of **Craft** going, and from here on out we're building a site together using this amazing platform. Are you as excited as I am? Probably not, but I know at least a few of you are and that makes it all worth it!
# Initial Installation & Setup
## Download The Require Files
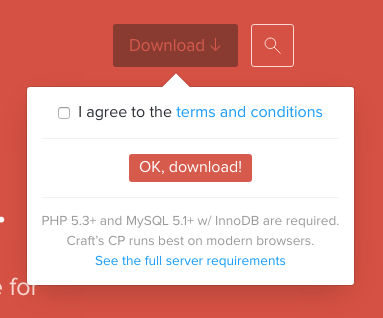
Step 1 of course is to download the required files from [Craft](http://buildwithcraft.com). You'll see a big button at the top right of the screen that literally says **Download**.

Once you click the download button, you'll need to agree to the terms and conditions *please read them don't just accept, lets get out of that habit shall we people?* and then click an additional button **OK, download!**
Ok your files have downloaded. That's fantastic!
## Requirements
So before we go any further, there of course **are** some system requirements to run this platform. Here they are:
* PHP 5.3.0 or later with safe mode disabled (I recommend PHP 5.7+)
* MySQL 5.1.0 or later, with the InnoDB storage engine installed (MariaDB works just as well)
* A web server (Apache, Nginx, IIS) - My personal preference is Apache, call me old fashioned.
* A minimum of 32MB of memory allocated to PHP (better to have 64-128)
* A minimum of 20MB of free disk space (come on folks, give it at least 500MB)
* A minimum of 1MB of database space (Clearly you're going to need more if the site you're building has a lot of content).
### As per the official documentation you'll also need the following *PHP Extensions* enabled for craft to function properly:
* [**Reflection Extension**](http://php.net/manual/en/class.reflectionextension.php)
* [**PCRE Extension**](http://php.net/manual/en/book.pcre.php)
* [**SPL Extension**](http://php.net/manual/en/book.spl.php)
* [**PDO Extension**](http://php.net/manual/en/book.pdo.php)
* [**PDO MySQL Extension**](http://php.net/manual/en/ref.pdo-mysql.php)
* [**Mcrypt Extension**](http://php.net/manual/en/book.mcrypt.php)
* [**GD Extension with FreeType Support (unless ImageMagick Extension is installed)**](http://php.net/manual/en/book.image.php)
* [**OpenSSL Extension**](http://php.net/manual/en/book.openssl.php)
* [**Multibyte String Extension**](http://php.net/manual/en/book.mbstring.php)
* [**JSON Extension**](https://php.net/manual/en/book.json.php)
* [**cURL**](http://us1.php.net/manual/en/book.curl.php)
* [**crypt() with BLOWFISH_CRYPT enabled**](http://us1.php.net/manual/en/function.crypt.php)
### As per the official documentation you'll also need the following *MySQL User Privileges* enabled as well for craft to function properly:
* `SELECT`
* `INSERT`
* `DELETE`
* `UPDATE`
* `CREATE`
* `ALTER`
* `INDEX`
* `DROP`
* `REFERENCES`
#### If you do not know if your server has all of the requirements enabled, you can go ahead and attempt to install Craft and the installer will notify you of any hiccups it encounters along the way. Most standard web servers meet these minimum requirements.
## Installation
Now that you've downloaded the files and checked to make sure that your server meets the minimum requirements, it's time to install! In the *zip* file that you downloaded you'll notice there are 2 top directories: **craft** and **public**.
### The *craft* directory
This folder contains the entire **Craft** application, the templates directory, the plugins directory, and pretty much everything else that makes craft run.
If you've used other content management systems in the past then you are probably used to dumping everything into the **root directory**, on a typical **cPanel** web hosting setup for instance you'd put all the files into the **public_html** folder. This is ***NOT*** the case with Craft. You can do that, but it's not advisable.
Craft assumes that the people using it are a bit smarter than other platforms, and it's true, **you are**! By default Craft expects you to place the **craft** folder ***ABOVE** the *web root* for security purposes. That means on a typical **cPanel** web hosting setup for instance, you will put the **craft** folder outside of **public_html** as a sibling of **public_html**.
You can move it anywhere on your server of course with a very simple setting, but you'll need to update the **index.php** file that is originally in the **content** folder. To put it above **public_html** for instance instead of as a sibling, you'd change the following:
`$craftPath = '../craft';`
to this
`$craftPath = '../../craft';`
If for some reason you refused to put the craft application above the web root and wanted to place it inside of the **public_html** folder for instance, then you'd instead change that line to this:
`$craftPath = './craft';`
You can also of course rename the folder to something else for additional security, just make sure that if you do that you update the `craftPath` variable accordingly.
### The *content* directory
Inside the content folder there are several files:
* **index.php** - The file we discussed earlier where the `craftPath` variable is set. This file is the only **required** file from this folder.
* **htaccess** - This is the file that will contain any server specific rules you need to set such as increasing the memory limit, removing index.php from URL's, etc. It already contains the rules to remove index.php from urls on Apache servers by directing all traffic to the index.php file behind the scenes. **NOTE:** You must rename this file **.htaccess** for it to work, yes that is a period right before the rest of the file. You may not want to rename it until it has already been uploaded to the server as on some platforms adding a period before a file forces it to become a **hidden** file.
* **web.config** - This is the ISS equivalent of the .htaccess file, unless you are on that type of server this file is not necessary.
* **robots.txt** - Here is the standard robots.txt file that includes information for robots that spider your site. If you did not put the **craft** folder above the web root you can prevent search engines from indexing it by setting the rules here.
All of these files should be put directly inside the **web root** of your site. If you are on a standard **cPanel** web hosting setup, that means that these files go inside **public_html**.
## Filesystem Permissions
Once you have uploaded all of these files into the proper directories, you need to set the permissions to make sure that **craft** can run the necessary commands on the filesystem without failing. Lets do that now.
Using your FTP client or File Manager, change the permissions of the following folders to **744** to enable craft to write to the folders:
* **craft/app/**
* **craft/config/**
* **craft/storage/**
If for any reasons these permissions do not work due to the relationship of the system user PHP is running as and the owners of the folders/files you can always set the permissions to **777** but please note that is not secure and you should instead figure out the proper relationship or configure it so that **744** is sufficient.
## Database
Now that we have all of that setup, we need to create our database and connect it to **Craft**. Create your database through phmyadmin or any other method comfortable to you, the recommended *charset* is **utf8** and the recommended default collation is **utf8_unicode_ci** if your project has different requirements then use those instead.
Once your database has been created open the file **/craft/config/db.php** and edit the following credentials to match your database credentials:
* **Server** - The location of your database server in relation to your filesystem. If they are on the same server this will usually be either `localhost` or `127.0.0.1`.
* **User** - The username that has been granted permissions to access the database you created earlier.
* **Password** - The password for the username that has been granted permissions to access the database you created earlier.
* **Database** - The name of the database
* **tablePrefix** - This can be left alone, by default it is set to `craft`to identify any tables in the database that are for the **craft** application in case you are sharing the database with other applications.
## Install!
Alright we are finally ready to run the installer! Go to `http://yourwebsite.com/admin` if you see the following image then you've followed all of the above instructions correctly and you're ready to roll!

### If for any reason you do *NOT* see this image, then something went wrong in the above steps.
The most common issue is a misconfigured **.htaccess** file. Try going to `http://yourwebsite.com/index.php/admin` or `http://yourwebsite.com/index.php?p=admin`. If either of these worked then revisit your **.htaccess** or **web.config** files and update the settings there to properly direct pages to the **index.php** file.
If instead you are getting an error that Craft can not connect to the database then go back to the **craft/config/db.php** file and make sure all of your settings are correct and make any necessary edits.
### Success
Assuming you did not have any problems and you did see the above image, go ahead and click **Begin**. You will be taken through the setup process step by step to create your Admin account, Name your site, Set the Site URL, and select the default language for the site. Note that you can always add additional languages to your site, but select the primary language during the install to avoid extra work later.
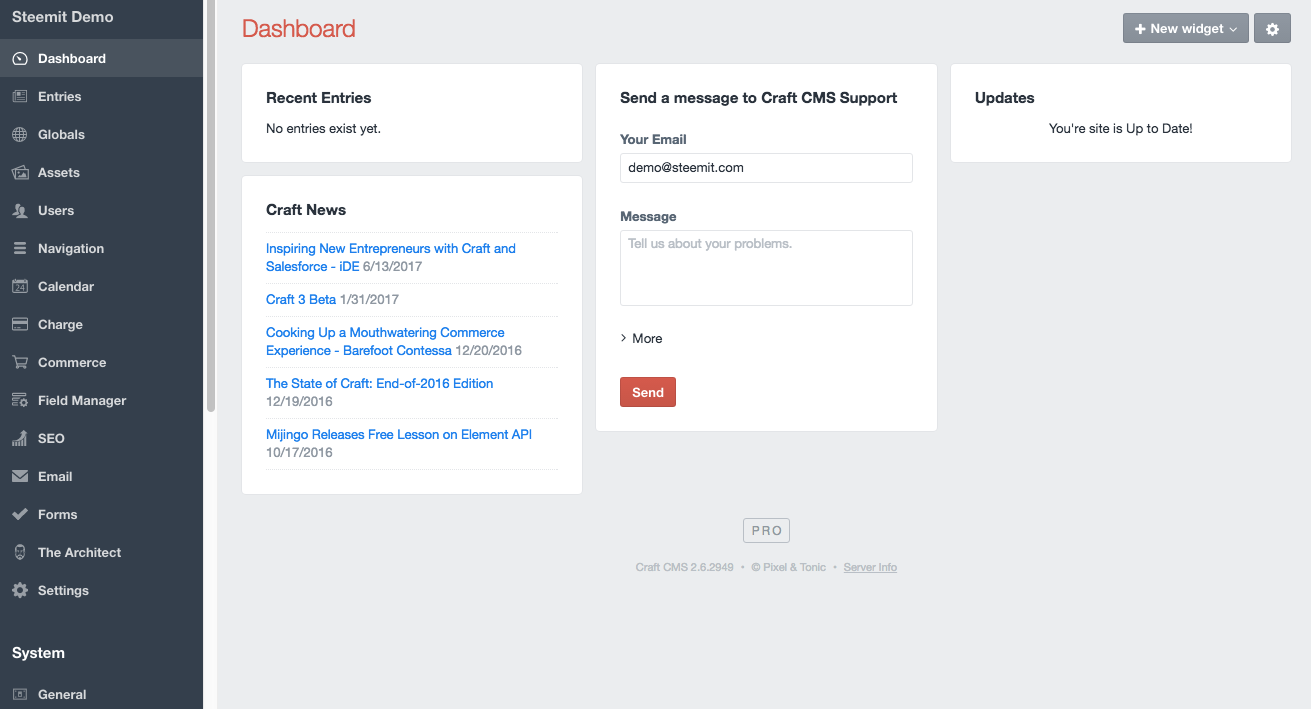
After you have completed all of the necessary fields Craft will run the installer and create all the database tables. You'll then be able to **Go to Craft** to visit your control panel for the very first time.
# Delete Example Content
After a fresh install there is some example content setup to help you along your way. I usually delete all of this right away because, to be frank, it's not at all how I plan to build the site. You are free to leave this content and attempt to learn from it, or if you plan on continuing to follow this series, lets go ahead and delete it all so we have a completely clean install.
## Deleting Content in the Control Panel
* Navigate to **System** -> **Fields** and delete the **Body** and **Tags** fields.
* Navigate to **System** -> **Sections** and delete the section **News*
* Navigate to **System** -> **Sections** and open the **Homepage Single Section** and delete make sure the **FieldGroup Layout** is blank.
### Deleting the Default Templates & Creating Your Own.
#### Creating Your Base Templates
Navigate to **craft/templates/** and create the following files and folders:
* `_layouts/`
* `_layouts/_master.twig`
* Create your master wrapper here. Set the `doctype` open and close the `html` `head` and `body` tags and set the base block directly inside the `<body> </body>` tags like so:
```
<!DOCTYPE html>
<html>
<head>
</head>
<body>
{% block main %}
Default content to show if there is no override
set in an extended template.
{% endblock %}
</body>
</html>
```
**NOTE:** The name **main** has no special meaning, however that is what we are using for our primary container block, if you plan on following along in this series further, make sure you use **main** but know that you could name it anything including **playdoh** and it would work just the same assuming everywhere else it is referenced with the same name.
* `index.twig`
* Extend the `_layouts/_master.twig` template here so that it is wrapped by that template and all content here goes inside of that template like so:
```
{% extends "_layouts/_master" %}
{% block main%}
All content here overrides content inside this block in _layouts/_master
{% endblock %}
```
* `404.twig`
* Extend the `_layouts/_master.twig` template here so that it is wrapped by that template and all content here goes inside of that template like so:
```
{% extends "_layouts/_master" %}
{% set title = "404" %}
{% block main%}
<h1>Page not found</h1>
<p>What’s worse, a hilarious 404 page can’t be found either.</p>
{% endblock %}
```
#### Deleting the Default Installed Templates
* Navigate to **craft/templates/** and delete the **news** folder.
* Navigate to **craft/templates/** and delete the **_layout.html** file.
* Navigate to **craft/templates/** and delete the **index.html** file.
* Navigate to **craft/templates/** and delete the **404.html** file.
#### Now we have a completely fresh install. In the next article in the series we'll take a look at some key plugins we may want to go ahead and install, explore how they work, and keep laying the initial foundation of what is sure to be an amazing site!
## I HOPE YOU ENJOYED & LEARNED SOMETHING!
As always If you've reached it to the end of the article, given it's not particularly short, I'm going to assume that you enjoyed reading it. Please go ahead and **UPVOTE** the post, **RESTEEM** if you think your followers would also find value in it, and make sure to [@FOLLOW ME](https://steemit.com/@sasha.shade) to make sure you don't miss the upcoming articles in this series where we'll get much more in depth and even build a site together from the ground up! ***EXCITING TIMES!***
Thanks to all of my followers both new and old, I hope to continue to bring you quality content that interest you, feel free to comment any requests for any particular topic you'd like to read or learn about if you believe I may be able to answer it for you. Cheers!