# Whenever you buy a new Graphics card, most people run them at stock settings, but there is always room for improvement.
##### Most reference graphics cards come with a very conservative clock setting on both the memory and core, with a mediocre fan curve to compensate for the heat the card produce. What most people fail to realize is there can be between 10 – 25% performance to be gained out of almost any GPU. So if you are a gamer who wants a higher frame rate or a miner who wants to get a higher hash rate, there is a quick and easy solution to help you out.
##### [MSI Afterburner](https://www.msi.com/page/afterburner) is **_the_** best universal tool for squeezing as much performance out of your GPU as possible. Not only is it a very good utility, but is also Free to use, very safe for the hardware and very easy to use. Even though this program is made by MSI it will work with AMD and Nvidia, even older ATI cards, as well as any vendors such as Sapphire, Gigabyte, ASUS, EVGA, Powercolor among others.


## Download and Install.
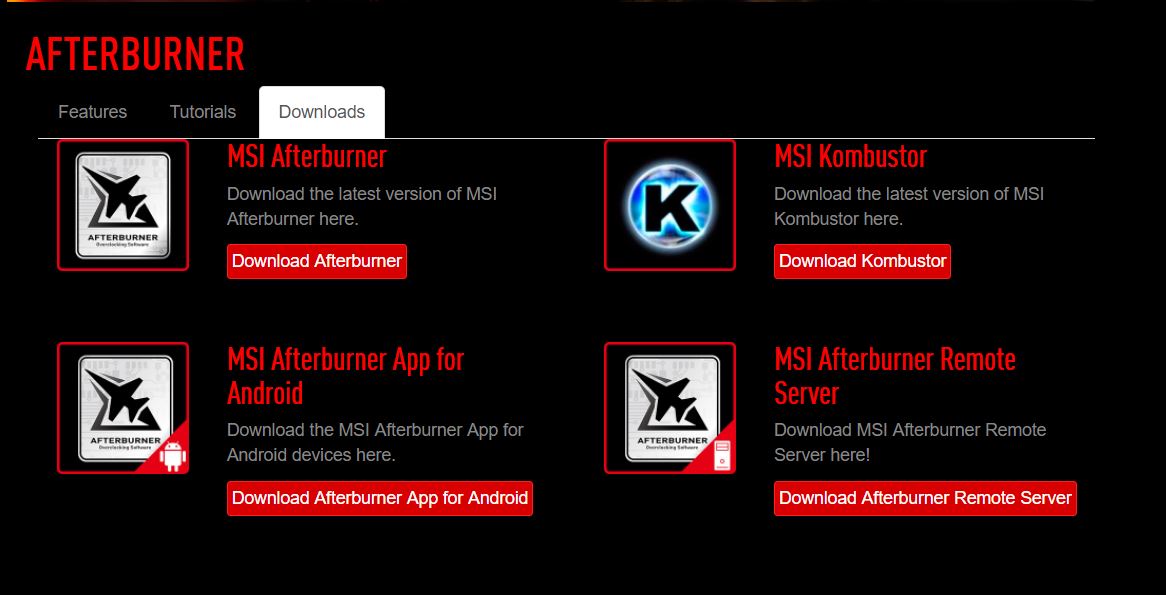
You can download the [MSI Afterburner Software from HERE](https://www.msi.com/page/afterburner).
It will download as a .zip file type. You will need to either extract or open the file and then double click on the installation executable file inside. During the instillation, you will be asked if you want to install Riva Tuner Statistics Server, for the purposes of this guide, it is not needed, so make sure it is unchecked.

## the User Interface Explained.
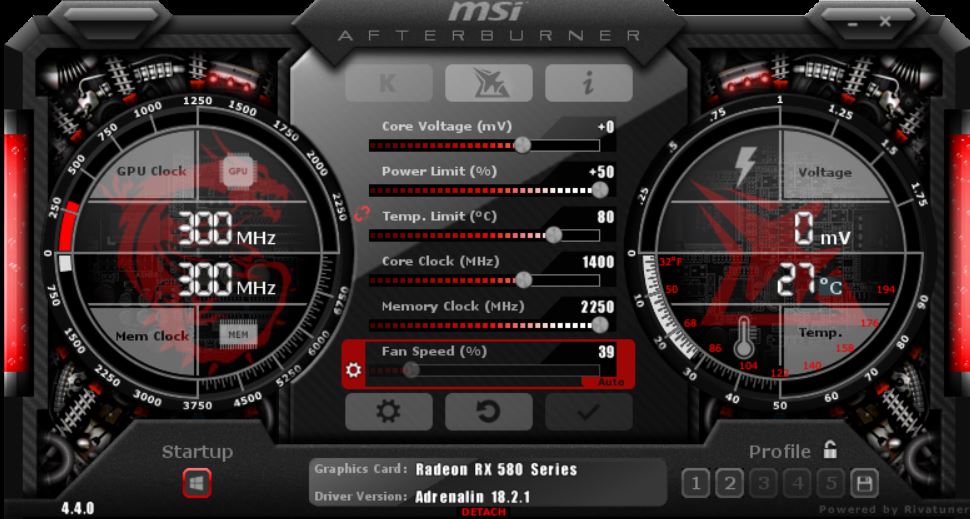
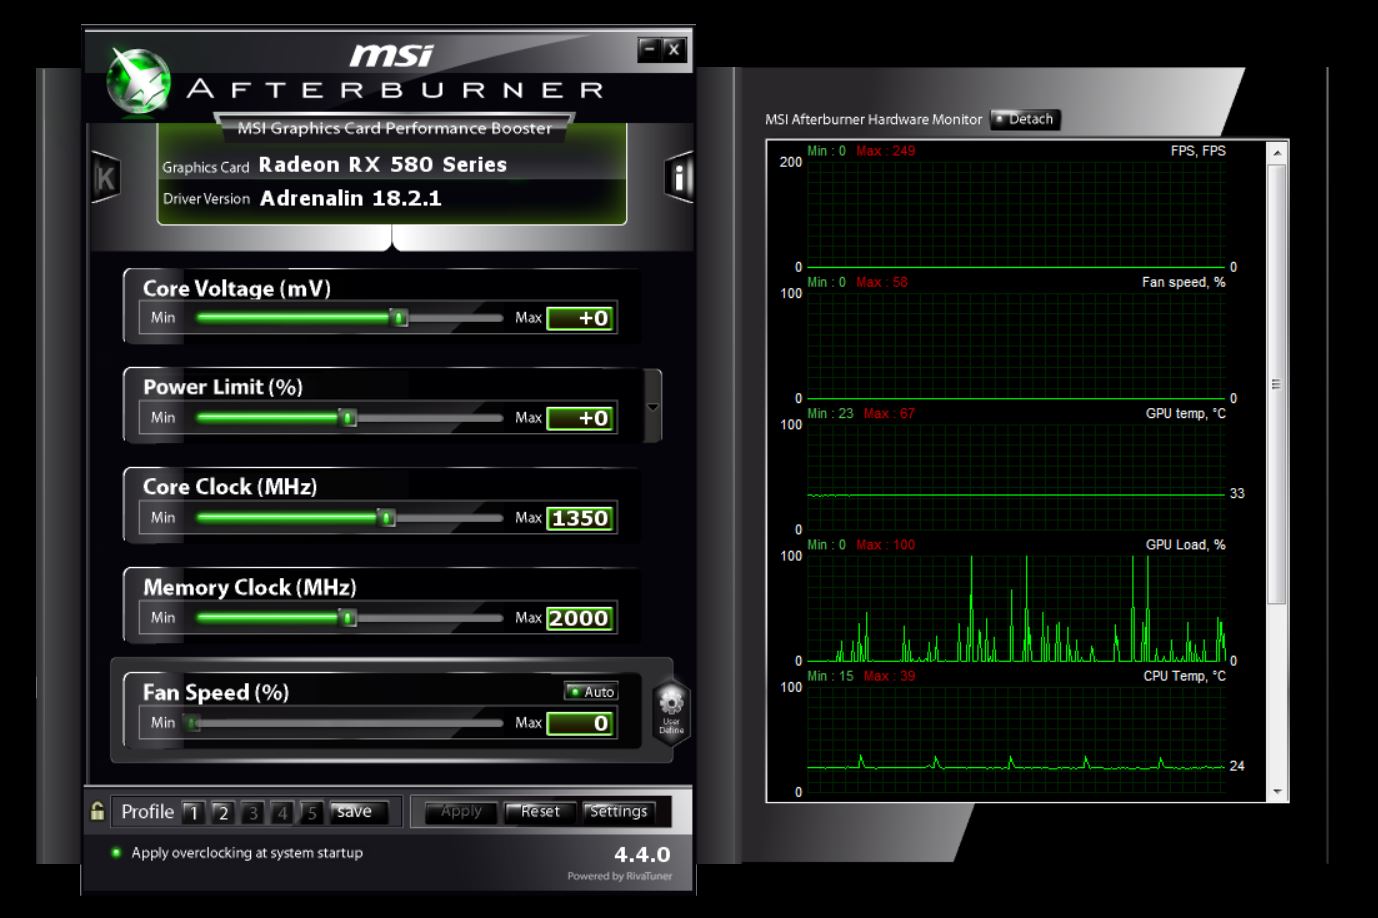
Although the interface looks complicated, it is in fact very user friendly. The stock skin that you see is split into 2 sections. On the left you have information about the Graphics card you have along with the current drivers. Under that you have several slider, Core voltage, Power limit, Core Clock, Memory Clock and Fan Speed. Some may be disabled depending on which GPU you have. Usually it is Core Voltage (which is disabled by default) and Power limit on older cards. Just under that, there is a profile save/load tool with settings too.
On the right is where you can monitor everything from Frame rate, to temperature to memory load and even CPU load. We will get into that later on.

## Settings.
On the left hand portion of the interface, at the bottom, go ahead and open the settings tab. In here you will find several tabs, but the only ones you need to pay attention too are the General, Fan and Monitoring tabs.
##### General.
- Under the General Tab, there is several check boxes and drop down menus. I always make sure that the 'Start With Windows' and 'Start 'Minimized' are checked under ''General Properties'' as this will apply the last profile set in the software so you will not have to go back in and adjust anything if you were happy with your overclock.
If you are running multiple graphics cards that are identical, (2 AMD RX 580's for example) check the 'Synchronise settings for similar graphics processors', so the same profile can be applied to all the GPU's that are the same. This is ideal for miners running more GPU's per mining rig, but also good for gamers who run an SLI or crossfire configuration.
Other options I make sure I have checked are 'Unlock Voltage Control', the drop box next to this option is so you can select what type of GPU you are running, if that be a reference card, MSI branded one or third party for a different vendor card. Mine is a PowerColor RX 580 so I have Third Party selected here.

_______
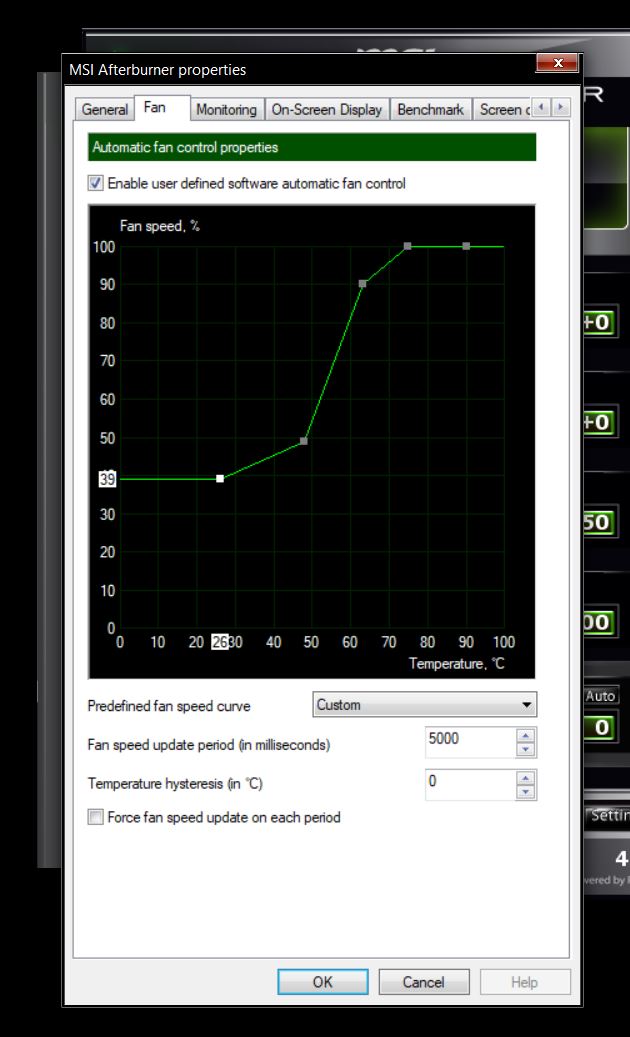
##### Fan.
- Under the Fan Tab, you will only see one check box. So ahead and check it. This will allow you to put in your own fan curve for your fans.
Along the left of the graph is fan speed, and along the bottom is temperature. Now stock fan curves are fairly weak with the fan speed not going past 60%, which is good for the stock settings the card comes with, but if you are planning on overclocking, you will need a more aggressive fan curve to compensate for the additional heat. As you can see from my fan curve, I have it so the fan speed ramps up between 50 and 60*, this is to help keep the temps stable. Yes it is a little loud, but I run with a headset most of the time so I don't notice the extra noise.
_______
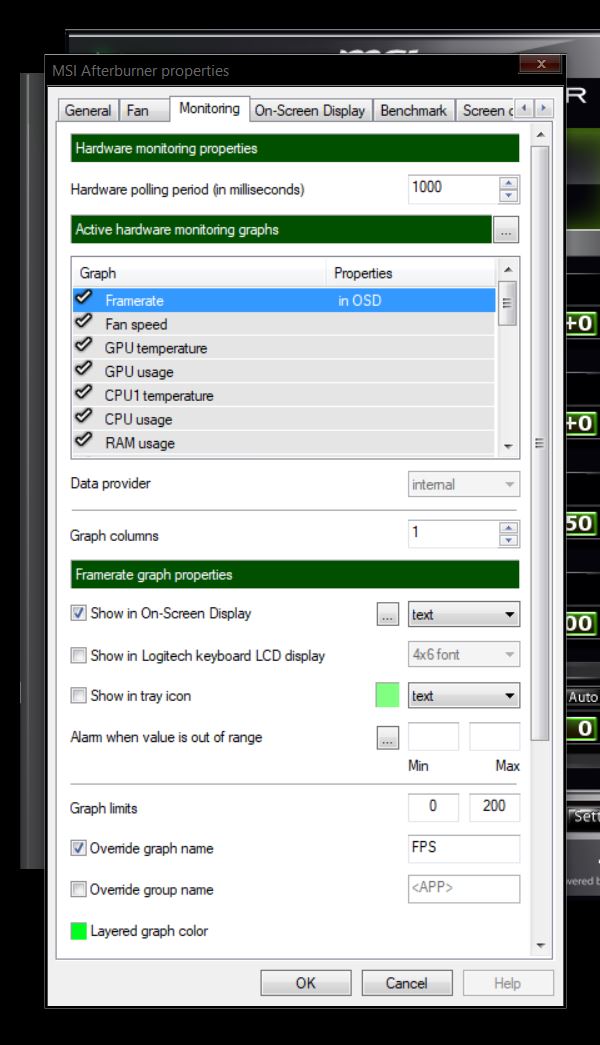
##### Monitoring.
- Being able to monitor what your system is doing is key when overclocking. Under the monitoring tab, you will see 'Active hardware monitoring graphs', such as fan speed, temperatures, usage and so on. Here you can click and drag the individual graphs so they appear in the order you want. You will also see a ''tick'' next to them. Unchecking these will remove them from the graph monitoring on the right of the User Interface.
If you want to monitor specific graphs while in game, highlight the graph name by clicking on it once and then check 'Show in On-Screen Display' box. You will now see an overlay in the corner when you are gaming. Miners do not need to bother with this.

## Overclocking for Gaming.
Gamers are all about quality and frame rate, and as said, you can gain anything from a 10 – 25% performance increase in game when overclocking correctly. Don't worry about causing any damage to your card. You wont. If your card gets too hot, it will throttle and lower its clock speed automatically to lower the temperature, and if you see artefacts across your screen, again don't worry, this is just the memory not processing the information fast enough for the increased clock speed. Just lower them down until it is stable.
There are only really 3 sliders you need to adjust if you are gaming, with your fan curve being adjusted after to compensate for the increase in heat from your GPU.
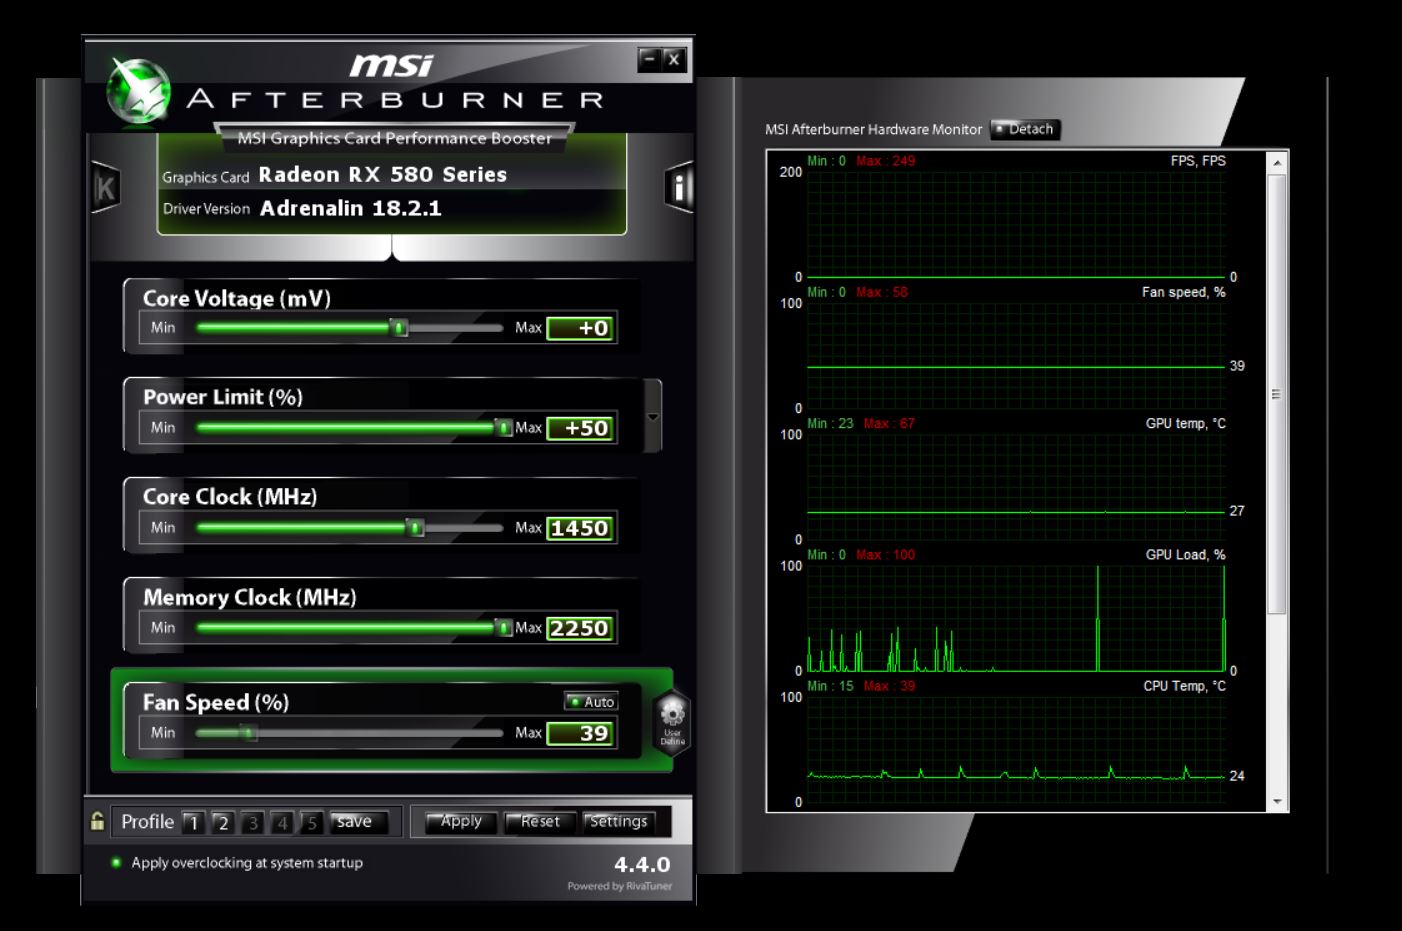
- On my card in particular, will allow me to adjust the Power Limit by 50%. so I increase this to the max, to allow the card to use more power if needed to compensate for the increase in clock speeds.
- Next is the Core Clock. Afterburner has some built in safeguards (if you haven't disabled them in the options) that don't allow you to overclock more than the card is capable. Despite this though. I only ever recommend you adjust this in small increments of 10-20Mhz at a time. Benchmarking in-between adjustments to make sure it is stable. I tend to use [Unigine Superposition](https://benchmark.unigine.com/superposition) as it will put your GPU under heavy load.
- Next would be the Memory Clock. Just like the Core Clock, it also has safeguards put in place, and you should only ever adjust in 10-20Mhz at a time. My stock speed on the RX 580 is set at 2000 Mhz, for gaming I have it set to 2250Mhz as you can see in the image.
Don't forget to apply each adjustment by clicking the ''Apply'' button at the bottom of the interface on the left side.
If you do notice your GPU's temperature climbing beyond what its operating temperature is, then you should adjust your fans, fan curve to a more aggressive one, under the Fan Tab in the settings.

## Overclocking / Underclocking for Miners.
Miners have a few more things to adjust and select compared to gamers. Memory clock speeds are the only thing that really matter in mining, with core being secondary.
You will have to go back into the settings and under the 'General' tab you will need to check ''Unlock Voltage Control'' and ''Extend official Overclocking Limits''. Once you have done that, you can begin adjusting.
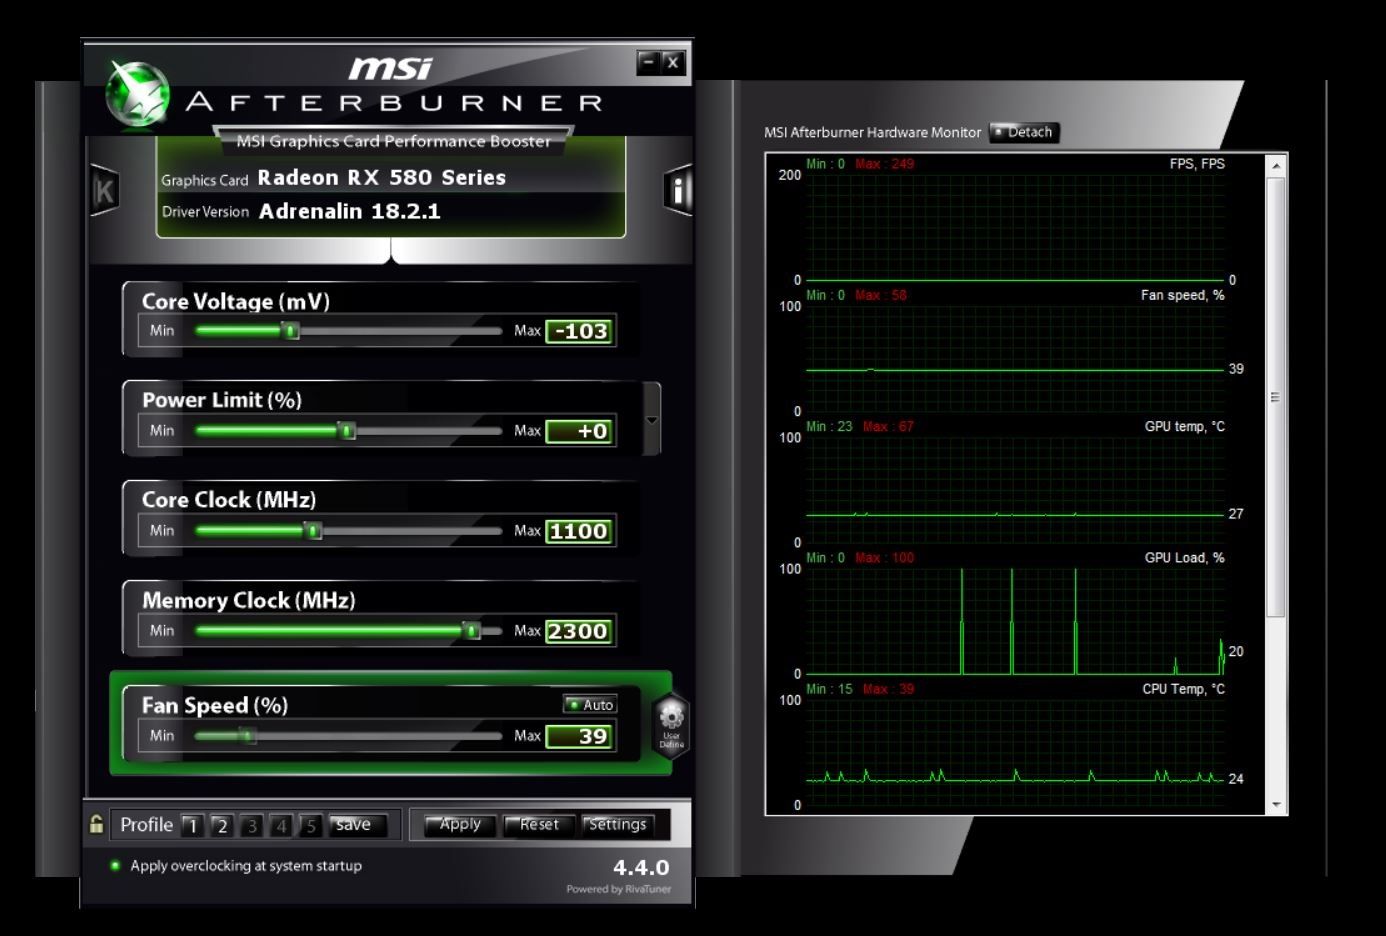
- First and fore most, you should start by adjusting your memory clock speed. Just like you would with gaming, only ever adjust it 10 – 20Mhz at a time. You should be more cautious, as you have removed the overclocking limits, so you can go beyond what is safe for your card. To test if your adjustments are working, make sure your mining software is running. If you go too high on your memory overclocking, you will notice your hashing speed will fall dramatically. With the safeguards removed on my RX 580 I can go beyond the 2250Mhz and go up to 2300Mhz. But if I go beyond this number, my hashing power drops like a turd. So I keep it around there.
- Next thing to adjust is the core clock. It isn't as essential as the memory, but if you drop the core clock too much, it will be just as if you overclocked your memory too much. Your hash rate will drop. Again. Only 10 – 20Mhz increments at a time, applying after each adjustment. My stock is around the 1350Mhz range, but I can safely drop it to 1100Mhz with no ill effects.
- Finally is the Core Voltage. This is disabled by default for a reason, if you over volt, you could damage your GPU. Fortunately though, we are undervolting, so we should not see any ill effects, just be cautious and only ever adjust in tiny 2-5mV at a time. If you under volt too much, you will see a very gradual drop off in your hash rate, so just keep an eye out for it. On my card, I can safely under volt up to -125mV, but to be on the safe side, I keep it at around -100mV.
The Main reason Miners under volt and under clock the core is to keep the heat under control. Miners cards are running non stop at full pelt 24/7 and this will undoubtedly create a lot of heat. If the GPUs get too hot, they could impact the hashing power and ultimately damage the GPU's, so this is one way to control the heat. Well, take a few degrees off.
Which brings me into the fan speed. If you do notice the heat getting too much. Just ramp up the speed of your fans under the 'Fan' tab in the settings.

So after you have made your adjustments and your PC hasn't ran away with your girlfriend because you have tortured it so much, you will notice the performance increase straight away in your favourite games and with your favourite miner software.
It is just a quick and easy guide to help you get the full potential out of your graphics cards. After all, you spent the money on it, so you may as well get your monies worth from it eh?
Thanks for reading.

> # Make Steemit Work For You! [Join SmartSteem NOW!... Click HERE to Find Out More!]( https://smartsteem.com?r=techmojo)
>_______________
## Don't Forget to Upvote, ReSteem and Follow for more content like this!

____
##### Stu @TechMojo
___
> | Join the chat | [TechMojo Discord Channel](https://discord.gg/CXYxhY) |
> | :-----------: | :--------------------------------------: |
> | **Follow us** | **[TechMojo OnG Social Page](https://ong.social/TechMojo)** |
> | **Like us** | **[TechMojo Facebook Page](https://www.facebook.com/OfficialTechMojo/)** |
> | **Follow us** | **[TechMojo Twitter](https://twitter.com/Tech_Mojo)** |
____
#### @TechMojo Recommended Blogs you should follow.
___
> | @Deeviras | @Gaming-Stuff | @retro-room |
> | :----------------: | :------------------: | :-------------------: |
> | **@gamesociety** | **@Rerez** | **@C0ff33a** |
> | **@Free999Enigma** | **@deadspace** | **@SteemGC** |
> | **@GeekClub** | **@XR-HammerGaming** | **@tygergamer** |
> If you want to apper here, then contact us via our [Discord Channel!]( https://discord.gg/CXYxhY)
____________
### **Like this Content? Why Not Donate Then.**
> | Bitcoin Wallet Address. | 1L8TZDQasoBU2RNcjkSeZX3iUsSaHT37aj |
> | ---------------------------- | ---------------------------------------- |
> | **Ethereum Wallet Address.** | **0xe3c6372121554f73c38acae3312fc7b1ddaf670f** |