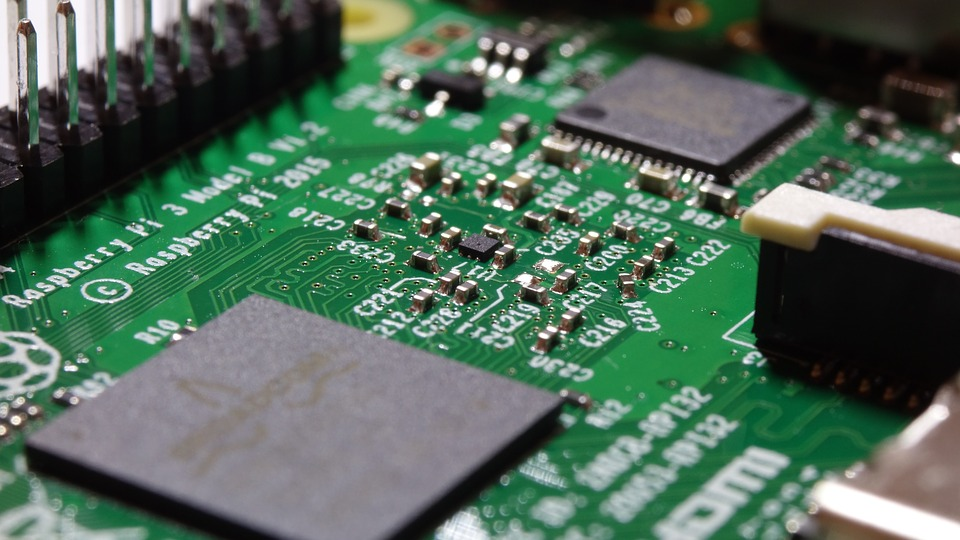
 If you read some of my recent posts I have been showing some really pretty charts like this as a result of my testing with the Pi 4.  I didn't create these charts myself, I used a utility called [Stressberry](https://github.com/nschloe/stressberry) which is really easy to use and allows you to graph the results of your test. You can even combine the results of your test as I did above. I'll walk you through the basics of using Stressberry and testing your own Raspberry Pi under different conditions. # How to install Stressberry Installation is simple but you do need to have Python installed. I recommend Python 3 because I'm so done seeing Python 2 around. First, install the Linux package **Stress*. `sudo apt install stress` Then install the Python package **Stressberry** `pip install stressberry` That's it! --- # Using Stressberry Using Stressberry is a two step process. You first run a stress test that outputs a data file. You then use the plotting tool to create a chart with your results. You can use the results from multiple tests to combine them in a chart like the one you see at the beginning of this post. In the simplest form, you can run these two commands to stress and plot. ``` stressberry-run out.dat MPLBACKEND=Agg stressberry-plot out.dat -o out.png ``` If you want to plot multiple tests at once, just add them as a plot argument. ``` MPLBACKEND=Agg stressberry-plot test1.dat test2.out test3.out -o alltests.png ``` Super easy, but there are a few arguments you might be interested in. --- #### Stress Arguments ### Name - `-n` I recommend this argument so you can have a label on your chart and keep track of which test is which. ### Duration - `-d` This option will set how long the test will be run in seconds. I recommend 1800 so you can do a standard 30-minute test. ### Idle - `-i` This argument sets how long the run idles before and after the test. I recommend 300 (5-minutes). ### Cores - `-c` This specifies how many cores to use, on the Raspberry Pi you want to set this to 4. ### Putting it together Stressberry will not be in your path so you will need to run `/home/pi/.local/bin/stressberry-run` `/home/pi/.local/bin/stressberry-run -n "case" -d 1800 -i 300 -c 4 case.out` --- #### Plot Arguments ### Display Frequency - `-f` This will output the frequency of your CPU, this is needed if you want to monitor throttling. ### Frequency Limits - `-l` Specify the lower and upper limits to plot frequency. I recommend `400 1600` unless you are overclocking, then I would go up to 2200. ### Temperature Limits - `-t` Specify the lower and upper limits of temperature. I recommend `30 90` for these limits. I don't see a scenario you would want anything else. ### Output file - `-o` Name of the png file you want to output your chart to. ### Disable transparency - `--not-transparent` This is optional but I would recommend try with and without to see which you prefer. ### Putting it all together `MPLBACKEND=Agg /home/pi/.local/bin/stressberry-plot case.out -f -l 400 1600 -t 30 90 -o case.png --not-transparent` --- # Conclusion Stressberry is an awesome test kit to try different scenarios with your Raspberry Pi. It is really easy to use and effective. A typical test I do the following two commands changing the name in the first command to describe my current test. ``` /home/pi/.local/bin/stressberry-run -n "case" -d 1800 -i 300 -c 4 case.out MPLBACKEND=Agg /home/pi/.local/bin/stressberry-plot case.out -f -l 400 1600 -t 30 90 -o case.png --not-transparent ``` I also have a script I use to upload an image to imgur but you can use sftp. ``` imgur case.png ``` --- <center>Securely chat with me on [Keybase](https://keybase.io/officialmarky) <center>https://images.hive.blog/0x0/https://steemitimages.com/DQmcWxV1dpA1eAtw2ipwZiWZkydyVNU5LaLa2Ak1GUnbGmS/The-Marky-Mark.png </center> # <center> [Why you should vote me as witness](https://peakd.com/witness-category/@themarkymark/why-you-should-vote-for-themarkymark-as-witness) </center> #
| author | themarkymark |
|---|---|
| permlink | how-to-stress-test-your-raspberry-pi |
| category | hive-163521 |
| json_metadata | {"app":"peakd/2020.06.2","format":"markdown","tags":["hive-163521","raspberrypi","technology","palnet","neoxian","tutorial"],"users":["themarkymark"],"links":["https://github.com/nschloe/stressberry","https://keybase.io/officialmarky","/witness-category/@themarkymark/why-you-should-vote-for-themarkymark-as-witness"],"image":["https://files.peakd.com/file/peakd-hive/themarkymark/EPAk8We2-image.png","https://files.peakd.com/file/peakd-hive/themarkymark/WvU9hpKU-image.png","https://steemitimages.com/DQmcWxV1dpA1eAtw2ipwZiWZkydyVNU5LaLa2Ak1GUnbGmS/The-Marky-Mark.png"]} |
| created | 2020-07-01 04:03:54 |
| last_update | 2020-07-01 04:03:54 |
| depth | 0 |
| children | 1 |
| last_payout | 2020-07-08 04:03:54 |
| cashout_time | 1969-12-31 23:59:59 |
| total_payout_value | 16.692 HBD |
| curator_payout_value | 11.477 HBD |
| pending_payout_value | 0.000 HBD |
| promoted | 0.000 HBD |
| body_length | 4,234 |
| author_reputation | 1,779,983,446,894,978 |
| root_title | "How to stress test your Raspberry Pi" |
| beneficiaries | [] |
| max_accepted_payout | 1,000,000.000 HBD |
| percent_hbd | 10,000 |
| post_id | 98,273,241 |
| net_rshares | 82,807,913,455,711 |
| author_curate_reward | "" |
| voter | weight | wgt% | rshares | pct | time |
|---|---|---|---|---|---|
| enlil | 0 | 134,647,892,335 | 25% | ||
| tombstone | 0 | 227,873,824,151 | 10.5% | ||
| kushed | 0 | 165,880,364 | 45% | ||
| complexring | 0 | 54,789,254,869 | 45% | ||
| steemychicken1 | 0 | 2,326,417,654,126 | 45% | ||
| aizensou | 0 | 13,429,435,799 | 45% | ||
| b0y2k | 0 | 1,543,008,940,516 | 45% | ||
| stoner19 | 0 | 5,828,320,172 | 45% | ||
| tuck-fheman | 0 | 22,862,070,799 | 100% | ||
| sock | 0 | 1,422,254,799 | 45% | ||
| josephcraig289 | 0 | 1,760,742,207 | 45% | ||
| kingscrown | 0 | -8,273,150,004,898 | -100% | ||
| richman | 0 | 0 | 0% | ||
| igl00 | 0 | 2,462,558,668 | 45% | ||
| razvanelulmarin | 0 | 55,381,140,498 | 45% | ||
| gerber | 0 | 339,967,285,357 | 5% | ||
| daan | 0 | 58,654,756,508 | 8% | ||
| ezzy | 0 | 392,750,742,668 | 5% | ||
| hitmeasap | 0 | 57,301,684,269 | 100% | ||
| fabio | 0 | 655,414,883,824 | 45% | ||
| anyx | 0 | 558,783,432,902 | 45% | ||
| mehanizator | 0 | 876,087,760 | 100% | ||
| inertia | 0 | 891,875,381,250 | 100% | ||
| shawnamawna | 0 | 17,350,482,368 | 45% | ||
| exyle | 0 | 502,411,687,539 | 5% | ||
| hagie | 0 | 24,551,284,824 | 45% | ||
| logic | 0 | 269,817,084,370 | 65% | ||
| bullionstackers | 0 | -760,981,742,482 | -100% | ||
| coinbar | 0 | 10,998,531,642 | 45% | ||
| magicmonk | 0 | 2,433,790,159,742 | 100% | ||
| caesarion | 0 | 2,324,995,467 | 45% | ||
| thebluepanda | 0 | 86,835,113,868 | 45% | ||
| yoshiko | 0 | 12,788,384,589 | 1% | ||
| thisisbenbrick | 0 | 6,168,943,687 | 45% | ||
| d3nv3r | 0 | 429,778,883 | 44% | ||
| jphamer1 | 0 | 12,097,102,349,607 | 100% | ||
| bidnat | 0 | 871,052,146 | 7.5% | ||
| shanghaipreneur | 0 | 65,716,681,001 | 100% | ||
| scaredycatguide | 0 | 21,782,018,174 | 50% | ||
| borran | 0 | 357,248,189,502 | 50% | ||
| someguy123 | 0 | 67,004,275,740 | 5% | ||
| jlufer | 0 | 105,395,028,458 | 100% | ||
| einsteinpotsdam | 0 | 15,100,451,277 | 45% | ||
| uwelang | 0 | 284,361,966,832 | 25% | ||
| kommienezuspadt | 0 | 4,190,970,175,946 | 100% | ||
| tejma | 0 | 112,395,980 | 45% | ||
| jacobtothe | 0 | 354,641,616,667 | 100% | ||
| doitvoluntarily | 0 | 118,264,014,097 | 100% | ||
| steemcleaners | 0 | 4,034,775,656,755 | 65% | ||
| allesgruen | 0 | 12,178,528,748 | 45% | ||
| dannystravels | 0 | 71,202,163,253 | 45% | ||
| clayboyn | 0 | 138,644,794,172 | 37.5% | ||
| jerryblanceton | 0 | 14,067,445,155 | 45% | ||
| platinum-blue | 0 | 179,029,271,308 | 45% | ||
| ssekulji | 0 | 19,612,356,124 | 45% | ||
| timbernana | 0 | 34,344,610 | 45% | ||
| sherlockcupid | 0 | 50,491,076,044 | 45% | ||
| dougkarr | 0 | 75,674,486,564 | 45% | ||
| gamer00 | 0 | 2,395,081,248 | 0.18% | ||
| jaybird | 0 | 189,261,326,480 | 100% | ||
| dark.horse | 0 | 342,779,477 | 45% | ||
| judasp | 0 | 420,549,740,644 | 100% | ||
| zorg67 | 0 | 537,704,829 | 100% | ||
| toyman | 0 | 34,049,714,872 | 45% | ||
| steemizen | 0 | 16,908,990,155 | 45% | ||
| i-gordan | 0 | 34,981,822,898 | 45% | ||
| sebastianjago | 0 | 31,571,154,394 | 5% | ||
| cpol | 0 | 46,280,968,666 | 100% | ||
| tarazkp | 0 | 839,497,382,546 | 20% | ||
| privex | 0 | 9,116,278,632 | 10% | ||
| buzzbeergeek | 0 | 426,665,398 | 45% | ||
| teammo | 0 | 360,230,287,670 | 100% | ||
| dyrt88 | 0 | 2,671,238,416 | 100% | ||
| alexis555 | 0 | 2,518,991,454,997 | 30% | ||
| danielsaori | 0 | 323,778,957,490 | 100% | ||
| bigdaddy | 0 | 14,879,453,509 | 45% | ||
| kingsmind | 0 | 10,508,972,590 | 45% | ||
| pboc | 0 | 1,500,824,500 | 45% | ||
| louisthomas | 0 | 261,798,677,788 | 100% | ||
| freebornsociety | 0 | 4,026,611,091 | 10% | ||
| dickturpin | 0 | 32,812,688,041 | 100% | ||
| daio | 0 | 11,223,951,413 | 100% | ||
| lizanomadsoul | 0 | 13,524,632,879 | 5% | ||
| stimialiti | 0 | -5,955,046,849 | -44% | ||
| zaragast | 0 | 152,776,705,153 | 100% | ||
| dune69 | 0 | 17,193,554,409 | 5% | ||
| acromott | 0 | 16,268,280,477 | 100% | ||
| thenightflier | 0 | 351,825,711,732 | 100% | ||
| schlees | 0 | 81,008,386,436 | 20% | ||
| papadimos | 0 | 844,705,968 | 45% | ||
| yeaho | 0 | 45,815,096,871 | 20% | ||
| romedog | 0 | 80,157,388,818 | 45% | ||
| jerrybanfield | 0 | 48,619,403,609 | 5% | ||
| sunshinetraveler | 0 | 31,167,050,178 | 45% | ||
| swelker101 | 0 | 250,845,146,488 | 75% | ||
| mys | 0 | 6,655,861,572 | 2.1% | ||
| spg | 0 | 353,406,475,350 | 45% | ||
| fredrikaa | 0 | 993,742,402,583 | 100% | ||
| isaria | 0 | 1,294,022,763,377 | 75% | ||
| theywillkillyou | 0 | 23,866,817,469 | 100% | ||
| anacristinasilva | 0 | 30,322,917,981 | 30% | ||
| theissen | 0 | 5,838,721,920 | 100% | ||
| sam99 | 0 | 5,443,208,500 | 100% | ||
| offoodandart | 0 | 371,331,999,341 | 100% | ||
| sammosk | 0 | 3,122,342,817 | 45% | ||
| biancajapan | 0 | 27,012,740,206 | 45% | ||
| whd | 0 | 2,428,809,859 | 2.1% | ||
| kayoko | 0 | 702,682,603 | 1% | ||
| deniskj | 0 | 40,239,222,356 | 100% | ||
| d-pend | 0 | 1,361,447,073 | 0.05% | ||
| geekgirl | 0 | 1,176,332,505,835 | 100% | ||
| horsepower | 0 | 2,485,368,646 | 45% | ||
| goldkey | 0 | 69,398,715,534 | 27% | ||
| drorion | 0 | 19,952,090,949 | 100% | ||
| steemshiro | 0 | 802,621,282 | 100% | ||
| ksteem | 0 | 808,679,337,122 | 100% | ||
| shitsignals | 0 | 1,751,231,919 | 5% | ||
| yoogyart | 0 | 19,214,128,451 | 51% | ||
| steempostitalia | 0 | 454,371,043,818 | 100% | ||
| bronkong | 0 | 394,707,458,414 | 100% | ||
| vikisecrets | 0 | 375,870,555,482 | 30% | ||
| bmonakken | 0 | 734,754,221 | 40.5% | ||
| faustofraser | 0 | 7,935,489,761 | 81% | ||
| nuthman | 0 | 2,433,846,858,799 | 100% | ||
| felander | 0 | 22,206,123,062 | 5% | ||
| santigs | 0 | 5,175,808,582 | 15% | ||
| teneiced | 0 | 8,835,918,000 | 45% | ||
| noloafing | 0 | 28,363,881,482 | 50% | ||
| redouanemez | 0 | 211,208,234,710 | 100% | ||
| jedigeiss | 0 | 1,384,692,927,490 | 100% | ||
| sumayyahsaidso | 0 | 17,638,221,009 | 45% | ||
| fbslo | 0 | 717,266,879 | 1.05% | ||
| accelerator | 0 | 46,964,198,785 | 5% | ||
| fersher | 0 | -5,888,463,375 | -15% | ||
| justinparke | 0 | 2,913,769,487 | 3% | ||
| alinakot | 0 | 143,469,713,117 | 100% | ||
| yogacoach | 0 | 1,898,869,292 | 2.5% | ||
| chinchilla | 0 | 248,267,091,254 | 100% | ||
| therealwolf | 0 | 9,872,872,508,731 | 35% | ||
| roleerob | 0 | 320,767,460,183 | 50% | ||
| deathwing | 0 | 5,197,807,893 | 5% | ||
| revisesociology | 0 | 222,085,016,716 | 20% | ||
| sandeep126 | 0 | 253,503,889,393 | 100% | ||
| jlsplatts | 0 | 61,806,481,537 | 10% | ||
| gringo211985 | 0 | 93,213,433,359 | 100% | ||
| heidi71 | 0 | 75,880,033,414 | 100% | ||
| steemseph | 0 | 106,897,045,041 | 100% | ||
| planetauto | 0 | 65,696,609,314 | 100% | ||
| pataty69 | 0 | 4,296,522,956 | 10% | ||
| liverpool-fan | 0 | 1,026,998,703 | 20% | ||
| caladan | 0 | 18,689,772,292 | 5% | ||
| blockbrothers | 0 | 667,011,210 | 2.5% | ||
| coyotelation | 0 | 2,334,111,428 | 10% | ||
| emrebeyler | 0 | 122,932,679,037 | 5% | ||
| princesstj | 0 | 101,919,118 | 100% | ||
| smartsteem | 0 | 3,612,710,095,466 | 35% | ||
| mytechtrail | 0 | 38,142,629,420 | 15% | ||
| chintya | 0 | 721,228,969 | 25% | ||
| nathen007 | 0 | 63,271,044,969 | 100% | ||
| cervisia | 0 | 137,096,087,526 | 40% | ||
| funtraveller | 0 | 1,756,634,803 | 5% | ||
| nokodemion | 0 | 31,019,946,961 | 100% | ||
| marcolino76 | 0 | 19,295,710,938 | 50% | ||
| steembasicincome | 0 | 82,731,454,652 | 3.65% | ||
| fourfourfun | 0 | 978,174,531 | 3.75% | ||
| leilafrangie | 0 | 1,122,955,682 | 58.32% | ||
| abitcoinskeptic | 0 | 32,376,737,277 | 15% | ||
| bitcoinportugal | 0 | 2,793,310,719 | 100% | ||
| jongolson | 0 | 1,043,362,945,017 | 100% | ||
| nealmcspadden | 0 | 101,598,871,456 | 5% | ||
| socialmediaseo | 0 | 29,879,830,632 | 50% | ||
| afiqsejuk | 0 | 686,466,026,655 | 100% | ||
| purefood | 0 | 80,288,053,936 | 5% | ||
| soyrosa | 0 | 504,538,689,448 | 50% | ||
| warnas | 0 | 40,060,343,007 | 10% | ||
| jnmarteau | 0 | 663,331,935 | 5% | ||
| philnewton | 0 | 5,215,143,857 | 75% | ||
| leoumesh | 0 | 30,788,878,952 | 100% | ||
| chronocrypto | 0 | 219,622,512,260 | 5% | ||
| cadawg | 0 | 10,283,539,519 | 3.5% | ||
| upfundme | 0 | 15,079,443,135 | 15% | ||
| ericburgoyne | 0 | 6,454,948,933 | 50% | ||
| bigtom13 | 0 | 148,325,038,951 | 50% | ||
| captainbob | 0 | 144,767,050,427 | 50% | ||
| moeenali | 0 | 1,783,867,976 | 1% | ||
| maxpatternman | 0 | 6,262,283,604 | 20% | ||
| bozz | 0 | 63,039,563,700 | 15% | ||
| cst90 | 0 | 47,984,205,566 | 100% | ||
| russellstockley | 0 | 1,203,917,929 | 10% | ||
| futurecurrency | 0 | 17,787,496,661 | 30% | ||
| g4fun | 0 | 10,429,150,281 | 25% | ||
| rubencress | 0 | 9,071,079,625 | 10% | ||
| frassman | 0 | 788,209,805 | 5% | ||
| josemalavem | 0 | 32,106,360,407 | 100% | ||
| properfraction | 0 | 23,203,448,522 | 100% | ||
| satren | 0 | 59,996,016,217 | 20% | ||
| beleg | 0 | 923,995,624 | 2.1% | ||
| bestboom | 0 | 17,815,366,267 | 5% | ||
| abrockman | 0 | 26,861,808,440 | 5% | ||
| ronaldoavelino | 0 | 82,278,917,322 | 25% | ||
| schlafhacking | 0 | 346,405,748,013 | 100% | ||
| goldvault | 0 | 9,949,840,083 | 29% | ||
| stmdev | 0 | 394,564,250 | 10% | ||
| paragism | 0 | 26,114,308,880 | 100% | ||
| jkramer | 0 | 1,126,395,799,007 | 100% | ||
| dream-o | 0 | 130,798,074 | 45% | ||
| freddio | 0 | 19,105,579,368 | 15% | ||
| blainjones | 0 | 2,191,781,768 | 15% | ||
| abdulmath | 0 | 6,752,970,943 | 100% | ||
| gadrian | 0 | 57,931,592,081 | 35% | ||
| ericahan | 0 | 8,086,071,457 | 100% | ||
| angelinafx | 0 | 201,394,802 | 6% | ||
| thejbullfrog | 0 | 2,191,912,833 | 100% | ||
| kgakakillerg | 0 | 23,377,918,018 | 10% | ||
| reinaldoverdu | 0 | 3,539,672,114 | 50% | ||
| we-are | 0 | 0 | 15.57% | ||
| tushy | 0 | 0 | 45% | ||
| raorac | 0 | 1,328,529,467 | 35% | ||
| yaraha | 0 | 4,055,953,390 | 20% | ||
| promobot | 0 | 23,648,343,991 | 15% | ||
| solominer | 0 | 2,871,996,152,186 | 100% | ||
| mrs.goldkey | 0 | 2,489,944,576 | 29% | ||
| veteranforcrypto | 0 | 65,031,075,011 | 50% | ||
| jancharlest | 0 | 163,189,658,082 | 100% | ||
| slobberchops | 0 | 4,629,265,289,190 | 100% | ||
| atanas007 | 0 | 8,422,856,750 | 100% | ||
| pladozero | 0 | 77,304,729,771 | 10% | ||
| crimo | 0 | 572,679,169 | 10% | ||
| nateaguila | 0 | 289,158,047,701 | 8% | ||
| davidesimoncini | 0 | 10,281,593,064 | 33% | ||
| enforcer48 | 0 | 108,538,035,389 | 15% | ||
| flibbertigibbet | 0 | 12,023,065,853 | 100% | ||
| teslaman | 0 | 39,800,149 | 45% | ||
| steem-tube | 0 | 158,538,185,035 | 100% | ||
| archisteem | 0 | 2,521,335,280 | 7.5% | ||
| blondephysics | 0 | 39,782,201 | 45% | ||
| susantabinod | 0 | 2,195,391,558 | 100% | ||
| oldmans | 0 | 43,004,531,927 | 49% | ||
| cryptoandcoffee | 0 | 891,674,185,600 | 100% | ||
| magictoni | 0 | 10,580,173,804 | 45% | ||
| digital.mine | 0 | 163,126,673,681 | 1% | ||
| qam2112 | 0 | 11,586,409,987 | 100% | ||
| swisswitness | 0 | 2,951,711,604 | 5% | ||
| lil-splatts | 0 | 3,159,131,357 | 37.5% | ||
| apshamilton | 0 | 329,150,493,214 | 100% | ||
| suonghuynh | 0 | 246,872,487,785 | 6% | ||
| bingbabe | 0 | 750,000,000 | 100% | ||
| ambiguity | 0 | 3,690,460,131 | 12.5% | ||
| zaibkang | 0 | 45,998,641,119 | 100% | ||
| schlunior | 0 | 11,829,185,926 | 20% | ||
| hamismsf | 0 | 516,970,964,855 | 100% | ||
| gerdtrudroepke | 0 | 10,394,289,756 | 20% | ||
| teamvn | 0 | 32,642,121,625 | 50.03% | ||
| dalz | 0 | 28,461,918,531 | 10% | ||
| holovision | 0 | 14,460,957,704 | 100% | ||
| jk6276 | 0 | 93,781,192 | 1.5% | ||
| yaelg | 0 | 48,585,163,821 | 90% | ||
| julian2013 | 0 | 950,977,604 | 0.94% | ||
| dlike | 0 | 58,773,711,572 | 5% | ||
| stever82 | 0 | 55,377,104,430 | 25% | ||
| gorbisan | 0 | 746,407,583 | 0.52% | ||
| gordonramzy | 0 | 619,704,598 | 100% | ||
| munhenhos | 0 | 785,109,108 | 10% | ||
| tipsybosphorus | 0 | 451,536,259,683 | 100% | ||
| jessica.steem | 0 | 588,978,974 | 100% | ||
| a-bot | 0 | 34,830,680,134 | 100% | ||
| bobby.madagascar | 0 | 1,979,004,512 | 1.25% | ||
| oakshieldholding | 0 | 160,671,459 | 100% | ||
| laissez-faire | 0 | 81,377,495 | 100% | ||
| silverkey | 0 | 2,536,809,562 | 29% | ||
| silvervault | 0 | 10,891,083,320 | 29% | ||
| cryptycoon | 0 | 4,214,971,609 | 29% | ||
| cryptoclerk | 0 | 4,469,237,606 | 29% | ||
| courtneyjensen | 0 | 4,628,581,316 | 100% | ||
| balticbadger | 0 | 7,672,031,158 | 25% | ||
| pedromonteiro | 0 | 3,961,551,847 | 50% | ||
| kuku-splatts | 0 | 5,137,245,308 | 37.5% | ||
| ldp | 0 | 713,909,740 | 5% | ||
| steemitcuration | 0 | 9,575,339,860 | 25% | ||
| merlin7 | 0 | 53,589,855,691 | 5% | ||
| thrasher666 | 0 | 1,956,386,028 | 60% | ||
| priyanarc | 0 | 65,107,454,329 | 20% | ||
| conectionbot | 0 | 830,894,164 | 20% | ||
| maonx | 0 | 14,462,768,739 | 100% | ||
| followjohngalt | 0 | 28,741,626,993 | 5% | ||
| avel692 | 0 | 8,276,732,084 | 50% | ||
| ohfiddlesticks | 0 | 141,932,503 | 49% | ||
| gudnius.comics | 0 | 3,331,864,073 | 100% | ||
| dein-problem | 0 | -121,753,598 | -1% | ||
| kekos | 0 | 101,796,620,626 | 100% | ||
| dismayedworld | 0 | 750,000,000 | 100% | ||
| redheaddemon | 0 | 784,623,032 | 50% | ||
| jpbliberty | 0 | 526,726,256,966 | 100% | ||
| brucutu | 0 | 10,872,093,907 | 50% | ||
| yuriy4 | 0 | 9,490,894,138 | 70% | ||
| steemfriends | 0 | 12,281,190,486 | 100% | ||
| ferrate | 0 | 62,918,386,484 | 100% | ||
| blind-spot | 0 | 14,803,669,686 | 20% | ||
| mflegerbein | 0 | 11,872,353,119 | 100% | ||
| brucutu1 | 0 | 4,376,076,864 | 100% | ||
| brucutu2 | 0 | 4,358,233,487 | 100% | ||
| drazeus | 0 | 6,003,234,033 | 100% | ||
| permaculturedude | 0 | 958,238,371 | 2.5% | ||
| agent14 | 0 | 1,046,973,261,518 | 35% | ||
| tubiska | 0 | 4,313,886,900 | 100% | ||
| pocoto | 0 | 4,468,518,994 | 100% | ||
| kitty-kitty | 0 | 4,480,531,421 | 100% | ||
| jamesbattler | 0 | 133,293,107,247 | 100% | ||
| jussara | 0 | 4,544,222,214 | 100% | ||
| cyrillo | 0 | 4,355,121,834 | 100% | ||
| broxi | 0 | 14,682,428,484 | 75% | ||
| monster-one | 0 | 212,369,681,601 | 100% | ||
| goodcontentbot | 0 | 806,962,529 | 15% | ||
| limka | 0 | 50,880,389 | 100% | ||
| dfacademy | 0 | 66,807,640,749 | 100% | ||
| carioca | 0 | 4,424,305,425 | 100% | ||
| goodcontentbot1 | 0 | 1,283,615,041 | 90% | ||
| denizcakmak | 0 | 880,967,685 | 100% | ||
| wolffeys | 0 | 10,532,928,038 | 100% | ||
| samuel.steem | 0 | 2,157,941,927 | 100% | ||
| kggymlife | 0 | 5,903,397,402 | 20% | ||
| kramgelo | 0 | 7,785,348,342 | 100% | ||
| david.steem | 0 | 511,362,875,495 | 100% | ||
| androshchuk | 0 | 3,109,916,365 | 100% | ||
| bynarikode | 0 | 1,975,718,124 | 90.99% | ||
| alenox | 0 | 395,583,305 | 8% | ||
| chunkysoupsvc | 0 | 40,995,382,495 | 100% | ||
| paolo.senegal | 0 | 1,453,941,237 | 100% | ||
| steemadventures | 0 | 639,126,904 | 80% | ||
| pfdm | 0 | 40,405,775,650 | 10% | ||
| wallvater | 0 | 1,362,123,230 | 20% | ||
| epicdice | 0 | 80,116,360,306 | 10.5% | ||
| theresteemer5000 | 0 | 472,461,029 | 100% | ||
| gadrian-sp | 0 | 1,323,507,240 | 35% | ||
| star.lord | 0 | 172,676,140,510 | 100% | ||
| gulf41 | 0 | 5,526,632,912 | 100% | ||
| sm-silva | 0 | 537,506,978 | 2.5% | ||
| likwid | 0 | 2,767,452,854,860 | 15% | ||
| quantumdeveloper | 0 | 2,541,117,699 | 50% | ||
| iktisat | 0 | 573,935,099 | 100% | ||
| maruskina | 0 | 31,256,742,518 | 50% | ||
| iamjohn | 0 | 571,484,100 | 10% | ||
| xyz004 | 0 | 44,317,193,508 | 25% | ||
| nalacanecorso | 0 | 1,239,625,202 | 100% | ||
| ernstboe | 0 | -64,992,100,922 | -99.5% | ||
| astil.codex | 0 | 364,564,792 | 70% | ||
| manylar | 0 | -53,267,031,110 | -99.7% | ||
| vxc | 0 | 590,050,239 | 10% | ||
| ljungbuske | 0 | -70,161,040,697 | -99.7% | ||
| milu-the-dog | 0 | 2,183,366,914 | 5% | ||
| asmr.tist | 0 | 51,430,386,942 | 100% | ||
| triplea.bot | 0 | 1,793,518,008 | 5% | ||
| steem.leo | 0 | 132,986,220,479 | 5% | ||
| havtorn | 0 | -69,194,765,607 | -99.7% | ||
| nichemarket | 0 | 2,142,654,778 | 100% | ||
| abh12345.pal | 0 | 658,500,113 | 100% | ||
| bala-pal | 0 | 488,775,757 | 100% | ||
| votebetting | 0 | 524,549,965,923 | 50% | ||
| freddio.sport | 0 | 3,668,575,380 | 15% | ||
| babytarazkp | 0 | 5,238,444,831 | 85% | ||
| asteroids | 0 | 28,662,751,238 | 5% | ||
| gingerbyna | 0 | 331,461,083 | 45.49% | ||
| arctis | 0 | 639,134,490 | 50% | ||
| abh12345.stem | 0 | 734,372,549 | 100% | ||
| marlians.ccc | 0 | 1,438,227,203 | 75% | ||
| thranax | 0 | 6,988,667,023 | 4% | ||
| midlet-creates | 0 | 773,592,073 | 50% | ||
| opidia | 0 | 22,999,148,033 | 100% | ||
| brutoken | 0 | 727,161,162 | 100% | ||
| fucanglong | 0 | 7,580,614,462 | 100% | ||
| one.life | 0 | 956,590,701 | 4.99% | ||
| btc4breackfast | 0 | 1,758,374,406 | 100% | ||
| ufm.pay | 0 | 55,536,010,783 | 11.25% | ||
| maxuvd | 0 | 20,458,524,748 | 6% | ||
| maxuve | 0 | 26,790,072,872 | 6% | ||
| shtup | 0 | 35,954,620,485 | 100% | ||
| jk6276.life | 0 | 48,433,658,279 | 50% | ||
| dappcoder | 0 | 6,237,275,442 | 16.8% | ||
| stem.alfa | 0 | 493,044,685 | 100% | ||
| alby2 | 0 | 6,080,790,906 | 100% | ||
| urtrailer | 0 | 153,239,115,024 | 50% | ||
| tolaramazan | 0 | -68,765,177,947 | -99.7% | ||
| bruneo | 0 | 711,870,188 | 100% | ||
| andylein | 0 | 42,302,310,885 | 50% | ||
| stemd | 0 | 332,669,588 | 100% | ||
| angelicsaman | 0 | -69,507,470,518 | -99.7% | ||
| chris-uk | 0 | 9,031,595,592 | 100% | ||
| axel-blaze | 0 | 1,496,557,234,298 | 100% | ||
| yggdrasil.laguna | 0 | 352,874,401 | 70% | ||
| eleez | 0 | 39,660,839,796 | 100% | ||
| seabuckthorn | 0 | -54,126,553,068 | -99.7% | ||
| huaren.news | 0 | 195,544,603,792 | 9% | ||
| goodreader | 0 | 2,498,953,789 | 18% | ||
| gerbo | 0 | 11,789,505 | 5% | ||
| pecoshop | 0 | 1,874,366,825 | 100% | ||
| galtsund | 0 | -106,728,981,959 | -99.7% | ||
| jgb | 0 | 1,889,153,446 | 16% | ||
| splatts | 0 | 29,279,946,344 | 50% | ||
| stem.curate | 0 | 977,568,753 | 100% | ||
| redwarbull | 0 | 2,845,551,546 | 33% | ||
| khalpal | 0 | 1,034,137,562 | 100% | ||
| hjmarseille | 0 | 9,865,765,481 | 70% | ||
| njord | 0 | -165,869,056,640 | -99.7% | ||
| boomalex | 0 | 2,462,772,471 | 100% | ||
| mvanhauten | 0 | 4,134,425,470 | 20% | ||
| dolcesalato1981 | 0 | 536,802,816 | 80% | ||
| angel33 | 0 | 642,549,208 | 100% | ||
| ribary | 0 | 1,612,347,528 | 2.5% | ||
| machete9595 | 0 | 2,245,580,898 | 100% | ||
| jeffmackinnon | 0 | 15,576,653,637 | 50% | ||
| toni.pal | 0 | 260,062,897 | 25.83% | ||
| daree23 | 0 | 0 | 100% | ||
| the66squirrel | 0 | -38,813,980,239 | -99.7% | ||
| mice-k | 0 | 10,217,608,817 | 5% | ||
| staryao | 0 | 8,266,714,215 | 21% | ||
| davidlionfish | 0 | 52,154,493,014 | 100% | ||
| dalz4 | 0 | 1,163,909,254 | 100% | ||
| abu.hair | 0 | 59,044,931 | 100% | ||
| frejalovisa | 0 | -151,276,001,209 | -99.7% | ||
| curamax | 0 | 2,048,495,660 | 5% | ||
| steemcityrewards | 0 | 1,098,540,032 | 5% | ||
| dpend.active | 0 | 1,602,734,809 | 1% | ||
| papetti | 0 | 1,655,836,615 | 58.32% | ||
| sgerhart | 0 | 20,056,126,978 | 100% | ||
| hivebuzz | 0 | 7,547,226,853 | 5% | ||
| hivewatchers | 0 | 213,163,398,162 | 65% | ||
| kohsamui99 | 0 | 201,329,090,687 | 100% | ||
| softworld | 0 | 229,270,004,833 | 15% | ||
| peterpanpan | 0 | 95,969,498,002 | 100% | ||
| dcityrewards | 0 | 134,165,339,825 | 5% | ||
| blocktokens | 0 | -17,782,512,776 | -100% | ||
| archon-mining | 0 | 2,419,092,742 | 7.5% | ||
| vibrasphere | 0 | 3,957,381,948 | 20% | ||
| hisha | 0 | 36,729,290,399 | 100% | ||
| weloveart | 0 | 3,844,196,450 | 100% | ||
| ronavel | 0 | 271,703,283,327 | 20% | ||
| pubglover | 0 | 2,737,332,285 | 100% | ||
| hivecur | 0 | 15,978,320,606 | 5% | ||
| kingturd | 0 | 300,337,561 | 100% | ||
| tammysilastv | 0 | 127,315,857 | 10% | ||
| jelly13 | 0 | 109,009,979,467 | 12% | ||
| hivebuilderteam | 0 | 1,112,941,010 | 25% | ||
| anewlakdk84 | 0 | 0 | 50% | ||
| w-splatts | 0 | 2,522,332,402 | 37.5% | ||
| cryptonoob1234 | 0 | 0 | 100% | ||
| srdotlibre | 0 | 0 | 100% |
Congratulations @themarkymark! You received a personal badge!

<table><tr><td>https://images.hive.blog/70x70/http://hivebuzz.me/badges/birthday-3.png</td><td>Happy Hive Birthday! You are on the Hive blockchain for 3 years!</td></tr></table>

<sub>_You can view [your badges on your board](https://hivebuzz.me/@themarkymark) And compare to others on the [Ranking](https://hivebuzz.me/ranking)_</sub>


###### Support the HiveBuzz project. [Vote](https://hivesigner.com/sign/update_proposal_votes?proposal_ids=%5B%22109%22%5D&approve=true) for [our proposal](https://peakd.com/me/proposals/109)!
| author | hivebuzz |
|---|---|
| permlink | hivebuzz-notify-themarkymark-20200701t135439000z |
| category | hive-163521 |
| json_metadata | {"image":["http://hivebuzz.me/notify.t6.png"]} |
| created | 2020-07-01 13:54:39 |
| last_update | 2020-07-01 13:54:39 |
| depth | 1 |
| children | 0 |
| last_payout | 2020-07-08 13:54:39 |
| cashout_time | 1969-12-31 23:59:59 |
| total_payout_value | 0.000 HBD |
| curator_payout_value | 0.000 HBD |
| pending_payout_value | 0.000 HBD |
| promoted | 0.000 HBD |
| body_length | 593 |
| author_reputation | 369,406,531,494,870 |
| root_title | "How to stress test your Raspberry Pi" |
| beneficiaries | [] |
| max_accepted_payout | 1,000,000.000 HBD |
| percent_hbd | 10,000 |
| post_id | 98,280,845 |
| net_rshares | 0 |