<p><div class="text-justify">
Hola amigos creativos de #hivediy, feliz de saludarlos en este grandioso día! Hoy quiero compartir un detalle que le realice a mi pareja, y es que siempre es ideal tener esos detalles románticos con esa persona que comparte tu día a día.
<p> </div>
> Hello creative friends of #hivediy, happy to greet you on this great day! Today I want to share a detail that I make to my partner, and it is always ideal to have those romantic details with that person who shares your day to day.
<p><div class="text-justify">
Así que a continuación les mostraré como lo elabore, acompañenme😉
<p> </div>
> So next I will show you how I made it, come with me😉
<p><div class="text-justify">
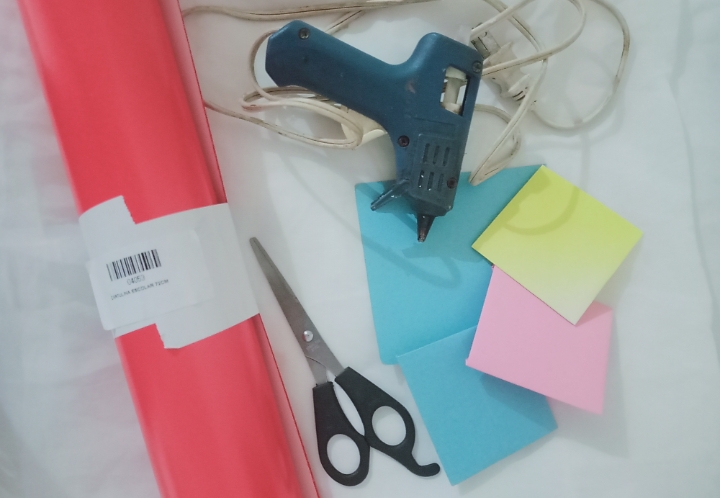
En esta oportunidad usaremos los siguientes materiales:
<p> </div>
> In this opportunity we will use the following materials:
<center>**MATERIALES**</center>
- cartulina escolar roja
- cartulina azul,amarilla y rosada
- Silicon
- tijera
- adorno dorado
> <center>**MATERIALS**</center>
- red school cardboard
- blue, yellow and pink cardboard
- Silicon
- scissor
- gold trim
<center>**PASO A PASO**</center>
> <center>**STEP BY STEP**</center>
<div class="text-justify">
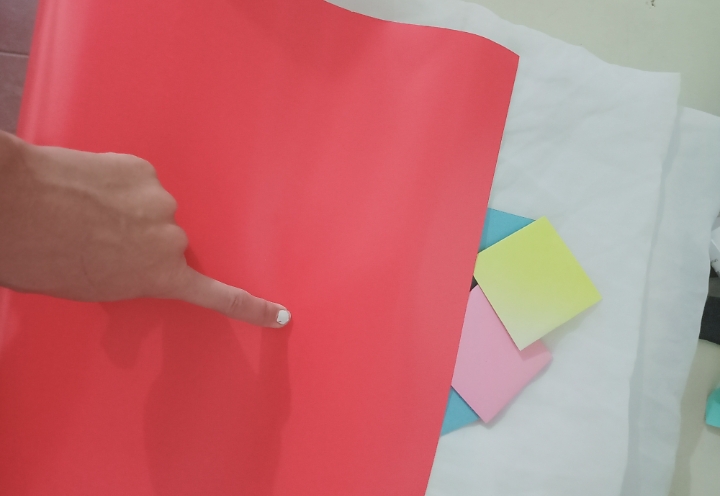
1. Tome la cartulina roja y con mi tijera corte un rectángulo!
</div>
> 1. Take the red cardboard and with my scissors cut a rectangle!
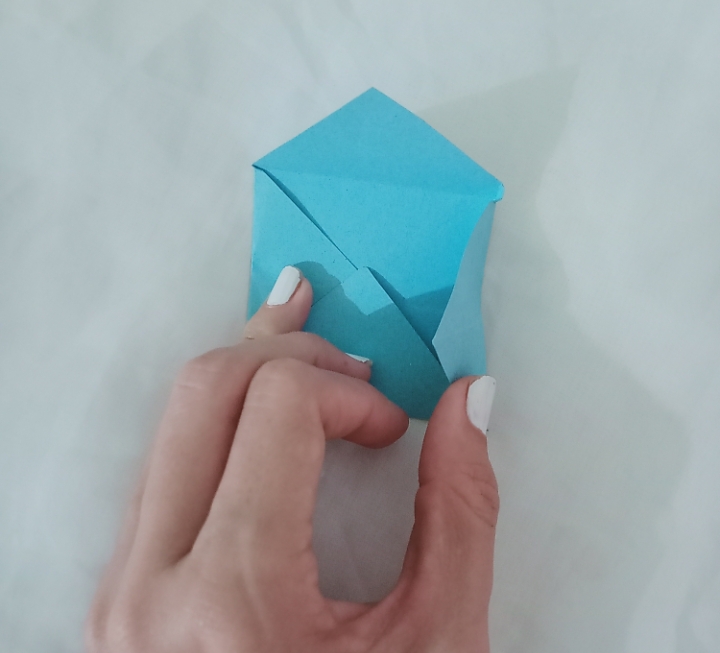
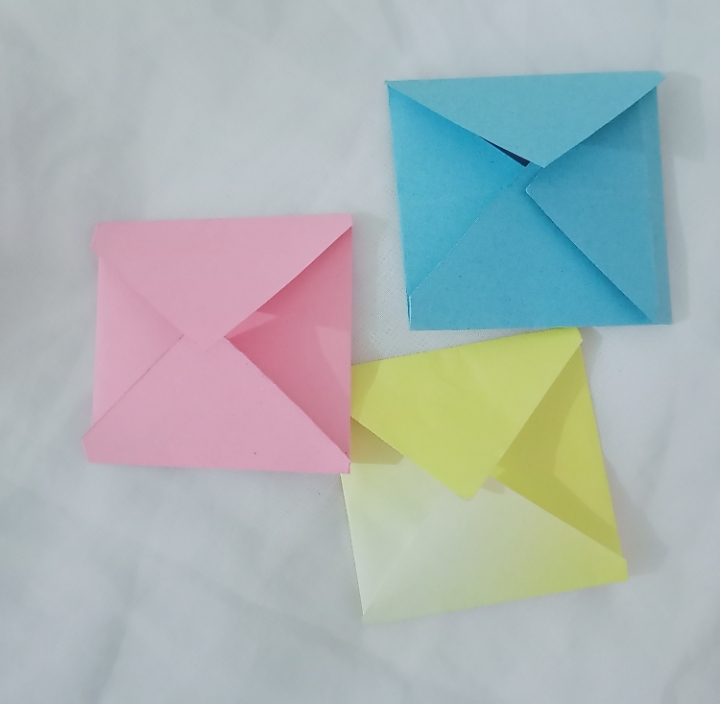
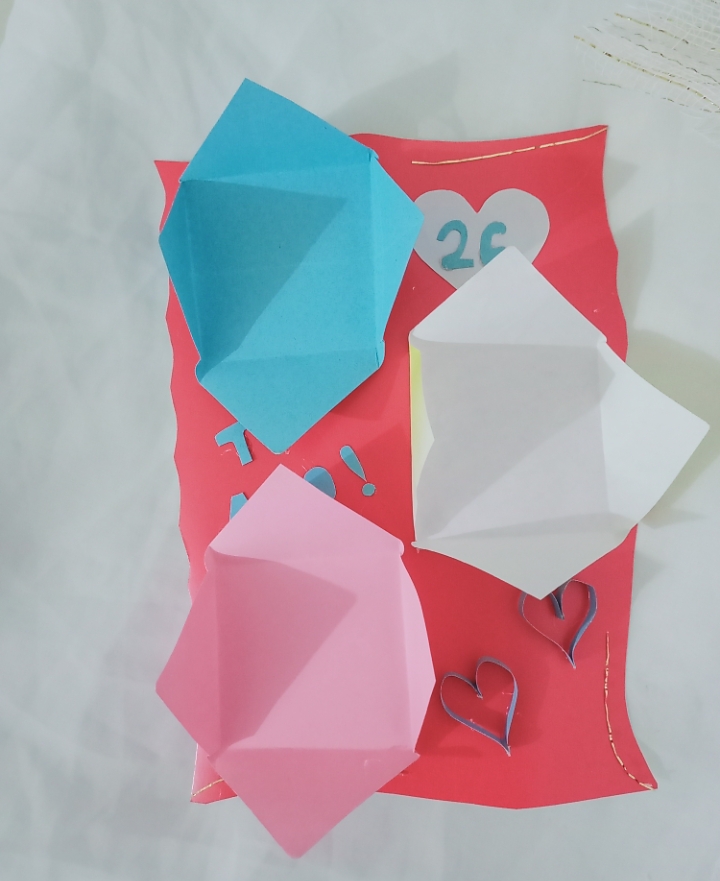
<div class="text-justify">
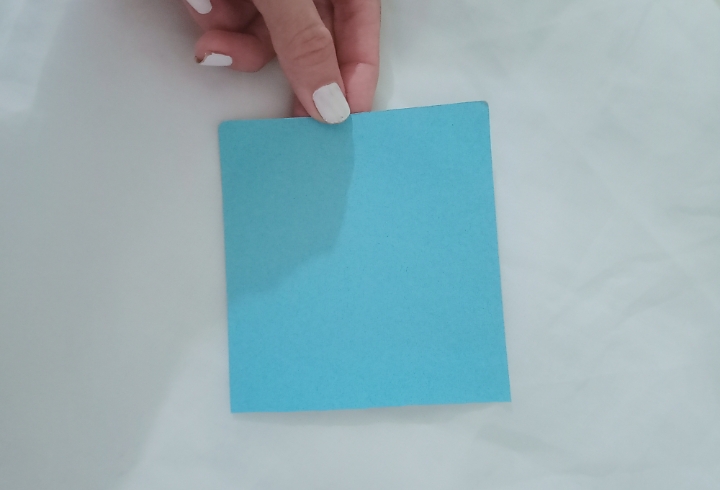
2. Luego recorte un cuadrado de la cartulina azul el cual doble sus puntas hacia dentro creando un sobre cómo les muestro a continuación
</div>
> 2. Then cut out a square from the blue cardboard which folds its ends inwards creating an envelope as I show you below
<div class="text-justify">
3. Este procedimiento los realice con las próximas piezas color rosado y amarillo.
<p> </div>
> 3. Do this procedure with the next pink and yellow pieces.
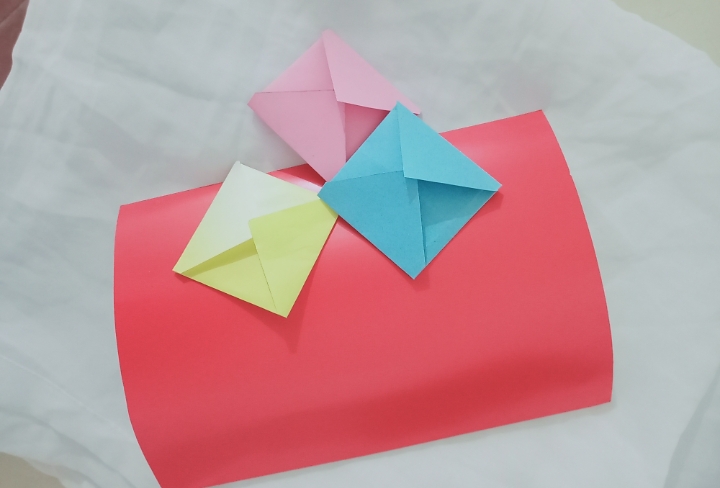
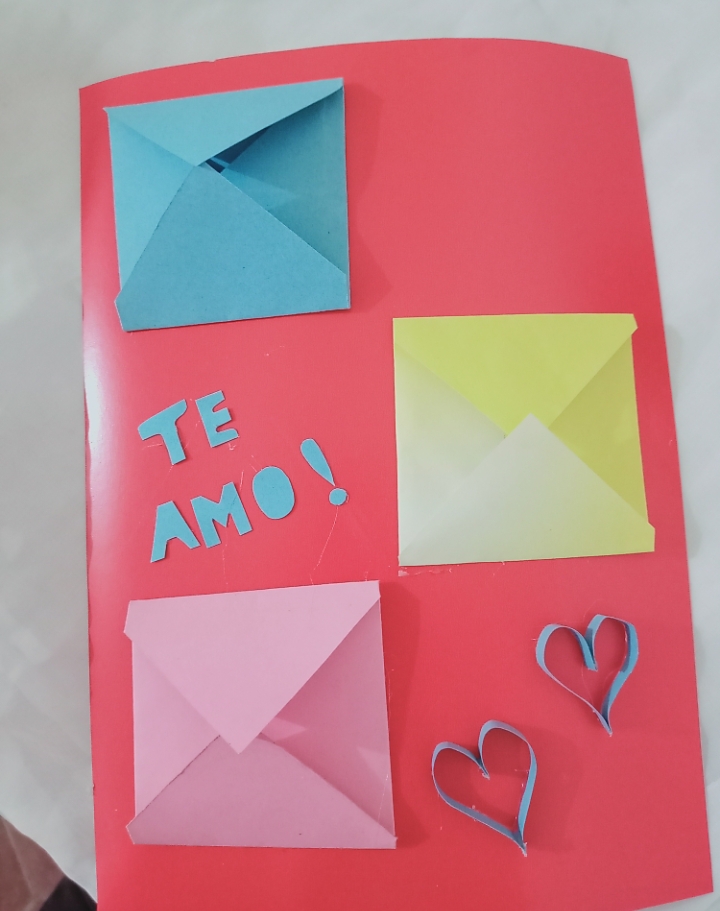
<div class="text-justify">
4. Ya teniendo nuestro sobres formados y nuestra base de la tarjeta procedemos a pegar.
<p> </div>
> 4. Having already formed our envelopes and our card base, we proceed to paste.
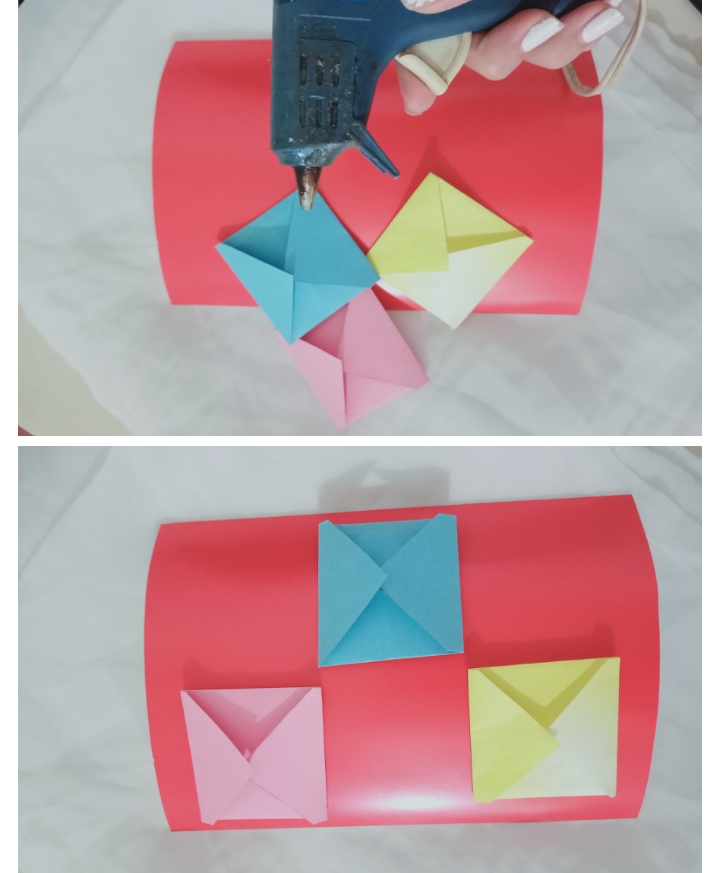
<div class="text-justify">
5. Tomé la pistola de silicón y aplique en la parte posterior de cada sobre ubicándolo en el lugar que deseaba.
<p> </div>
> 5. I took the glue gun and applied to the back of each envelope placing it in the place I wanted.
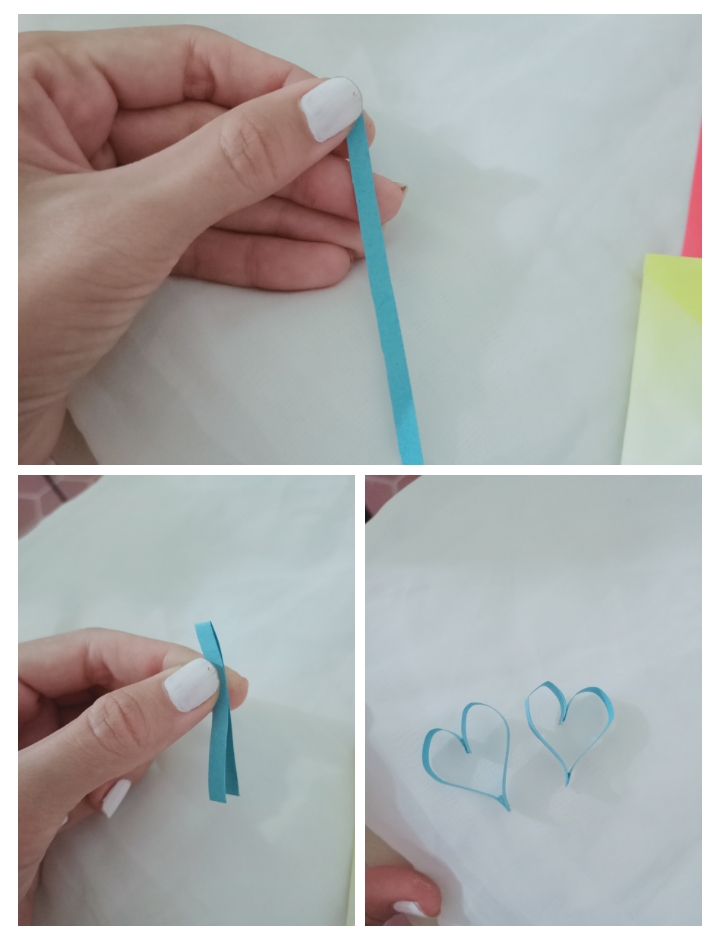
<div class="text-justify">
6 . Ahora bien, tome mi tijera y recorte de la cartulina azul una tira muy delgada con la cual forma un corazón, para esto doblamos a la mitad ponemos un punto de silicón en medio y en la punta y así obtendremos nuestro corazón.
<p> </div>
> 6. Now, take my scissors and cut a very thin strip from the blue cardboard with which to form a heart, for this we fold it in half and put a dot of silicone in the middle and on the tip and thus we will obtain our heart.
<div class="text-justify">
7 . De la cartulina color azul extraje la frase "te amo!", Pegue en el espacio inferior al primer sobre.
<p> </div>
> From the blue cardboard I extracted the phrase "I love you!", Paste in the space below the first envelope.
<div class="text-justify">
8 . En papel blanco saqué la forma de un corazón y el número 26 de la cartulina azul, ya que esa es la edad que él está cumpliendo!
<p> </div>
> On white paper to make the shape of a heart and number 26 on blue cardstock, since that is the age he is turning!
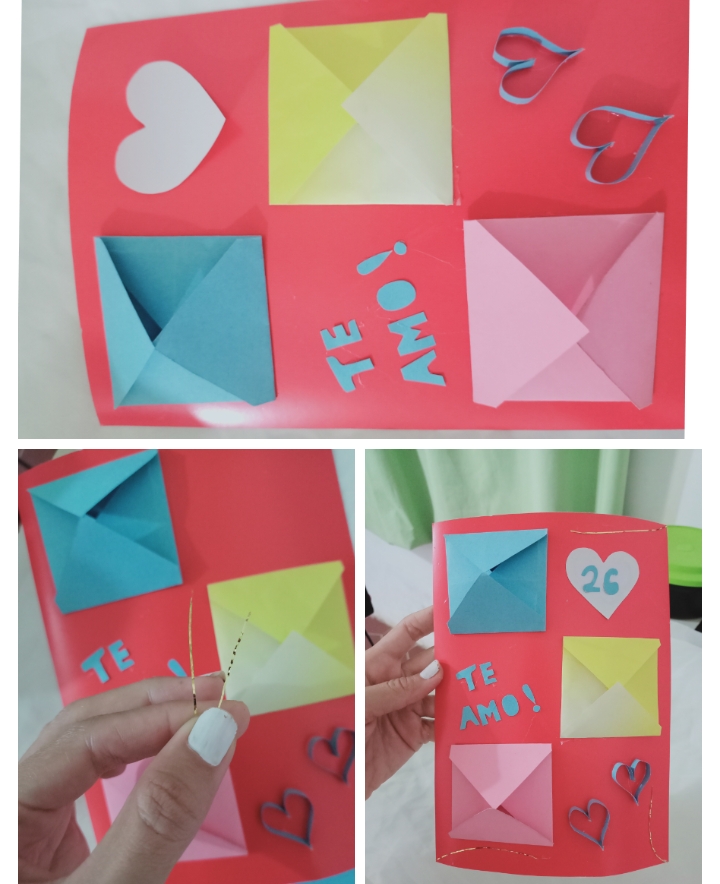
<div class="text-justify">
9 . Finalmente pegamos en conjunto con la brillantina, y realice un corte por el borde de la tarjeta.
<p> </div>
> Finally we glued together with the glitter, and you ate was make a cut along the edge of the card.
<div class="text-justify">
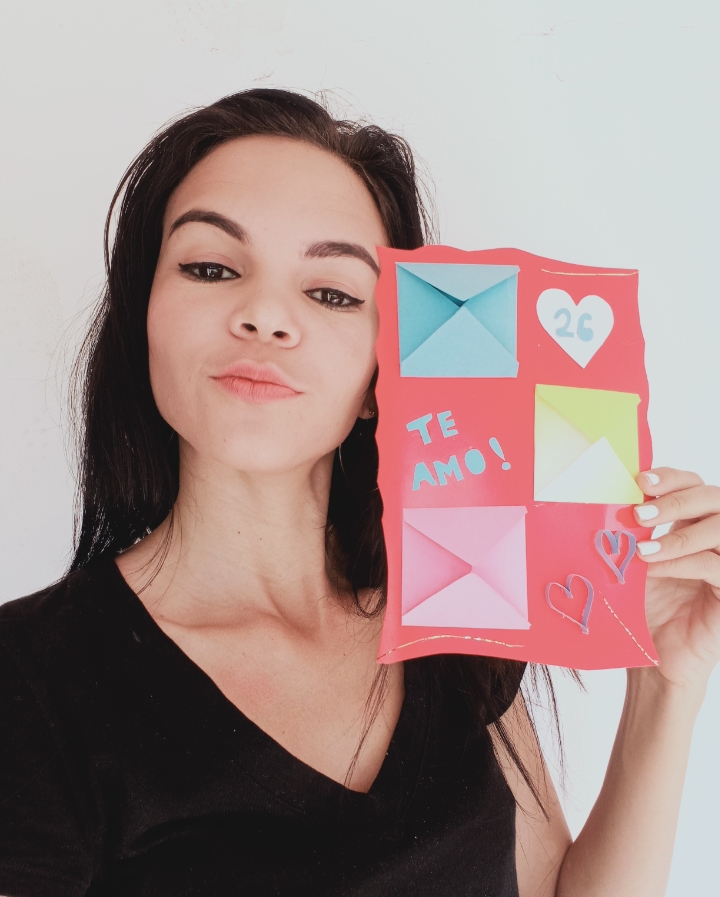
Y listo! Así obtuve mi tarjeta 😁♥️
<p> </div>
> And ready! This is how I got my card 😁♥️
<div class="text-justify">
**RESULTADO FINAL**
> **FINAL SCORE**
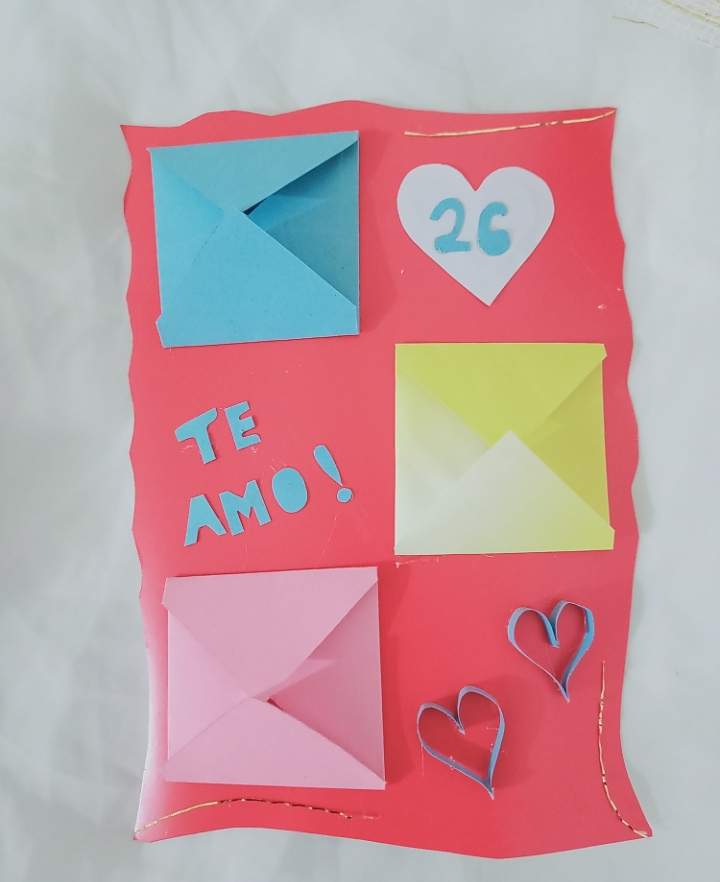
<p><div class="text-justify">
recuerda escribir tu mensaje de amor en el Interior de los sobres
<p> </div>
> remember to write your love message inside the envelopes
--
<p><div class="text-justify">
Feliz de compartir con ustedes mi creación, espero haya sido de su agrado! Será hasta una próxima oportunidad!
<p> </div>
<p><div class="text-justify">
**Fotografías propias tomadas con mi REALME 7i**
**Own photographs taken with my REALME 7i**
**Portada: diseño propio creado en PicsArt/ own design created in PicsArt**
<p> </div>