
[image source](https://www.ionicframework.com/)
Repository: [Ionic Github Repository](https://github.com/ionic-team/ionic)
Software Requirements:
Visual Studio Code(Or any preferred code editor),
npm, ionic.
What you will learn:
In this tutorial you would learn about how to manage your ionic app on whatever platform you choose to target covering these major concepts
- How to startup up an ionic-electron project
- Understanding Renderer and Main processes while in use with ionic
- How to make electron native API calls based on function
### Tutorial
Javacript is bigger and better and ever, you can use it to build almost anything across almost any platform. But what if you could you a single code base for every platform on every device. Yes it is possible and you can use ionic for you and logic across all your platforms.
**What is electron?**
Electron is a framework for building desktop applications. It is build based on chromium and gives a variety of native api's that help you do alot of relevant native stuff. To read more about it, you could simply [follow this link](https://electronjs.org/) as it is already well documented.
On the other hand, i would be showing you how to combine ionic with electron. These are two independent platforms but can be used together to prevent having to build the same app from the start all over again.
#### How to start up an ionic-electron application
Getting started can be quite confusing and as more releases become available the simple google search doesn't give you the right way to go about it. Electron has a basic project structure, which only needs three essential files.
```
your-app/
├── package.json
├── main.js
└── index.html
```
But ionic has a rather different file structure.
```
├── <PROJECT_ROOT>
└── /src
└── /app - App Module
├── app.component.ts
├── app.html
├── app.module.ts
├── app.scss
├── main.ts
└── /core - Core Feature Module (e.g., Singleton Services/Providers)
├── core.module.ts
├── module-import-guard.ts
└── /logger
├── console-logger.service.ts
├── logger.service.ts
└── /pages - Page (Component) Modules
└── /home
├── home.page.html
├── home.page.module.ts
├── home.page.scss
├── home.page.spec.ts
├── home.page.ts
└── /shared - Shared Feature Module (shared Components, Directives and Pipes)
├── shared.module.ts
└── /assets
└── /environments - Environment specific configuration
├── environment.dev.ts
├── environment.ts
└── /theme
├── facebook-messenger-theme.scss
├── gradient-mixins.scss
├── gradient.scss
├── green-and-blue-theme.scss
├── variables.scss
├── index.html
├── manifest.json
├── service-worker.js
└── /config - Webpack Configuration
├── webpack.config.json
└── /e2e - E2E Test Configuration
├── app.e2e-spec.ts
├── app.po.ts
├── tsconfig.e2e.json
└── /resources - Default Resources (e.g., Icon and Splash)
└── /www - Ionics 'dist' directory
└── /assets
└── /build
├── index.html
├── manifest.json
├── service-worker.js
├── .editorconfig
├── .gitignore
├── config.xml
├── ionic.config.json
├── karma.conf.json
├── package.json
├── protractor.conf.json
├── README.md
├── tsconfig.json
├── tsconfig.ng-cli.json
├── tslint.json
```
This is the structure of a typical ``ionic 4`` application. Note however that this will work for an ionic 3 project. If you have any problems however you can leave a comment below.
**How do they work together**
When you build an ionic app it compiles your code into a ``www`` folder which i like to call the main soup. All we have to do when using it with electron is open a browser window with the native electron api and load the ``www`` folder into this window. Easy as pie.
So lets get started
```
//Start a new ionic project --type=ionic-angular
ionic start newproject Blank
//install electron as a development dependency
npm install electron --save-dev
//Yarn should have the same command
```
Next thing would be simply to create a main.js file like the one shown in our electron directory and help make it identifiable from our package.json. Add this to your package.json after making the ``main.js`` file.
```
.......
"main": "main.js"
.....
```
In our main.js file just as stated earlier we would have to make a new browser window and inject the ``www`` files into it. Simply do this
```
const electron = require('electron')
const app = electron.app
const BrowserWindow = electron.BrowserWindow
const path = require('path')
const url = require('url')
let win, serve
const args = process.argv.slice(1)
serve = args.some(val => val === '--serve')
function createWindow () {
win = new BrowserWindow({
width: 1800,
height: 1200,
center: true,
icon: path.join(__dirname, './resources/electron/icons/64x64.png')
})
if (serve) {
require('electron-reload')(__dirname, {
electron: require(`${__dirname}/node_modules/electron`)
})
win.loadURL('http://localhost:4200')
} else {
win.loadURL(url.format({
pathname: path.join(__dirname, 'www/index.html'),
protocol: 'file:',
slashes: true
}))
}
win.webContents.openDevTools()
// Emitted when the window is closed.
win.on('closed', () => {
// Dereference the window object, usually you would store window
// in an array if your app supports multi windows, this is the time
// when you should delete the corresponding element.
win = null
})
}
try {
// This method will be called when Electron has finished
// initialization and is ready to create browser windows.
// Some APIs can only be used after this event occurs.
app.on('ready', createWindow)
// Quit when all windows are closed.
app.on('window-all-closed', () => {
// On OS X it is common for applications and their menu bar
// to stay active until the user quits explicitly with Cmd + Q
if (process.platform !== 'darwin') {
app.quit()
}
})
app.on('activate', () => {
// On OS X it's common to re-create a window in the app when the
// dock icon is clicked and there are no other windows open.
if (win === null) {
createWindow()
}
})
} catch (e) {
// Catch Error
// throw e;
}
```
And then we can run this application by building from ionic and then running electron. Add this to your scripts so you can do this from your command-line.
```
..Package.json
....Other code here
//Your scripts should be exactly this
"scripts": {
"debug-main": "electron --inspect-brk=5858 .",
"build": "ionic-app-scripts build",
"clean": "ionic-app-scripts clean",
"dev": "gulp dev",
"lint": "ionic-app-scripts lint",
"ionic:build": "ionic-app-scripts build",
"ionic:serve": "ionic-app-scripts serve",
"ionic:watch": "ionic-app-scripts watch",
"start": "npm run build && electron .",
},
```
We can begin by running
```
npm start
```
And this should be the result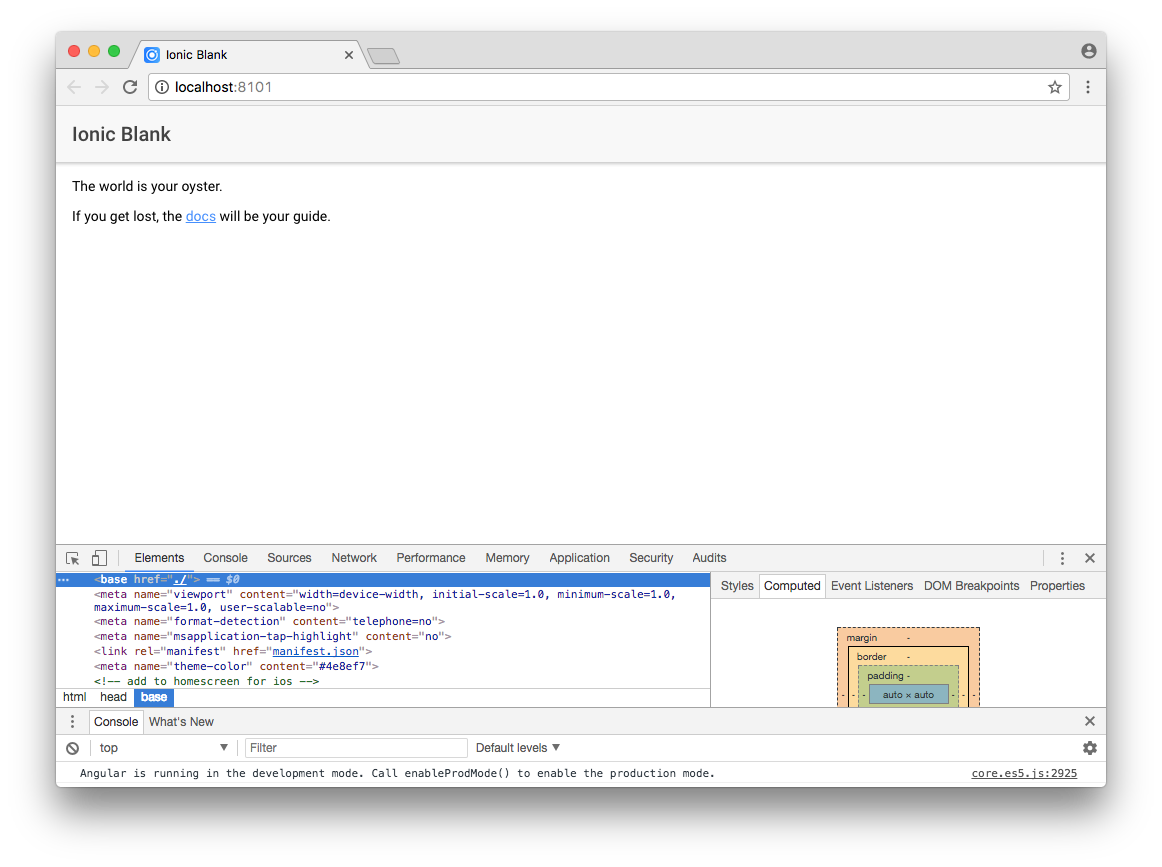
#### Understanding the main and renderer processes
This is one of the major concepts you need to understand to successfully build an electron application.
The application runs with multiple processes based on function. Chromium is built this way so that if one window of an application crashes, it does not destroy the whole application. Some apis can be called from the main process, while others can be called from renderer processes. For a full list click [Here](https://electronjs.org/docs/tutorial/application-architecture).
Ionic runs in a renderer process. Meaning that you cannot make main process calls through ionic. You would need to use ipc to send a message to the main process to make that call. To send this messages appriopriately, there is an awesome angular module called Ngx-Electron-Module.
This is what we would use to make the api calls.
#### Making API calls
First thing you need to do is install the ngx-electron module and add it to your imports
```
npm install ngx-electron --save-dev
```
Then
...
```
\\...Other code here
mport { NgxElectronModule } from 'ngx-electron'
@NgModule({
declarations: [AppComponent],
entryComponents: [],
imports: [BrowserModule, IonicModule.forRoot(), AppRoutingModule, NgxElectronModule],
providers: [
StatusBar,
SplashScreen,
{ provide: RouteReuseStrategy, useClass: IonicRouteStrategy }
],
bootstrap: [AppComponent]
})
export class AppModule {}
```
We can now proceed to making api calls like this
```
import { ElectronService } from 'ngx-electron'
import { Platform, Events } from '@ionic/angular'
...
constructor(public electron: ElectronService, private platform: Platform, private events: Events) {}
...
public setup() {
const ctx = this
console.log('Setting up the application database')
ctx.electron.ipcRenderer.sent('asyncronous-message','ping')//Make the api call
}
```
And we receive it from main.js like
```
ipcMain.on('asynchronous-message', (event, arg) => {
console.log(arg) // prints "ping"
event.sender.send('asynchronous-reply', 'pong')
})
```
Thanks for reading, Hope you found it helpful.
Find the code in [Github](https://github.com/yalzeee/NewProject-Ionic)| author | yalzeee |
|---|---|
| permlink | ionic-tutorials-working-with-electron-api-s |
| category | utopian-io |
| json_metadata | {"tags":["utopian-io","tutorials","programming","stach","wafrica"],"image":["https://cdn.steemitimages.com/DQmS4ho2iWke6Uc4wmNdSTD2GCtYJZFb7rRzMD2LLV49Dqs/ionic.jpg","https://cdn.steemitimages.com/DQmWpv66Rgdgq3eth9oYAR1P8Kusc243UfqwrckHz84AZwj/browser-ionic-blank.png"],"links":["https://www.ionicframework.com/","https://github.com/ionic-team/ionic","https://electronjs.org/","https://electronjs.org/docs/tutorial/application-architecture","https://github.com/yalzeee/NewProject-Ionic"],"app":"steemit/0.1","format":"markdown"} |
| created | 2019-02-22 21:00:57 |
| last_update | 2019-02-22 21:00:57 |
| depth | 0 |
| children | 7 |
| last_payout | 2019-03-01 21:00:57 |
| cashout_time | 1969-12-31 23:59:59 |
| total_payout_value | 11.368 HBD |
| curator_payout_value | 3.511 HBD |
| pending_payout_value | 0.000 HBD |
| promoted | 0.000 HBD |
| body_length | 10,594 |
| author_reputation | 12,484,565,044,191 |
| root_title | "Ionic Tutorials: Working with electron(API's)" |
| beneficiaries | [] |
| max_accepted_payout | 1,000,000.000 HBD |
| percent_hbd | 10,000 |
| post_id | 80,257,058 |
| net_rshares | 27,362,737,270,076 |
| author_curate_reward | "" |
| voter | weight | wgt% | rshares | pct | time |
|---|---|---|---|---|---|
| tombstone | 0 | 1,819,631,226,026 | 7.61% | ||
| bleepcoin | 0 | 210,836,699,805 | 50% | ||
| goode | 0 | 714,880,678 | 100% | ||
| rufans | 0 | 21,110,471,220 | 100% | ||
| lordneroo | 0 | 28,781,732,924 | 50% | ||
| miniature-tiger | 0 | 126,620,213,818 | 50% | ||
| helo | 0 | 39,903,939,967 | 19.76% | ||
| klynic | 0 | 959,111,975 | 50% | ||
| codingdefined | 0 | 28,274,597,536 | 20% | ||
| bachuslib | 0 | 19,961,022,299 | 100% | ||
| haji | 0 | 93,497,680 | 0.5% | ||
| elbleess | 0 | 817,950,487 | 100% | ||
| kaz2305 | 0 | 158,885,921 | 50% | ||
| vwovwe | 0 | 1,463,961,549 | 100% | ||
| bhim | 0 | 72,373,817 | 50% | ||
| jadabug | 0 | 1,284,232,561 | 1% | ||
| accelerator | 0 | 5,880,357,455 | 0.39% | ||
| stach | 0 | 102,882,330,313 | 100% | ||
| espoem | 0 | 32,995,331,297 | 17.6% | ||
| tolarnee | 0 | 1,102,730,368 | 50% | ||
| mcfarhat | 0 | 13,956,644,141 | 7.9% | ||
| rogerman | 0 | 150,363,922 | 100% | ||
| mzajoke | 0 | 391,921,279 | 50% | ||
| romiferns | 0 | 279,004,924 | 9.51% | ||
| loshcat | 0 | 2,550,121,870 | 100% | ||
| yusifm | 0 | 214,996,508 | 50% | ||
| tekadii | 0 | 0 | 100% | ||
| utopian-io | 0 | 23,699,525,572,224 | 19.03% | ||
| jaff8 | 0 | 43,992,988,525 | 19.76% | ||
| lumen77 | 0 | 1,405,559,975 | 100% | ||
| advsamadhan | 0 | 128,545,580 | 50% | ||
| pasaift | 0 | 922,173,699 | 5% | ||
| newsrx | 0 | 72,736,625 | 6.24% | ||
| caesar2341 | 0 | 239,170,788 | 50% | ||
| fejiro | 0 | 1,269,003,763 | 50% | ||
| steemitag | 0 | 3,370,663,218 | 10% | ||
| turkolog | 0 | 163,045,059 | 50% | ||
| olatun | 0 | 419,572,823 | 100% | ||
| amosbastian | 0 | 59,341,566,565 | 19.76% | ||
| jeline | 0 | 1,682,271,815 | 100% | ||
| daeshawn | 0 | 1,267,235 | 2.25% | ||
| pearlkel | 0 | 242,935,835 | 50% | ||
| kekegist | 0 | 164,916,348 | 100% | ||
| portugalcoin | 0 | 12,813,843,458 | 15% | ||
| hokulor | 0 | 59,413,667 | 5% | ||
| yalzeee | 0 | 73,022,872 | 100% | ||
| tobias-g | 0 | 131,451,554,556 | 48% | ||
| deril | 0 | 194,498,174 | 50% | ||
| waku | 0 | 608,254,872 | 100% | ||
| crypto4euro | 0 | 212,281,801 | 50% | ||
| hashas120 | 0 | 402,975,010 | 100% | ||
| used-lessboy | 0 | 165,846,585 | 50% | ||
| matadonis | 0 | 244,835,614 | 50% | ||
| dr-frankenstein | 0 | 1,460,872,029 | 50% | ||
| syahrulfardani | 0 | 249,246,220 | 50% | ||
| chidiarua | 0 | 555,616,294 | 100% | ||
| valarmorg | 0 | 539,972,049 | 100% | ||
| fego | 0 | 11,920,130,300 | 19.76% | ||
| rusliwaddah | 0 | 248,312,108 | 50% | ||
| smart-shaegxy | 0 | 546,689,595 | 50% | ||
| fifi-yanti | 0 | 248,659,724 | 100% | ||
| steempeninsula | 0 | 423,884,666 | 100% | ||
| jacintoelbarouki | 0 | 141,031,265 | 50% | ||
| reazuliqbal | 0 | 47,514,313,927 | 25% | ||
| properfraction | 0 | 686,401,238 | 100% | ||
| anam01 | 0 | 91,808,877 | 50% | ||
| jo5h | 0 | 2,775,101,299 | 100% | ||
| phaazer1 | 0 | 1,487,879,627 | 50% | ||
| isaaceko | 0 | 352,174,452 | 100% | ||
| teukuizul | 0 | 447,937,135 | 100% | ||
| rikilb | 0 | 228,673,895 | 50% | ||
| saifuddin07 | 0 | 671,413,390 | 100% | ||
| ismail96 | 0 | 158,964,363 | 100% | ||
| eskomauliadi | 0 | 107,992,365 | 50% | ||
| adamada | 0 | 15,816,009,606 | 50% | ||
| sarjani | 0 | 441,251,562 | 100% | ||
| andhikafebrian | 0 | 167,261,859 | 50% | ||
| ezravandi | 0 | 1,790,142,213 | 1.5% | ||
| carloniere | 0 | 282,432,064 | 50% | ||
| cjunros | 0 | 3,732,737,257 | 60% | ||
| wandy01 | 0 | 180,780,352 | 50% | ||
| murhadi9 | 0 | 786,761,776 | 100% | ||
| mandarin2016 | 0 | 19,153,750,622 | 50% | ||
| everydaybitcoin | 0 | 112,601,530 | 50% | ||
| juned0292 | 0 | 248,051,997 | 50% | ||
| teukuafzal | 0 | 186,781,070 | 50% | ||
| bookoons | 0 | 2,504,316,035 | 50% | ||
| oiq | 0 | 248,874,836 | 50% | ||
| statsexpert | 0 | 7,531,892,466 | 100% | ||
| pepememes | 0 | 154,444,521 | 50% | ||
| gifty-e | 0 | 104,636,884 | 50% | ||
| wawan.anestesi | 0 | 243,700,391 | 50% | ||
| kerabanafk | 0 | 249,161,218 | 50% | ||
| nurjannah11 | 0 | 249,246,575 | 50% | ||
| khairuddin08 | 0 | 196,769,393 | 50% | ||
| nur-malita | 0 | 248,299,165 | 50% | ||
| steem-factuals | 0 | 163,114,778 | 50% | ||
| syahril9 | 0 | 148,655,712 | 50% | ||
| wr212 | 0 | 226,337,904 | 50% | ||
| kendallron | 0 | 234,526,543 | 15% | ||
| terry00 | 0 | 125,421,287 | 50% | ||
| fachod | 0 | 133,606,629 | 50% | ||
| romeskie | 0 | 1,850,743,699 | 25% | ||
| indayclara | 0 | 284,271,672 | 7.5% | ||
| bahagia9 | 0 | 248,521,005 | 50% | ||
| kataindah | 0 | 161,479,529 | 50% | ||
| nigerian-yogagal | 0 | 2,714,430,939 | 50% | ||
| etaletai | 0 | 569,339,895 | 50% | ||
| pinas | 0 | 466,419,675 | 50% | ||
| alimirza0416 | 0 | 100,447,843 | 50% | ||
| awesome-p | 0 | 248,293,798 | 50% | ||
| finite-clothings | 0 | 100,378,532 | 25% | ||
| hardaeborla | 0 | 4,278,685,302 | 50% | ||
| viralz | 0 | 135,579,913 | 50% | ||
| lightoj | 0 | 96,330,913 | 10% | ||
| manualejandrop | 0 | 100,189,623 | 25% | ||
| artcreator | 0 | 177,228,557 | 20% | ||
| nuryriana | 0 | 248,463,955 | 50% | ||
| akmal93 | 0 | 547,619,480 | 50% | ||
| leomarock | 0 | 235,469,875 | 50% | ||
| midesignature | 0 | 164,563,555 | 50% | ||
| evegrace | 0 | 679,927,498 | 50% | ||
| newsnow | 0 | 156,727,761 | 50% | ||
| pharao20 | 0 | 148,912,854 | 50% | ||
| osakuni | 0 | 83,808,679 | 50% | ||
| albertotang | 0 | 110,364,256 | 50% | ||
| signup-newpeople | 0 | 163,515,983 | 50% | ||
| polash66129 | 0 | 165,343,997 | 50% | ||
| ninihorlah | 0 | 212,797,980 | 50% | ||
| chrome.citizen | 0 | 165,427,742 | 50% | ||
| pinkyangel | 0 | 161,993,077 | 50% | ||
| bestofph | 0 | 6,379,121,586 | 15% | ||
| ulockblock | 0 | 19,089,270,030 | 10.07% | ||
| olusegun | 0 | 234,595,228 | 50% | ||
| carolinafer | 0 | 181,237,966 | 50% | ||
| mahdi-steem | 0 | 547,821,093 | 50% | ||
| sadnesscarl | 0 | 170,986,015 | 50% | ||
| cryptouno | 0 | 525,532,388 | 5% | ||
| mops2e | 0 | 170,916,832 | 14.08% | ||
| swapsteem | 0 | 817,734,518 | 9.51% | ||
| taqiyagenji | 0 | 248,931,630 | 50% | ||
| sid000 | 0 | 108,797,637 | 50% | ||
| barnacoi | 0 | 245,891,736 | 100% | ||
| merlin7 | 0 | 317,839,014 | 0.01% | ||
| pemburubitcoin | 0 | 191,882,668 | 50% | ||
| shahidullah832 | 0 | 112,571,821 | 50% | ||
| steem-ua | 0 | 642,050,081,229 | 6.24% | ||
| sammiegold | 0 | 974,985,154 | 50% | ||
| olulekan | 0 | 353,153,512 | 50% | ||
| naveedakhtar6283 | 0 | 163,928,500 | 50% | ||
| steemexpress | 0 | 2,050,855,894 | 3.77% | ||
| toheliuk | 0 | 557,675,934 | 50% | ||
| ascorphat | 0 | 2,269,466,672 | 2.5% | ||
| ctime | 0 | 112,265,882,897 | 3.95% | ||
| writeandearn | 0 | 662,035,735 | 50% | ||
| hamsa.quality | 0 | 1,413,386,858 | 1% | ||
| xrp.trail | 0 | 853,971,584 | 1.3% | ||
| src3 | 0 | 3,892,880,529 | 100% | ||
| ehsan1895 | 0 | 202,109,988 | 50% | ||
| jdhh7 | 0 | 247,300,374 | 50% | ||
| mdorka | 0 | 3,883,389,378 | 100% |
Thank you for your contribution @yalzeee.
We've been reviewing your contribution and suggested the following points for your next tutorial:

- We suggest you put more images of the results than you are explaining. Images help make the tutorial more enjoyable to read.

- The comments in the code were fine, but you need to explain in more detail about the code section that you put in your tutorial.

Thank you for your work in developing this tutorial.
Looking forward to your upcoming tutorials.

Your contribution has been evaluated according to [Utopian policies and guidelines](https://join.utopian.io/guidelines), as well as a predefined set of questions pertaining to the category.

To view those questions and the relevant answers related to your post, [click here](https://review.utopian.io/result/8/3-1-3-1-3-3-2-3-).

----
Need help? Chat with us on [Discord](https://discord.gg/uTyJkNm).

[[utopian-moderator]](https://join.utopian.io/)
| author | portugalcoin |
|---|---|
| permlink | re-yalzeee-ionic-tutorials-working-with-electron-api-s-20190223t095218483z |
| category | utopian-io |
| json_metadata | {"tags":["utopian-io"],"users":["yalzeee"],"links":["https://join.utopian.io/guidelines","https://review.utopian.io/result/8/3-1-3-1-3-3-2-3-","https://discord.gg/uTyJkNm","https://join.utopian.io/"],"app":"steemit/0.1"} |
| created | 2019-02-23 09:52:18 |
| last_update | 2019-02-23 09:52:18 |
| depth | 1 |
| children | 1 |
| last_payout | 2019-03-02 09:52:18 |
| cashout_time | 1969-12-31 23:59:59 |
| total_payout_value | 7.868 HBD |
| curator_payout_value | 2.480 HBD |
| pending_payout_value | 0.000 HBD |
| promoted | 0.000 HBD |
| body_length | 949 |
| author_reputation | 602,509,723,215,093 |
| root_title | "Ionic Tutorials: Working with electron(API's)" |
| beneficiaries | [] |
| max_accepted_payout | 1,000,000.000 HBD |
| percent_hbd | 10,000 |
| post_id | 80,278,159 |
| net_rshares | 17,394,879,336,431 |
| author_curate_reward | "" |
| voter | weight | wgt% | rshares | pct | time |
|---|---|---|---|---|---|
| lordneroo | 0 | 11,528,805,979 | 20% | ||
| codingdefined | 0 | 27,689,573,375 | 20% | ||
| espoem | 0 | 28,685,806,845 | 15% | ||
| utopian-io | 0 | 17,146,118,829,403 | 12.14% | ||
| jaff8 | 0 | 46,177,763,953 | 20.58% | ||
| emrebeyler | 0 | 11,633,653 | 0.01% | ||
| amosbastian | 0 | 62,254,424,077 | 20.58% | ||
| nenya | 0 | 1,851,954,285 | 80% | ||
| sudefteri | 0 | 5,569,846,322 | 100% | ||
| reazuliqbal | 0 | 18,965,903,324 | 10% | ||
| amico | 0 | 454,245,480 | 0.15% | ||
| statsexpert | 0 | 7,502,450,416 | 100% | ||
| ulockblock | 0 | 8,022,782,636 | 4.34% | ||
| nijn | 0 | 395,235,625 | 80% | ||
| quenty | 0 | 3,260,643,117 | 60% | ||
| curbot | 0 | 2,497,293,303 | 100% | ||
| ascorphat | 0 | 2,231,439,808 | 2.5% | ||
| nimloth | 0 | 1,565,818,459 | 80% | ||
| yff | 0 | 19,352,922,320 | 100% | ||
| curatortrail | 0 | 268,879,629 | 80% | ||
| tenyears | 0 | 473,084,422 | 87% |
Thank you for your review, @portugalcoin! Keep up the good work!
| author | utopian-io |
|---|---|
| permlink | re-re-yalzeee-ionic-tutorials-working-with-electron-api-s-20190223t095218483z-20190225t171659z |
| category | utopian-io |
| json_metadata | "{"app": "beem/0.20.17"}" |
| created | 2019-02-25 17:17:03 |
| last_update | 2019-02-25 17:17:03 |
| depth | 2 |
| children | 0 |
| last_payout | 2019-03-04 17:17:03 |
| cashout_time | 1969-12-31 23:59:59 |
| total_payout_value | 0.000 HBD |
| curator_payout_value | 0.000 HBD |
| pending_payout_value | 0.000 HBD |
| promoted | 0.000 HBD |
| body_length | 64 |
| author_reputation | 152,955,367,999,756 |
| root_title | "Ionic Tutorials: Working with electron(API's)" |
| beneficiaries | [] |
| max_accepted_payout | 1,000,000.000 HBD |
| percent_hbd | 10,000 |
| post_id | 80,380,617 |
| net_rshares | 0 |
Great tutorial!!!

Posted using [Partiko Android](https://steemit.com/@partiko-android)
| author | src3 |
|---|---|
| permlink | src3-re-yalzeee-ionic-tutorials-working-with-electron-api-s-20190222t210203292z |
| category | utopian-io |
| json_metadata | {"app":"partiko","client":"android"} |
| created | 2019-02-22 21:02:03 |
| last_update | 2019-02-22 21:02:03 |
| depth | 1 |
| children | 1 |
| last_payout | 2019-03-01 21:02:03 |
| cashout_time | 1969-12-31 23:59:59 |
| total_payout_value | 0.000 HBD |
| curator_payout_value | 0.000 HBD |
| pending_payout_value | 0.000 HBD |
| promoted | 0.000 HBD |
| body_length | 87 |
| author_reputation | 3,053,491,751,983 |
| root_title | "Ionic Tutorials: Working with electron(API's)" |
| beneficiaries | [] |
| max_accepted_payout | 1,000,000.000 HBD |
| percent_hbd | 10,000 |
| post_id | 80,257,090 |
| net_rshares | 72,336,811 |
| author_curate_reward | "" |
| voter | weight | wgt% | rshares | pct | time |
|---|---|---|---|---|---|
| yalzeee | 0 | 72,336,811 | 100% |
Thanks
Glad you like it
| author | yalzeee |
|---|---|
| permlink | re-src3-src3-re-yalzeee-ionic-tutorials-working-with-electron-api-s-20190222t213715629z |
| category | utopian-io |
| json_metadata | {"tags":["utopian-io"],"app":"steemit/0.1"} |
| created | 2019-02-22 21:37:21 |
| last_update | 2019-02-22 21:37:21 |
| depth | 2 |
| children | 0 |
| last_payout | 2019-03-01 21:37:21 |
| cashout_time | 1969-12-31 23:59:59 |
| total_payout_value | 0.000 HBD |
| curator_payout_value | 0.000 HBD |
| pending_payout_value | 0.000 HBD |
| promoted | 0.000 HBD |
| body_length | 24 |
| author_reputation | 12,484,565,044,191 |
| root_title | "Ionic Tutorials: Working with electron(API's)" |
| beneficiaries | [] |
| max_accepted_payout | 1,000,000.000 HBD |
| percent_hbd | 10,000 |
| post_id | 80,258,245 |
| net_rshares | 0 |
#### Hi @yalzeee!

Your post was upvoted by @steem-ua, new Steem dApp, using UserAuthority for algorithmic post curation!
Your post is eligible for our upvote, thanks to our collaboration with @utopian-io!
**Feel free to join our [@steem-ua Discord server](https://discord.gg/KpBNYGz)**
| author | steem-ua |
|---|---|
| permlink | re-ionic-tutorials-working-with-electron-api-s-20190223t112727z |
| category | utopian-io |
| json_metadata | "{"app": "beem/0.20.18"}" |
| created | 2019-02-23 11:27:30 |
| last_update | 2019-02-23 11:27:30 |
| depth | 1 |
| children | 0 |
| last_payout | 2019-03-02 11:27:30 |
| cashout_time | 1969-12-31 23:59:59 |
| total_payout_value | 0.000 HBD |
| curator_payout_value | 0.000 HBD |
| pending_payout_value | 0.000 HBD |
| promoted | 0.000 HBD |
| body_length | 286 |
| author_reputation | 23,214,230,978,060 |
| root_title | "Ionic Tutorials: Working with electron(API's)" |
| beneficiaries | [] |
| max_accepted_payout | 1,000,000.000 HBD |
| percent_hbd | 10,000 |
| post_id | 80,280,881 |
| net_rshares | 0 |
Hi. I am part of [this project](https://steemit.com/steem/@steemcommunity/announing-steems-biggest-push-yet-to-grow-a-middle-class-let-make-250-new-minnows-in-a-month) to increase the number of Steem minnows (over 500 SP). You are pretty close and I wonder if you would like some support to get there. We just ask that you do a post committing to powering up and sticking with Steem using the tag #TenKMinnows. If you are interested then please reply to this.
| author | steevc |
|---|---|
| permlink | re-yalzeee-ionic-tutorials-working-with-electron-api-s-20190305t202303183z |
| category | utopian-io |
| json_metadata | {"tags":["utopian-io","tenkminnows"],"links":["https://steemit.com/steem/@steemcommunity/announing-steems-biggest-push-yet-to-grow-a-middle-class-let-make-250-new-minnows-in-a-month"],"app":"steemit/0.1"} |
| created | 2019-03-05 20:23:03 |
| last_update | 2019-03-05 20:23:03 |
| depth | 1 |
| children | 0 |
| last_payout | 2019-03-12 20:23:03 |
| cashout_time | 1969-12-31 23:59:59 |
| total_payout_value | 0.000 HBD |
| curator_payout_value | 0.000 HBD |
| pending_payout_value | 0.000 HBD |
| promoted | 0.000 HBD |
| body_length | 459 |
| author_reputation | 1,393,391,130,705,019 |
| root_title | "Ionic Tutorials: Working with electron(API's)" |
| beneficiaries | [] |
| max_accepted_payout | 1,000,000.000 HBD |
| percent_hbd | 10,000 |
| post_id | 80,786,413 |
| net_rshares | 0 |
Hey, @yalzeee!

**Thanks for contributing on Utopian**.
We’re already looking forward to your next contribution!

**Get higher incentives and support Utopian.io!**
 Simply set @utopian.pay as a 5% (or higher) payout beneficiary on your contribution post (via [SteemPlus](https://chrome.google.com/webstore/detail/steemplus/mjbkjgcplmaneajhcbegoffkedeankaj?hl=en) or [Steeditor](https://steeditor.app)).

**Want to chat? Join us on Discord https://discord.gg/h52nFrV.**

<a href='https://steemconnect.com/sign/account-witness-vote?witness=utopian-io&approve=1'>Vote for Utopian Witness!</a>
| author | utopian-io |
|---|---|
| permlink | re-ionic-tutorials-working-with-electron-api-s-20190223t183508z |
| category | utopian-io |
| json_metadata | "{"app": "beem/0.20.17"}" |
| created | 2019-02-23 18:35:09 |
| last_update | 2019-02-23 18:35:09 |
| depth | 1 |
| children | 0 |
| last_payout | 2019-03-02 18:35:09 |
| cashout_time | 1969-12-31 23:59:59 |
| total_payout_value | 0.000 HBD |
| curator_payout_value | 0.000 HBD |
| pending_payout_value | 0.000 HBD |
| promoted | 0.000 HBD |
| body_length | 589 |
| author_reputation | 152,955,367,999,756 |
| root_title | "Ionic Tutorials: Working with electron(API's)" |
| beneficiaries | [] |
| max_accepted_payout | 1,000,000.000 HBD |
| percent_hbd | 10,000 |
| post_id | 80,294,892 |
| net_rshares | 0 |