<center>
<div class="text-justify">
<center>
</center>
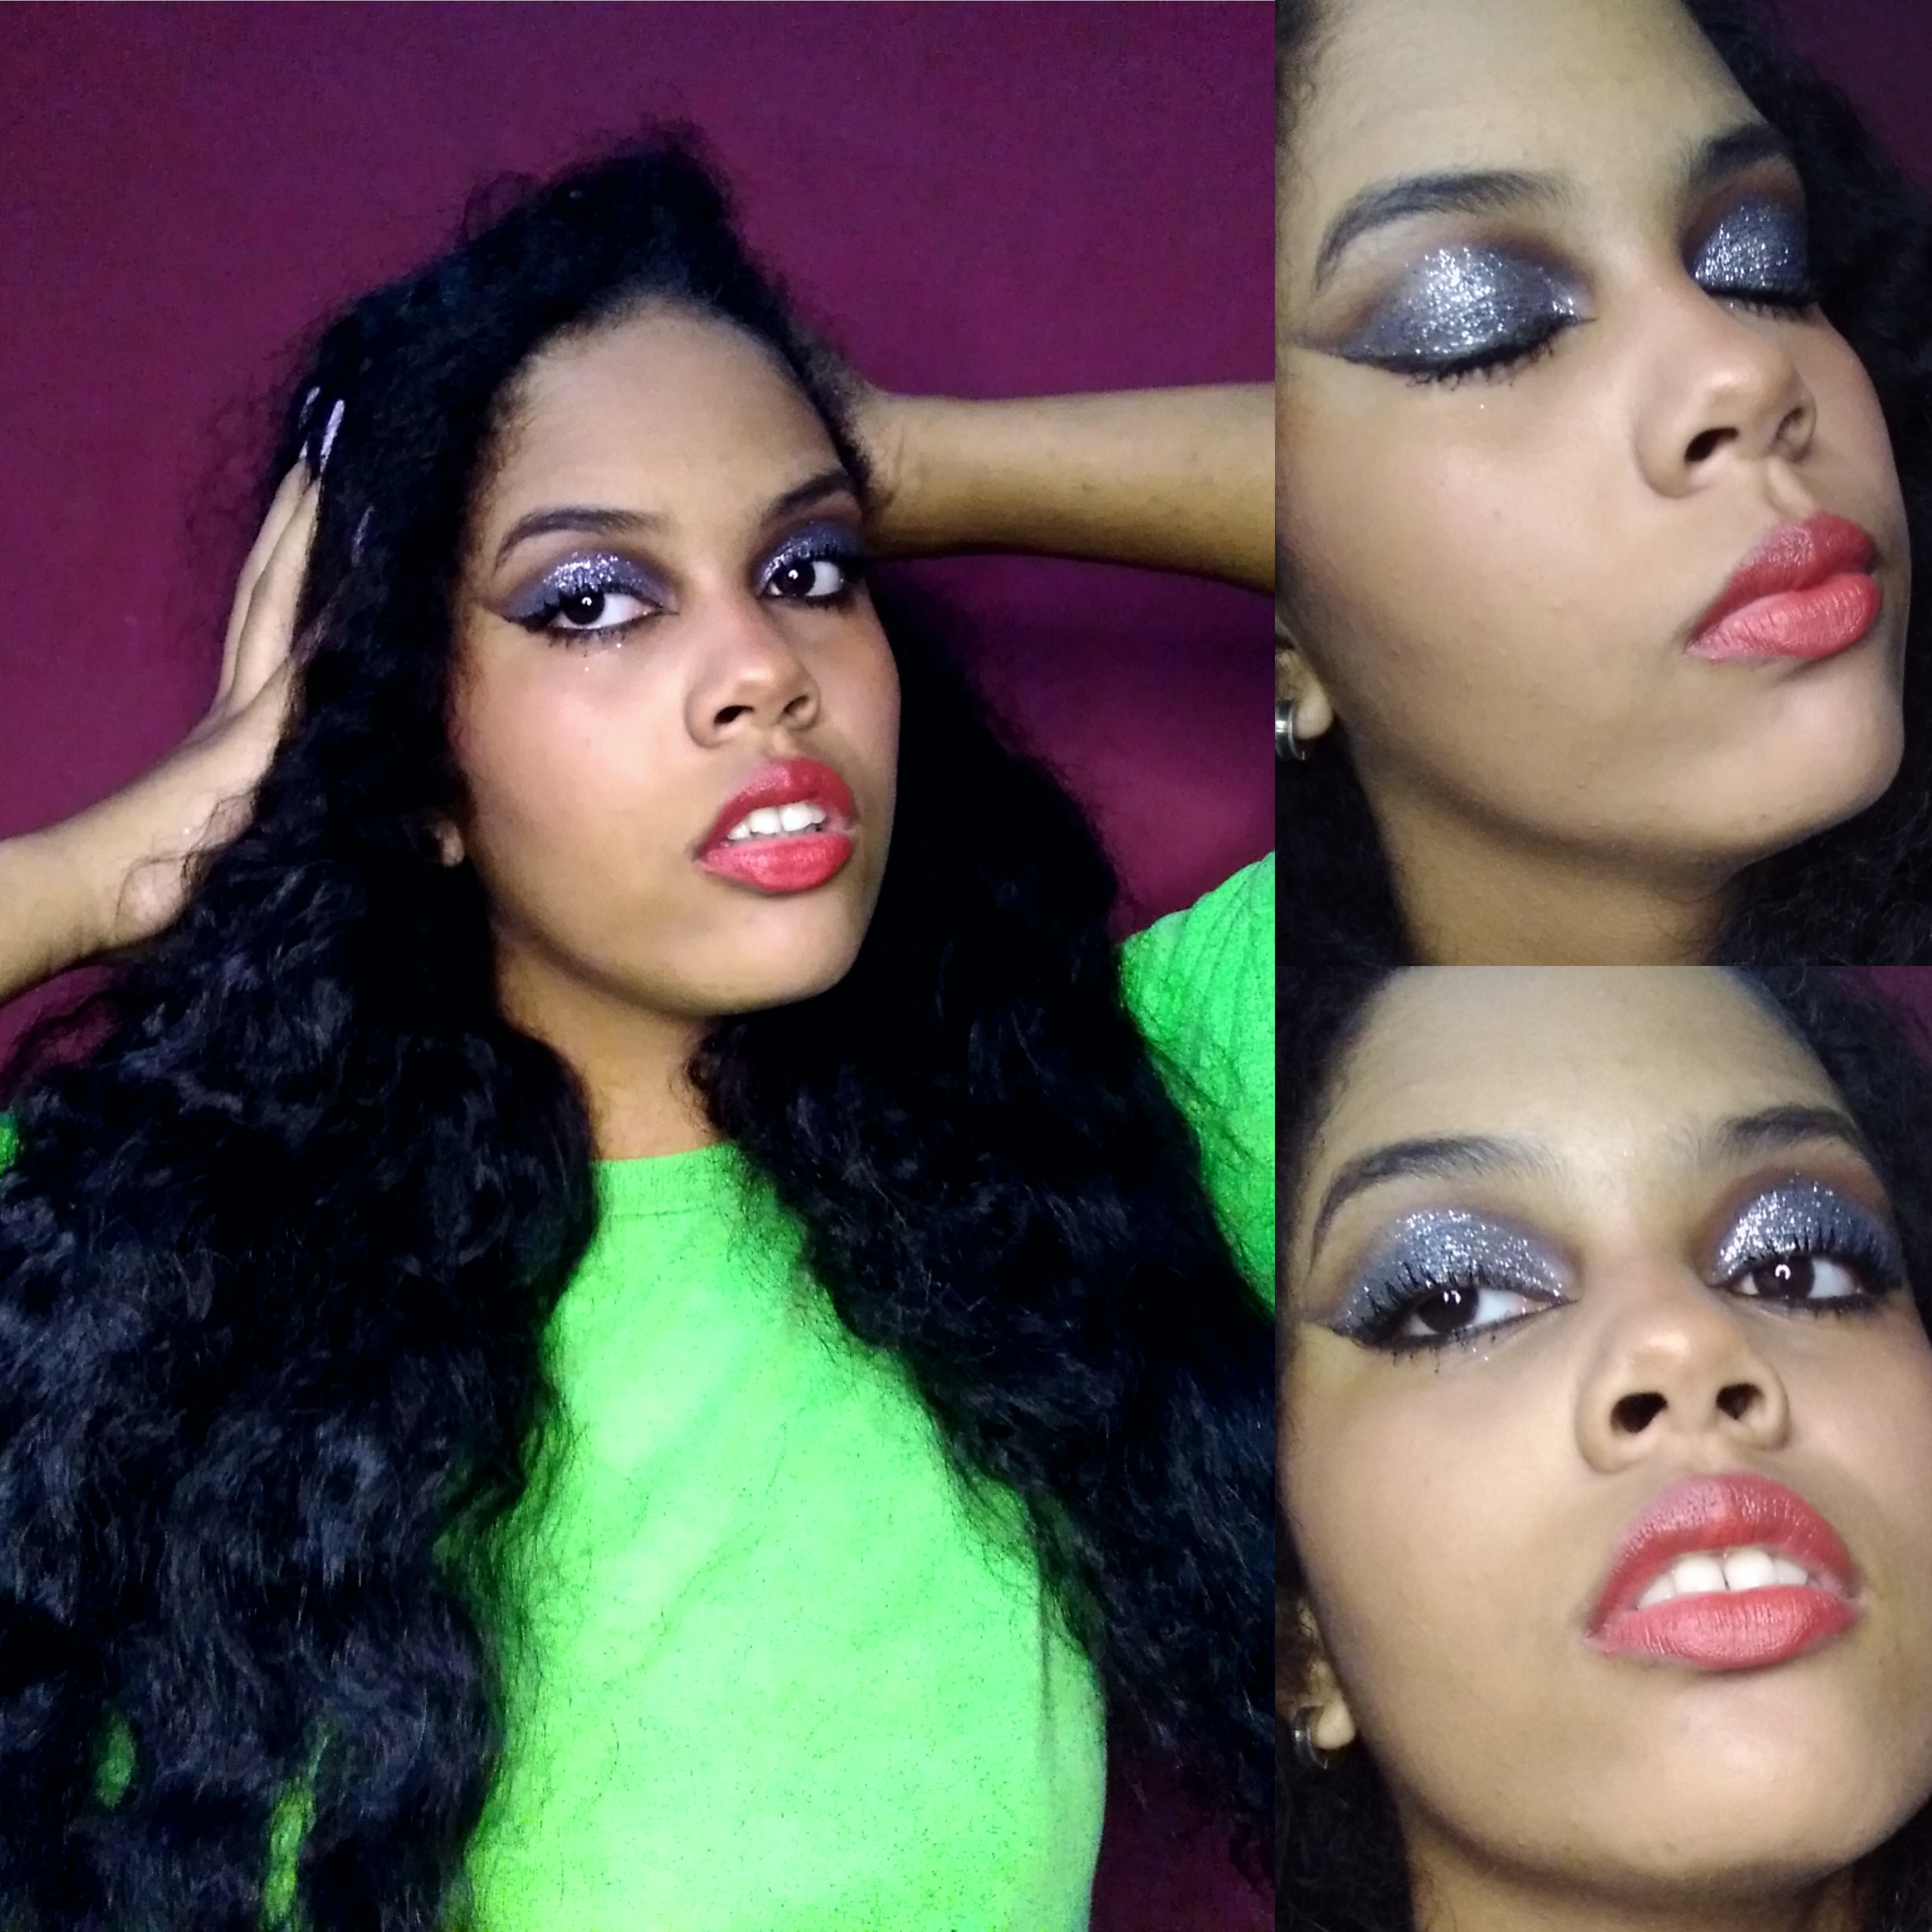
Hola hola hermosa comunidad, saludos para todos, espero se encuentren bien y tengan un buen día, como siempre para mi es un gran placer traer contenido para compartirlo con todos ustedes. Hace tiempo quería probar algo y diferente, hasta que por fin en esta ocasión me di la oportunidad de crear un maquillaje por primera vez en tonos oscuros.
> Hello hello beautiful community, greetings to all, I hope you are well and have a good day, as always for me it is a great pleasure to bring content to share with you all. For some time I wanted to try something and different, until finally this time I gave myself the opportunity to create a makeup for the first time in dark tones.
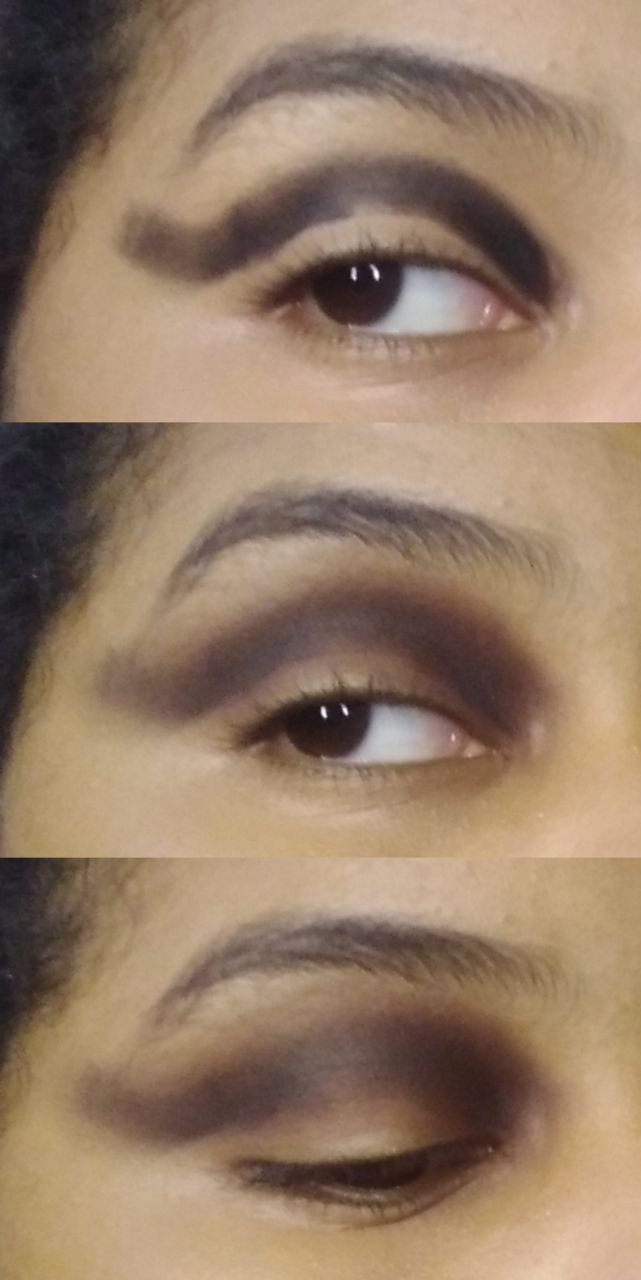
Paso 1: aplicamos sombra negra en la parte superior del párpado, llevándola un poco hacia afuera, luego con una sombra color marrón oscuro lo vamos difuminando hacia arriba.
<center>
</center>
> Step 1: apply black shadow on the upper part of the eyelid, moving it a little bit outwards, then with a dark brown shadow we blend it upwards.
Paso 2: con base realizamos un corte en la cuenca, luego aplicaremos un poco de sombra gris.
<center>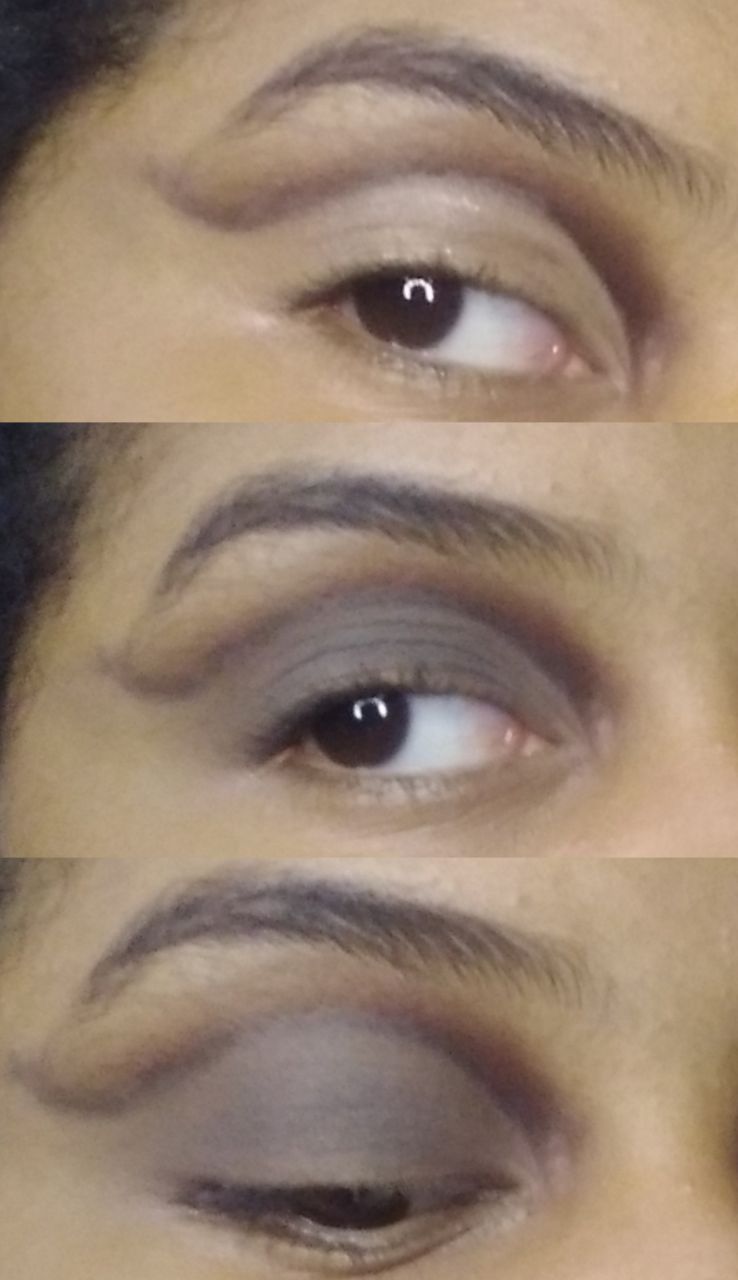</center>
> Step 2: with a base we make a cut in the basin, then we apply a little gray shadow.
Paso 3: aplicamos glitter plateado con negro y realizamos un pequeño delineado.
<center>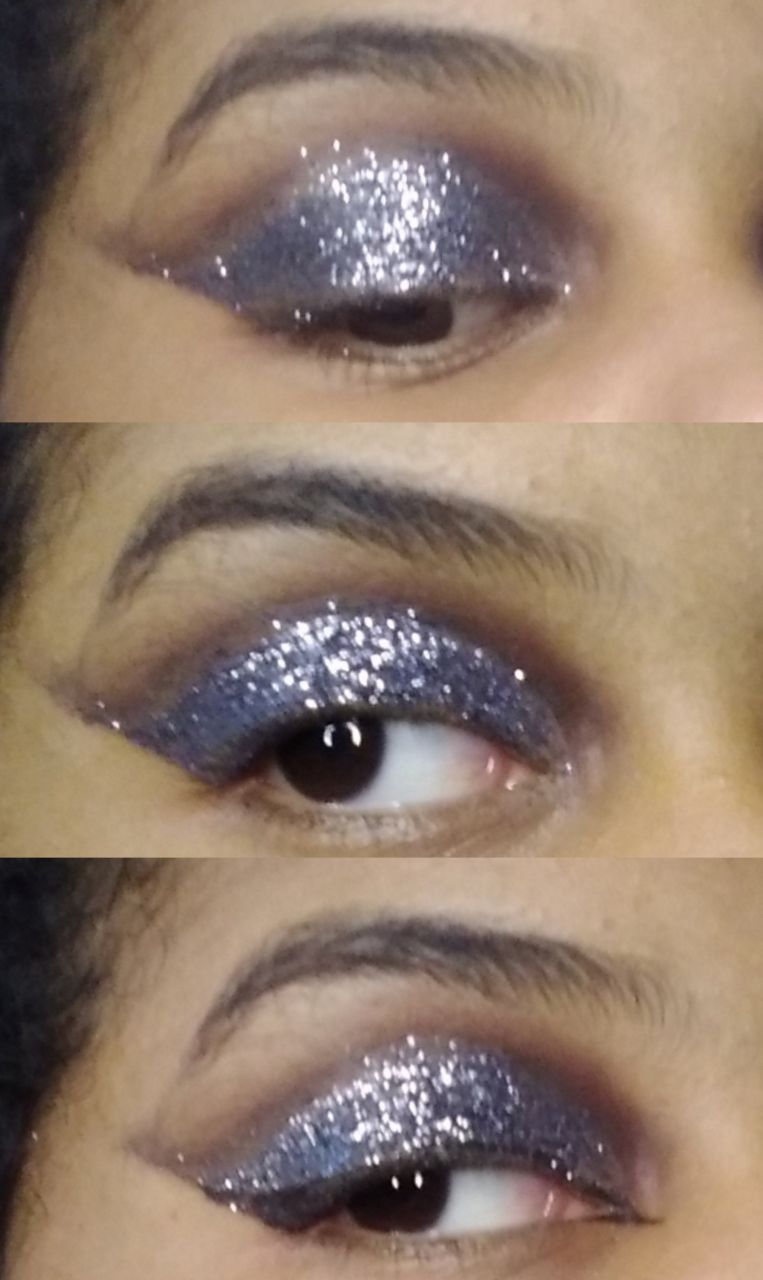 </center>
> Step 3: apply silver glitter with black and make a small outline.
Paso 4: agregamos máscara de pestañas y sombra negra a la línea de pestañas inferiores.
<center>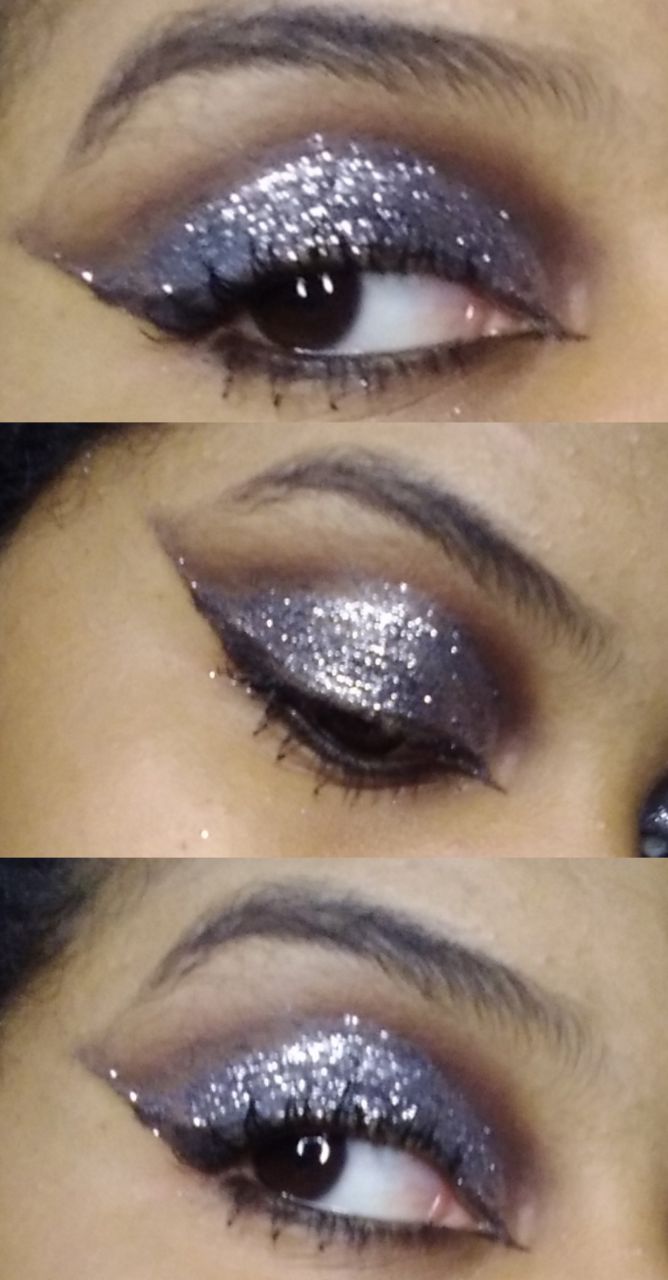 </center>
> Step 4: add mascara and black shadow to the lower lash line.
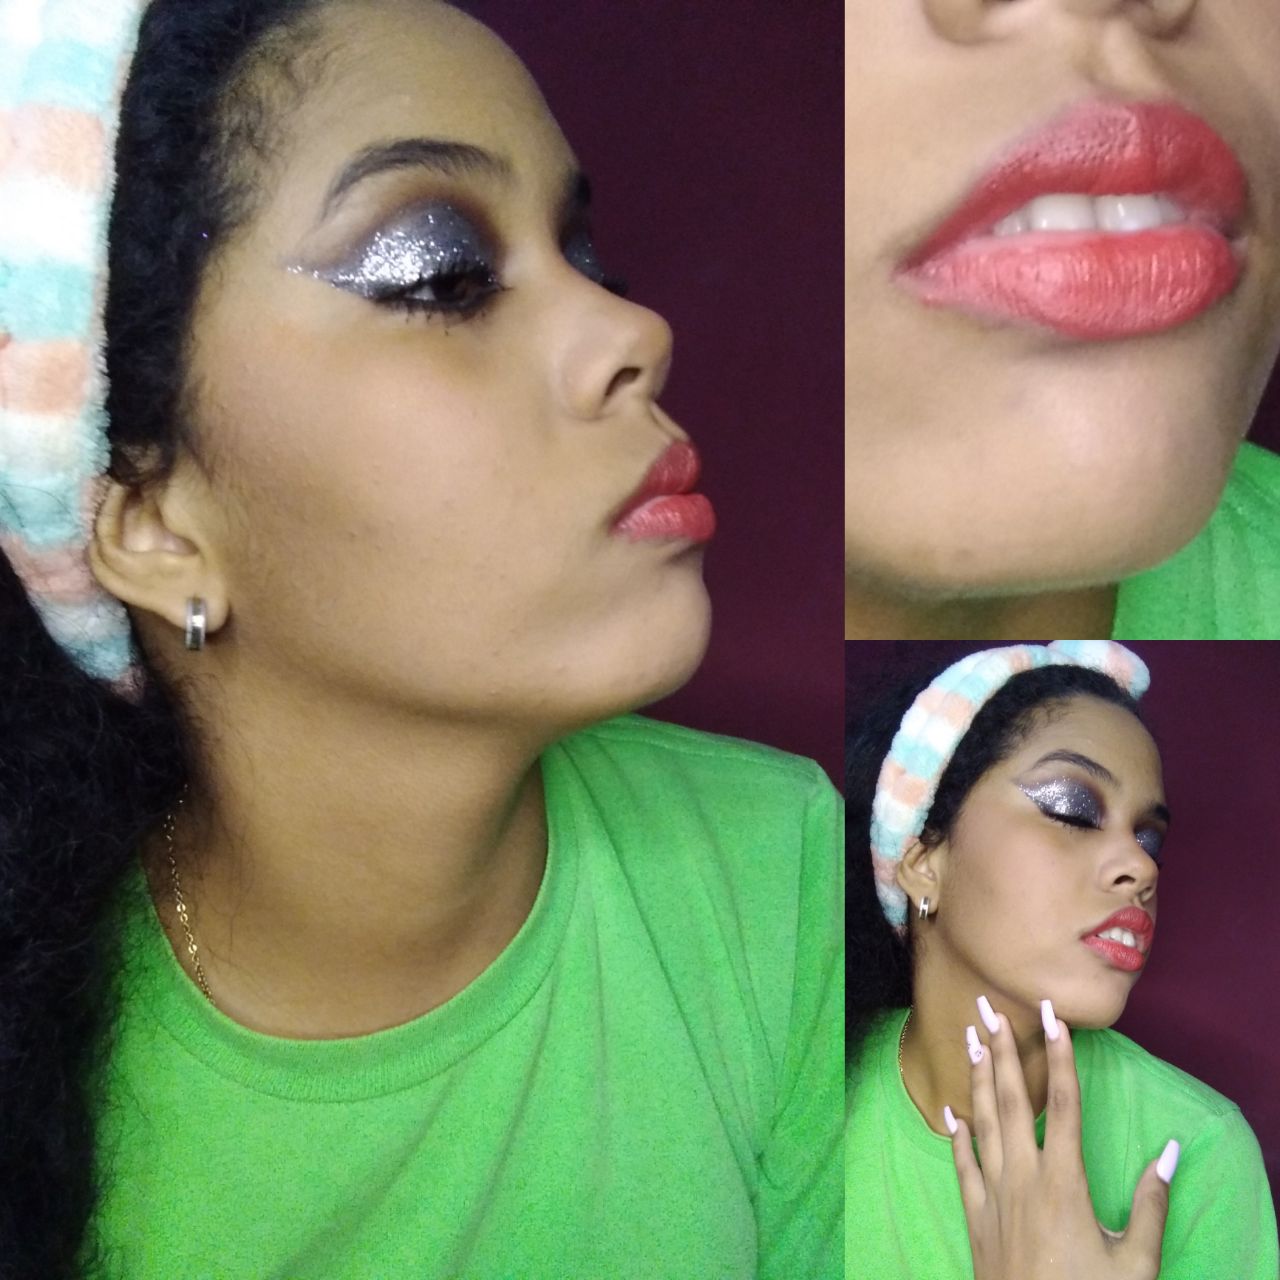
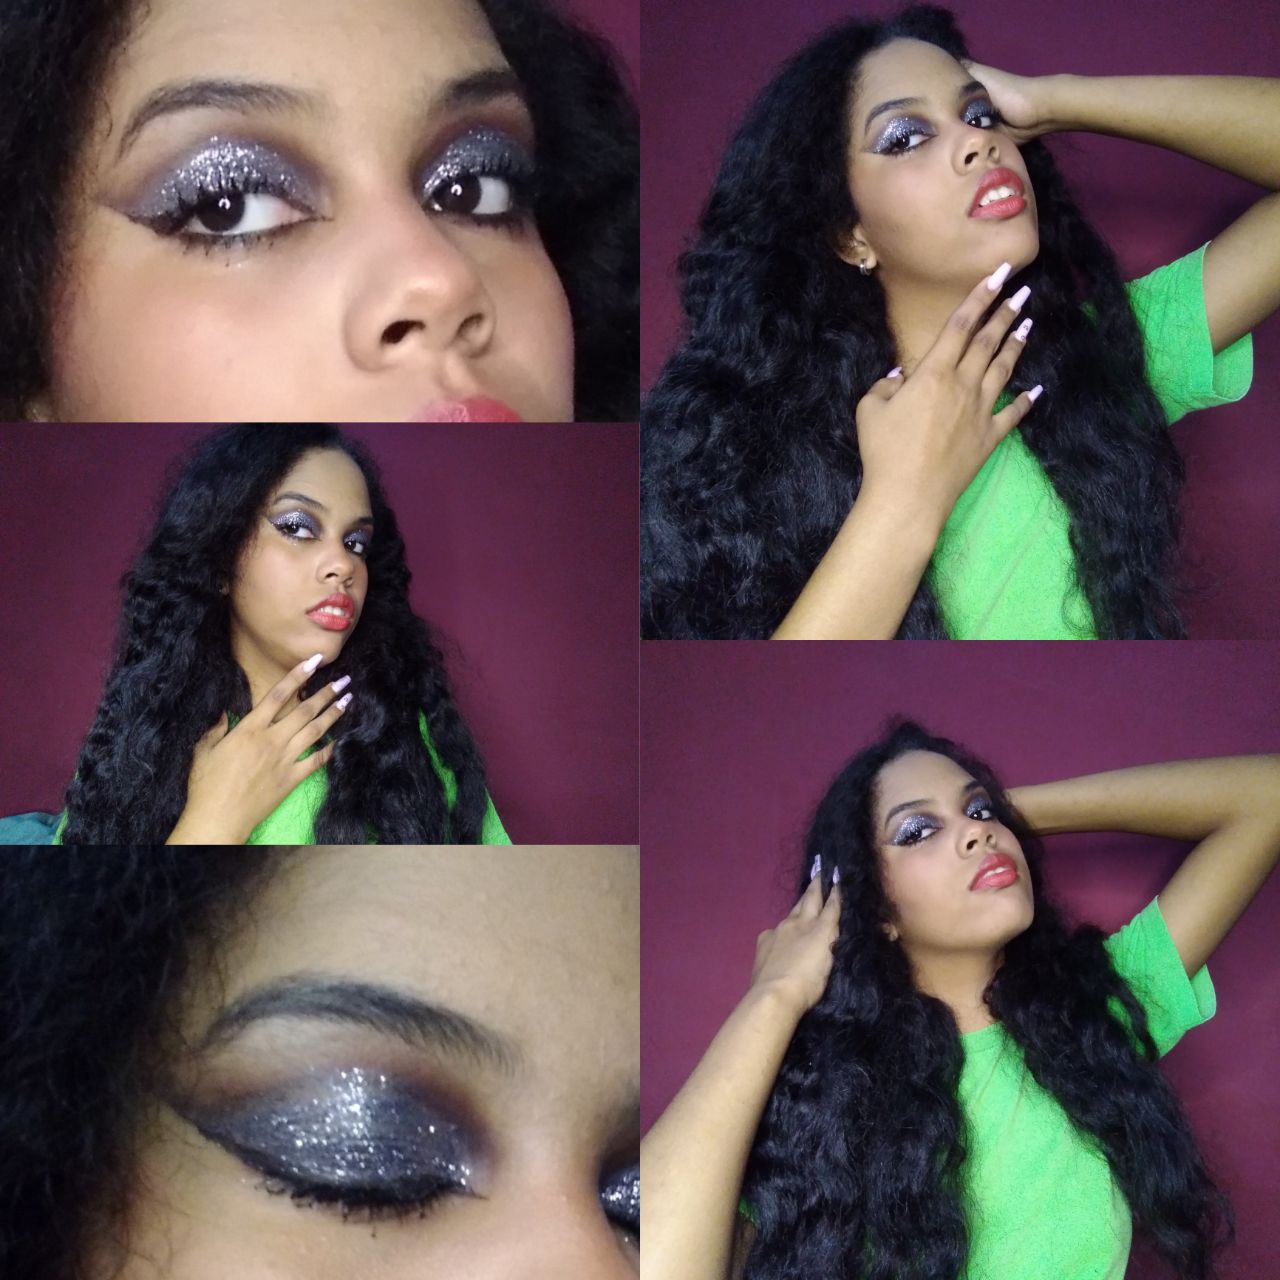
Paso 5: maquillamos la piel, con un tono rojo pintamos nuestros labios y listo.
<center>
</center>
> Step 5: we make up the skin, with a red tone we paint our lips and that's it.
A veces es bueno salir de nuestra zona de confort, muchas veces escuché que no debía aplicar tonos oscuros a mis ojos, ya que no quedarían bien con el tono de mi piel, pero decidí no hacer caso a esos comentarios y me arriesgue creando este increíble look del cual me encantó el resultado.
<center>
</center>
> Sometimes it's good to get out of our comfort zone, many times I heard that I shouldn't apply dark tones to my eyes, since they wouldn't look good with my skin tone, but I decided to ignore those comments and I took a risk creating this amazing look which I loved the result.
<center></center>
</div>